lab environment
System: centos7
Panel: aapanel
Site: ccc.com ### local test domain name
Web server: nginx
Security software: fail2ban 0.11
Purpose
Prevent ssh blasting
Defense against cc attacks
Prevent wordpress blasting
1.Install aapanel and deploy WordPress, Confirm that WordPress access is normal
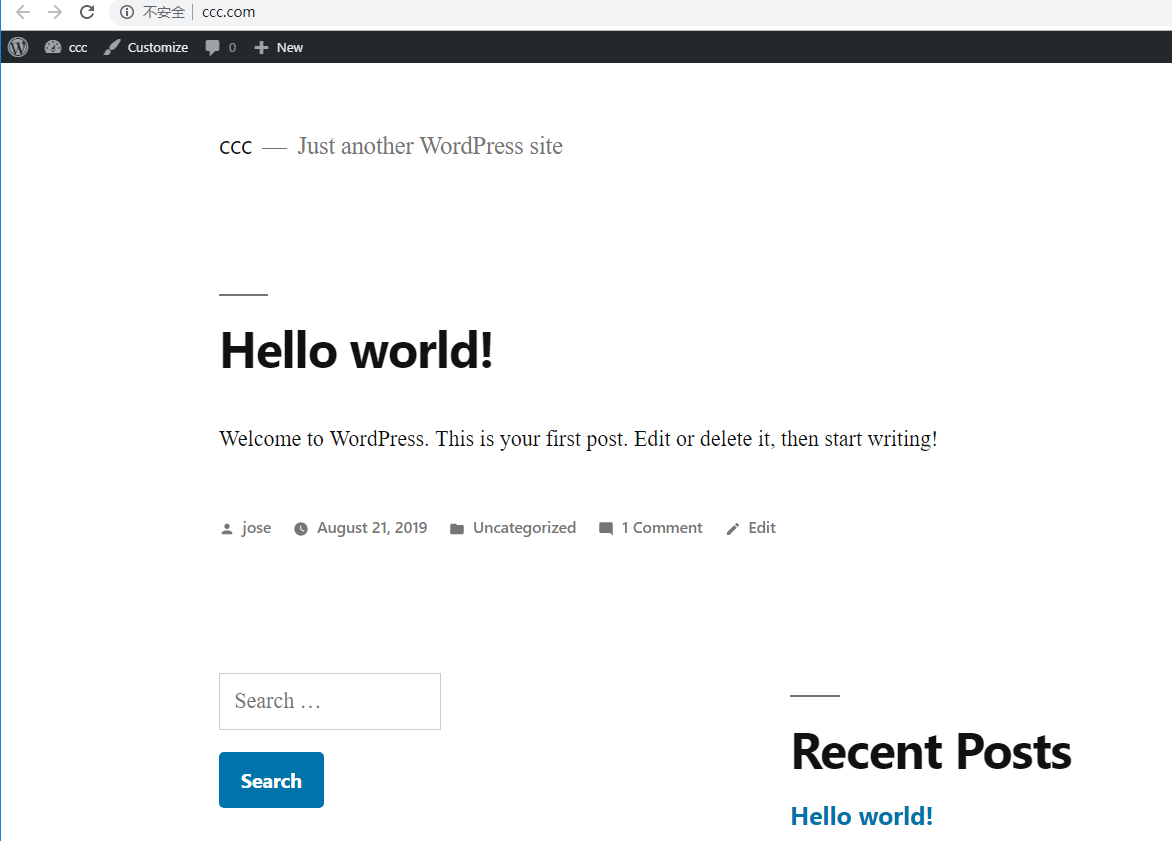
2.Install fail2ban
#Pull the latest version
git clone https://github.com/fail2ban/fail2ban.git
cd fail2ban
#start installation
sudo python setup.py install
#Copy the service file to the /etc/init.d/ directory
cp files/debian-initd /etc/init.d/fail2ban
#Start fail2ban and view the version
fail2ban-server start
fail2ban-client version

3.Configure ssh anti-blasting
If you are still using the default SSH port (22), it will be scanned by a large number of scanning tools every day. We recommend that you modify the port as soon as possible to avoid long-term sweeping.
Enter the configuration directory of fail2ban and create a new jail.local to override some default rules for fail2ban:
cd /etc/fail2ban/
vi /etc/fail2ban/jail.local
Enter the following
[DEFAULT]
ignoreip = 127.0.0.1/8
bantime = 86400
findtime = 600
maxretry = 5
banaction = firewallcmd-ipset ##banaction must use firewallcmd-ipset, this is the key to the support of fiewalll, if you use Iptables please do not fill in this way
action = %(action_mwl)s
Parameter Description:
Ignoreip: IP whitelist, IP in whitelist will not be blocked, can be filled in multiples separated by (,)
Bantime: masking time in seconds (s)
Findtime: time range
Maxretry: maximum number of times
Banaction: the method used to block IP, using firewalld to shield the port
Continue to modify the jail.local configuration file, add the following content:
[sshd] #Name, You can fill it in as you like
enabled = true
filter = sshd #Rule name, you must fill in the rules in the filter.d directory, sshd is the built-in rule of fail2ban
port = 22 #ssh service listening port
action = %(action_mwl)s #Action taken
logpath = /var/log/secure #Log path to be monitored
Now, our jail.local rules might look like this:
[DEFAULT]
ignoreip = 127.0.0.1/8
bantime = 60
findtime = 600
maxretry = 5
banaction = firewallcmd-ipset
action = %(action_mwl)s
[sshd]
enabled = true
filter = sshd
port = 22
action = %(action_mwl)s
logpath = /var/log/secure
The above configuration means that if the same IP, in 10 minutes, if there are more than 5 errors in succession, use Firewalld to IP his ban.
After running fail2ban-client reload, let's try the effect.
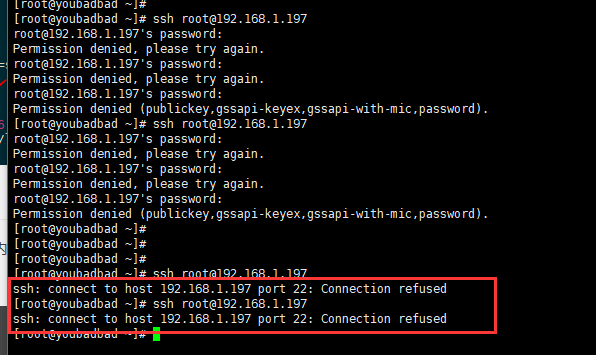
Use another server to constantly try to connect to SSH, and constantly enter the password incorrectly, you will find that after more than 5 consecutive times, you can't connect directly, indicating that the IP is banned.
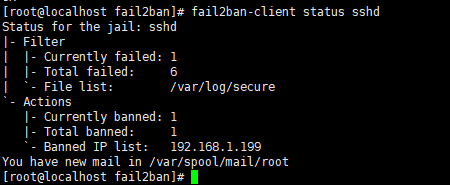
You can run: fail2ban-client status sshd to view the IP of the ban, as shown in the screenshot below.
4.Prevent sites under aapanel from being attacked by cc
Take Nginx as an example. Use fail2ban to monitor the nginx log, match the frequently requested IP in a short period of time, and use firewalld to shield its IP to achieve CC protection.
#Need to create a new nginx log matching rule first.
vi /etc/fail2ban/filter.d/nginx-cc.conf
#Fill in the following content
[Definition]
failregex = <HOST> -.*- .*HTTP/1.* .* .*$
ignoreregex =
#Continue to modify jail.local to add the following content:
[nginx-cc]
enabled = true
port = 80,443
filter = nginx-cc
action = %(action_mwl)s
maxretry = 50
findtime = 60
bantime = 3600
logpath = /www/wwwlogs/ccc.com.log
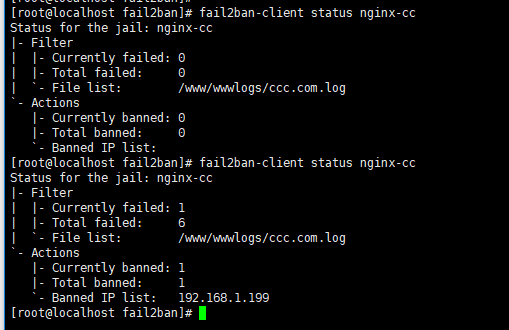
The above configuration means that if the same IP reaches 50 requests within 60s, the IP ban will be 3600 seconds. The above is just for testing. Please modify it according to your actual situation. Logpath is the nginx access log path.
After running fail2ban-client reload, let's try the effect.
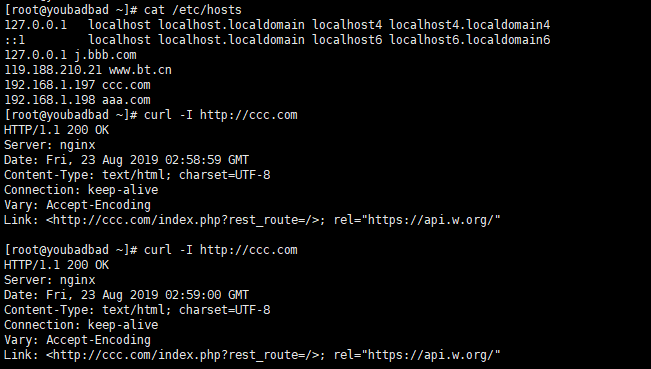
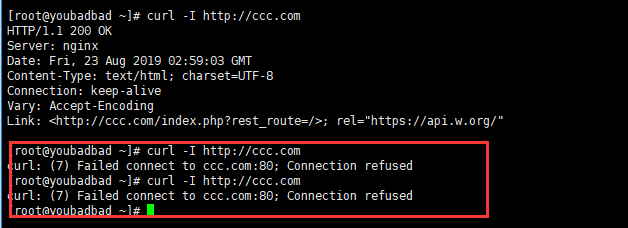
Check our fial2ban status
Prevent Wordpress from blasting
If you analyze the logs frequently, you will find that a large number of robots are scanning the wordpress login page wp-login.php, although the other party may not succeed, but in order to avoid the need to kill his IP as well.
#Need to create a new nginx log matching rule first.
vi /etc/fail2ban/filter.d/wordpress.conf
#Fill in the following content
[Definition]
failregex = <HOST> -.* /wp-login.php.* HTTP/1\.."
ignoreregex =
#Continue to modify jail.local to add the following content:
[wordpress]
enabled = true
port = http,https
filter = wordpress
action = %(action_mwl)s
maxretry = 10
findtime = 60
bantime = 3600
logpath = /www/wwwlogs/ccc.com.log
running fail2ban-client reload make it take effect
The above examples are believed to have given you a basic understanding of its workflow, and then you have to play it yourself, I wish you good luck.