
Mail Server
Need to install
Mail Serverin theApp Storeof themain aaPanelbefore it can be used normally.
Mail Server menu
| Mail Domain | Mailboxes | Other Settings |
|---|
Mail Domain

| Function | Describe |
|---|---|
| Add Domain | Add a new domain name to the Mail Server. |
Refresh domain record | Refresh domain name DNS records. Generally takes 2 minutes or more for new records to take effect. |
| Domain name | Display domain name. |
| Not in Spam List | Check if the domain is on the email Spam list immediately and on a schedule. |
| Quota | Display the maximum usage space capacity of the domain name. |
| Mailboxes | Display the number of email users of the domain name. |
Default mailbox size | Display the default mail space capacity of the mail user of the domain name. |
| Catch All | Whether to add catch all of the domain name to receive non-existent email addresses. |
| SSL | Configure the SSL certificate of the domain name. It is recommended to use the pan-domain name certificate: *.xxx.com. |
| DNS Record | Click the DNS record of the domain name and follow the prompts to add it in the domain name resolution. |
| Edit | Modify the information of this domain name. |
| Delete | Delete this domain name, email users, emails, etc. will also be deleted. Please back up data to avoid data loss. |
Add Domain
Mail Domain --> Add Domain
| Function | Describe |
|---|---|
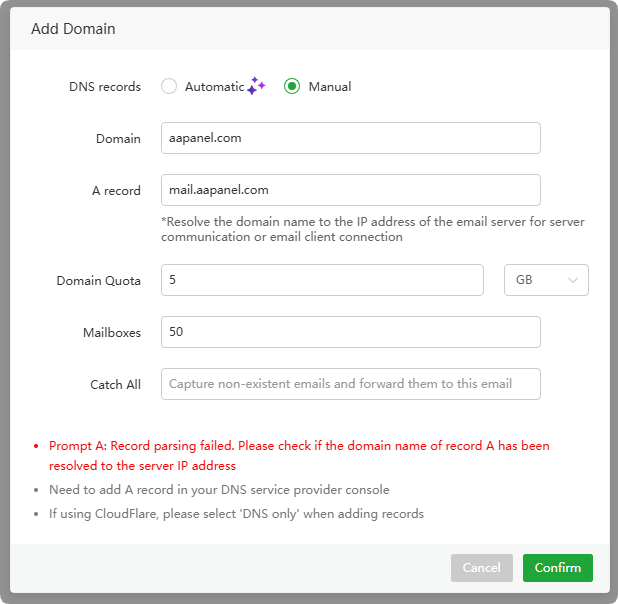
| DNS record | Automatic or Manual parsing can be selected. Automatic will automatically add A, MX, SPF, DKIM and DMARC records. Note: Automatic currently requires adding the corresponding DNS API in the main aaPanel Domains and having a valid SSL certificate for the domain to function properly. |
Domain name | Enter the domain name to be added, e.g.: aapanel.com |
| A record | Enter the A record of the domain name. This A record must point to the IP of the server, e.g.: mail.aapanel.com |
Domain quota | Enter the space capacity limit of the domain name |
| Mailboxes | Enter the maximum number of email users to add. New email users cannot be added after exceeding the limit. |
| Catch All | Enter the email address to receive catch all. When sending to a non-existent email address, messages will be sent to the catch all email address. |
DNS Record
Mail Domain --> DNS Record
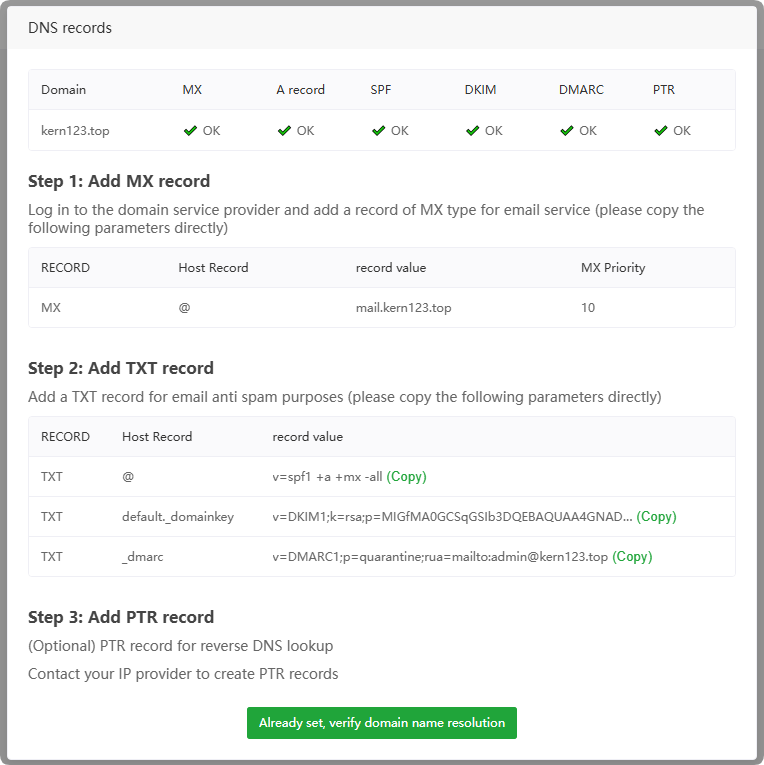
- Please follow the prompts to add
MX recordsandTXT recordsat thedomain name providerordomain name management office. PTR recordsare generally configured on theserver provider's website, or at theserver network provider.
Mailboxes

| Function | Describe |
|---|---|
| Add Email | Add a new mail user |
| Username | Display the email address of the mail user |
| Password | Display and copy the password of the mail user |
| Login info | Copy the email user's information, password and other details |
| Quota | Display the mail space capacity of the mail user |
| Type | Display the type of mail user: General user or Admin |
| Status | Display the status of the mail user: disabled or enabled |
| Edit | Modify the information of this email user |
| Delete | Delete this mailbox user (emails will also be deleted). Please back up data first to avoid data loss. |
Add Email
Mailboxes --> Add Email
| Function | Describe |
|---|---|
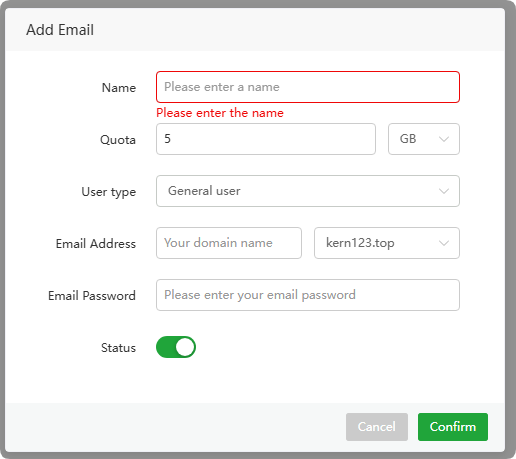
| Name | Enter user name |
| Quota | Enter the mail space capacity of the mail user |
| User type | Select the type of mail user: General user or Admin |
| Email Address | Enter the prefix of the email address |
| Email Password | Enter the password of the mail user |
| Status | User status: disabled or enabled |
Other Settings
BCC
Other Settings --> BCC
BCC is a "Blind Carbon Copy" that allows sending a copy of an email to specified recipients, but hiding those recipients' email addresses from being visible to other recipients.

- Add BCC
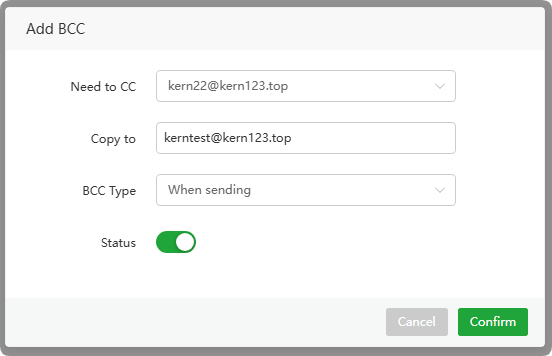
| Need to Copy | Enter the email address of the person being BCCed |
|---|---|
| Copy to | Enter the receiving email address |
| BCC Type | Select BCC type, supported when sending and receiving emails |
| Active | Enable BCC |
Mail forward
Other Settings --> Mail forward

- Add Forward
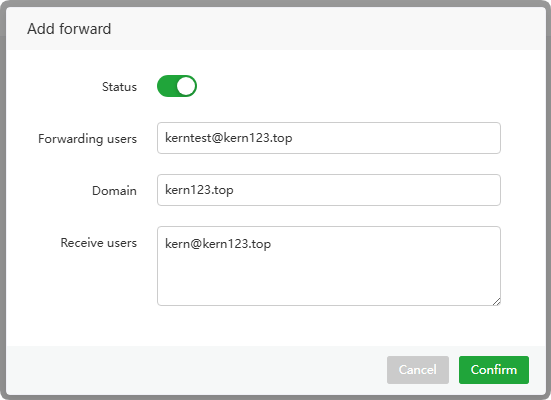
| Status | Enable forwarding |
|---|---|
| Forwarded users | Enter the email address of the user to be forwarded |
| Domain | Enter the forwarded domain name |
| Receive user | Enter the email address of the user you want to receive |