Website
Website overview

| Function | Describe |
|---|---|
| Add Website | Add a PHP website or static website |
Website Name | Display the domain name of the website, click to view and modify the configuration of the current website |
| Status | Displays the running status of the website, click to Running and Disabled the website |
| Backup | Displays the number of backups of the website. Click to perform Backup, Restore, Download, Delete and other operations |
| Path | Display the root directory of the website, click to use File to manage files |
| Remarks | Display website remark information, click to modify the remark information |
| PHP | Display the PHP version of the current site. Click to modify the PHP version of the current site. Note that need to first PHP Interface installation |
| SSL | Display the SSL status of the current site, click to manage and deploy SSL certificate |
| Configuration | Click to view and modify the configuration of the current website. as: Domain Management, Redirect, Reverse Proxy, Default Index, Hotlink Protection, Limit Access, Traffic Control etc. |
| Delete | Delete the current website. Will not be able to access this website after deletion |
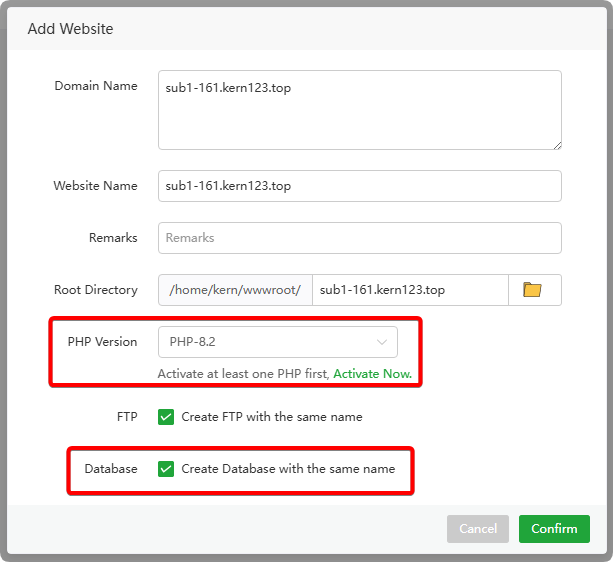
Add Website
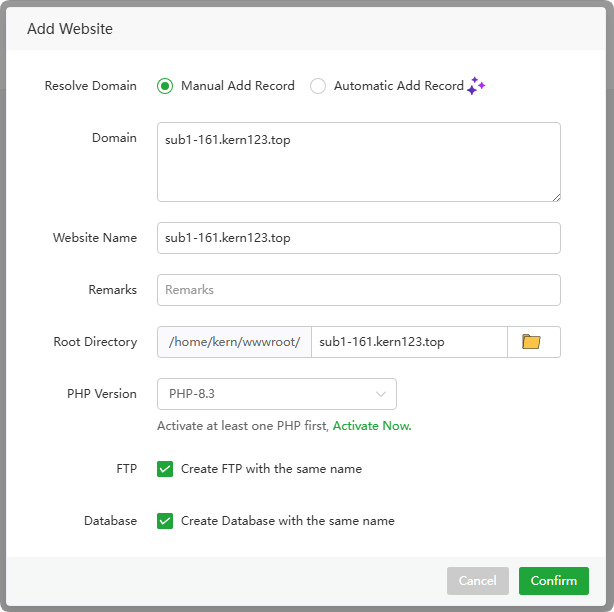
| Function | Example | Describe |
|---|---|---|
Resolve Domain | Manual, Automatic Add Record | Automatic Currently requires adding the corresponding DNS API in the main aaPanel Domains and having a valid SSL certificate for the domain to function properly. |
| Domain Name | sub1-161.kern123.top | Enter the domain name of the website |
Website Name | sub1-161.kern123.top | Enter the website name |
Root Directory | /home/kern/wwwroot/sub1-161.kern123.top | The root directory of the website |
| PHP Version | PHP-8.3 | Select the PHP version used by the website. Note that you need to first PHP Interface install |
| FTP | kern_sub1-161_kern123_top | Create an FTP account when creating a website. After creation, View it on the FTP interface |
| Database | kern_sub1_161_kern123_top | When creating a website, create a database, which can be viewed in the Database interface after creation. |
Website Name or Configuration
Domain Management
Add,deletedomain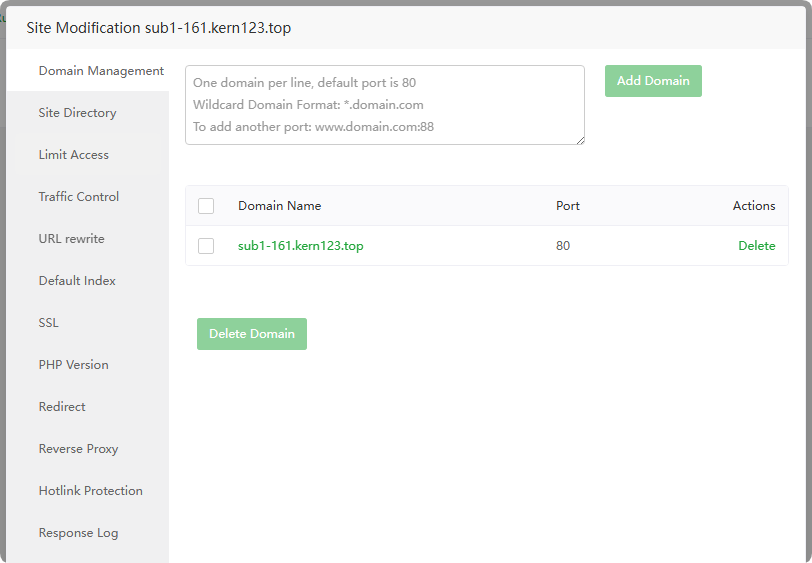
Site Directory
Set the
Website DirectoryorRunning Directoryof the current website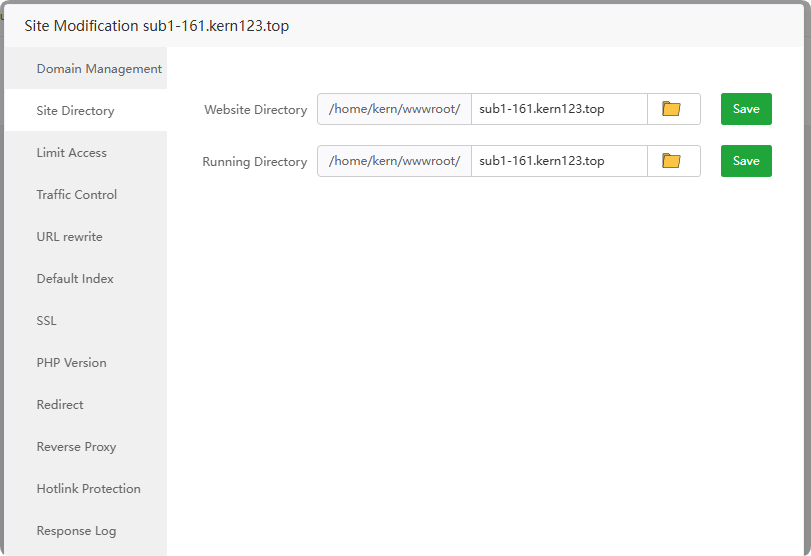
- Limit Access
Limit Access
Specifying the
site directoryrequires anaccountandpassword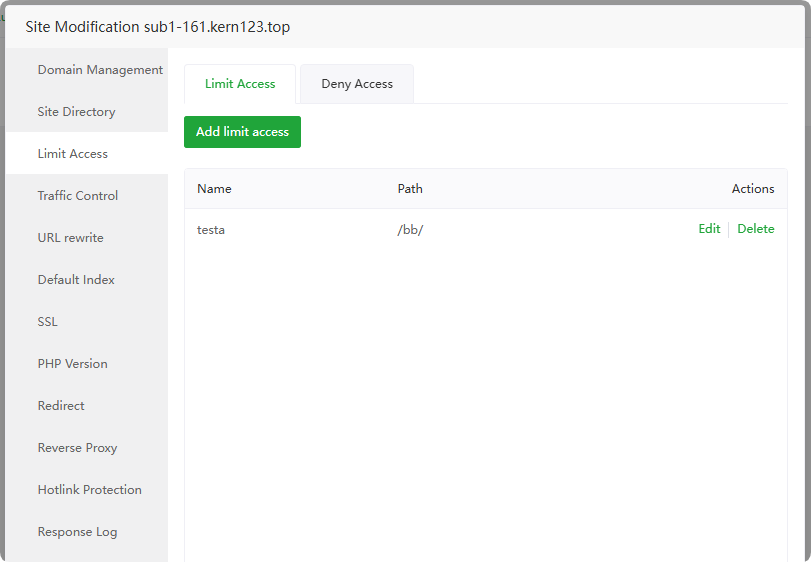
Deny Access
Disable access filesin the specified directory of the site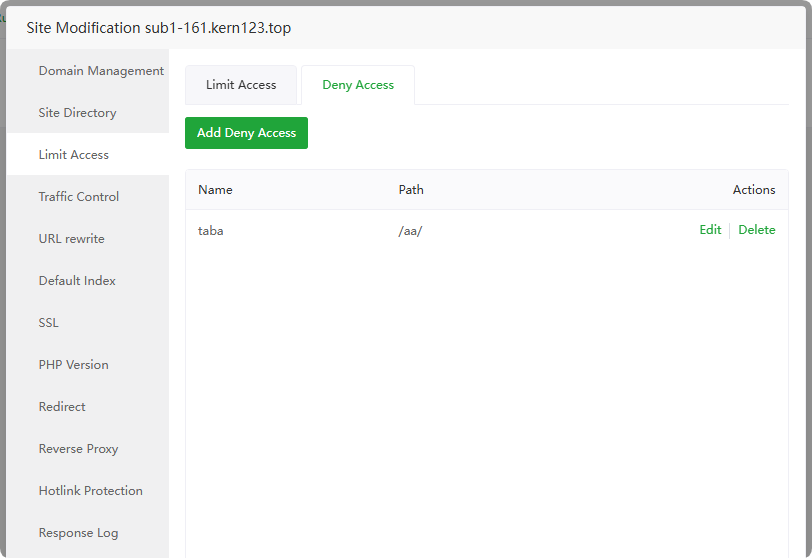
Traffic Control
Limit trafficcontrol for the current site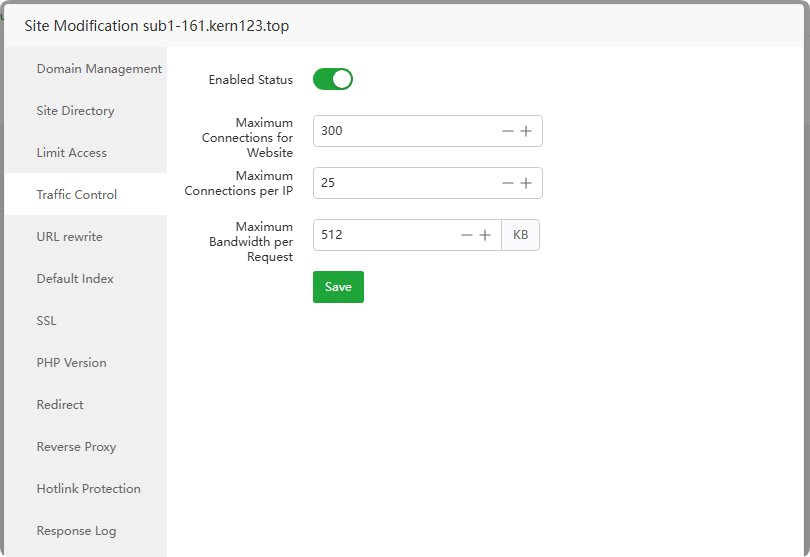
URL rewrite
URL rewrite is generally used to make dynamic addresses pseudo-static. By default, the
.htaccessfile in the site directory is used, or the URL rewritetemplatecan be used.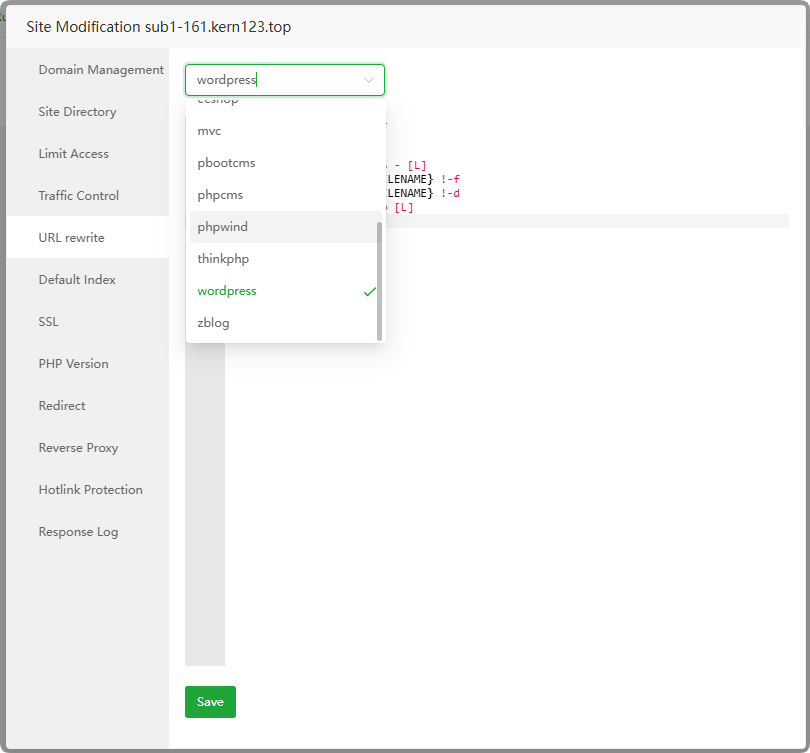
Default Index
Set the
default homepageof the current website, that is, the index file of the site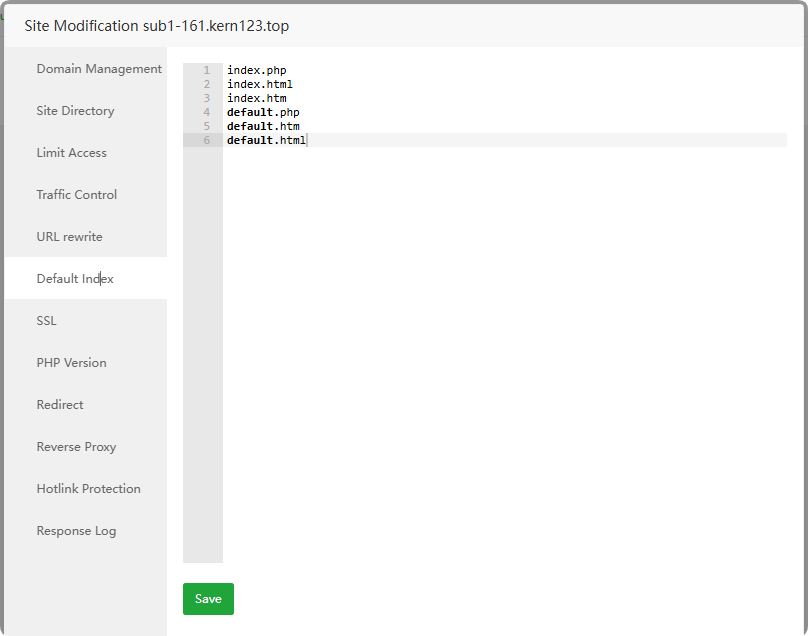
- SSL
Set Certificate
Configure encrypted access to the website, that is, use
httpsto access the website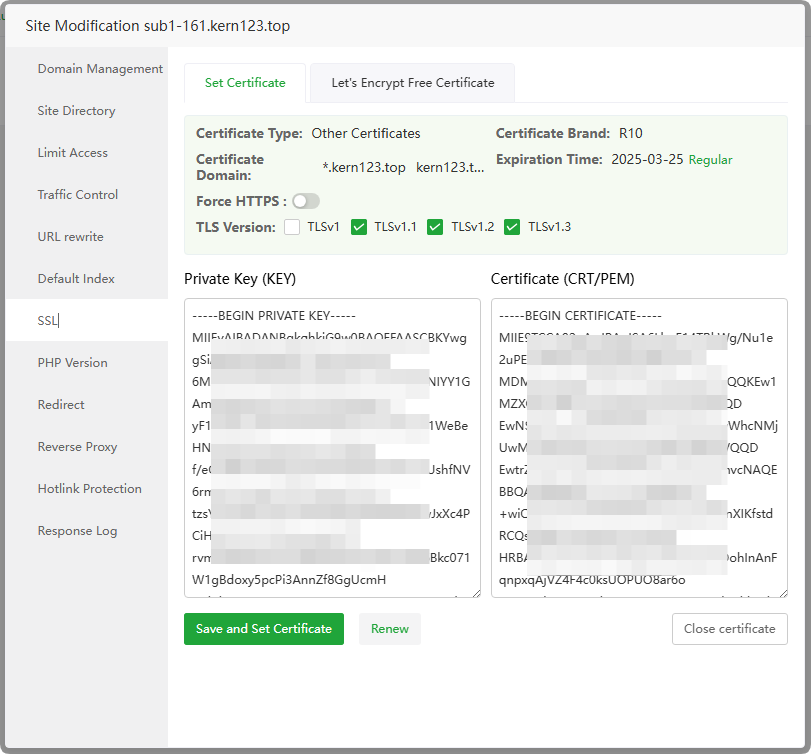
Certificate Type : Display the type of SSL certificate
Certificate Brand : Display SSL certificate brand
Certificate Domain : Display the certified domain name of the SSL certificate
Expiration Time : Display the expiration time of the SSL certificate
Force HTTPS :
Enable/disableforced HTTPSTLS Version : Set the TLS version used by the current website
Private Key (KEY) : Display the contents of the
SSL certificate private keyused by the current websiteCertificate (CRT/PEM) : Display the contents of the
SSL certificateused by the current websiteSave and Set Certificate : Save and set up SSL certificate
Renew : Renew the SSL certificate of the current website
Close certificate :
Turn offSSL certificate
Let's Encrypt Free Certificate
HTTP File Verification
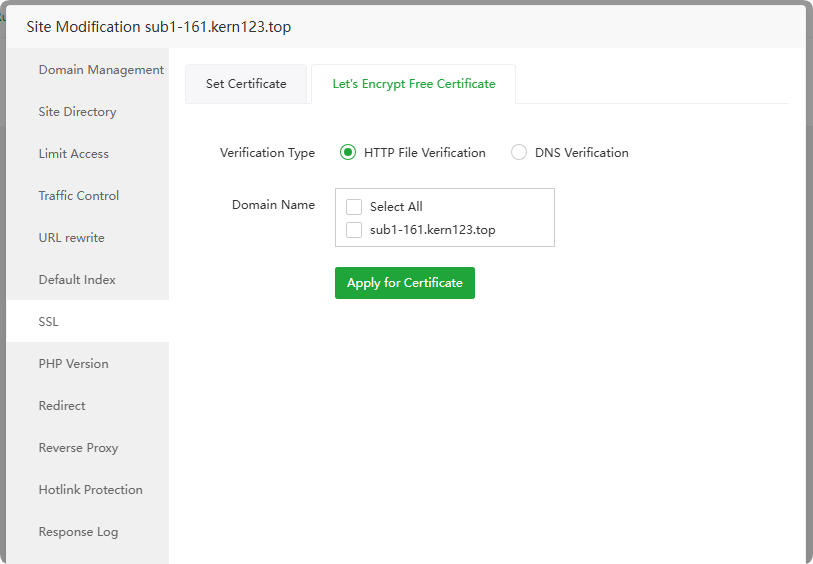
Let's Encryptservers verify domain ownership by accessing thiswebsite's filesIf an error occurs, please troubleshoot first and then verify. Multiple errors will be limited Let's Encrypt Rate Limits.
If you encounter verification failure, please troubleshoot according to the prompts
Maybe the domain name resolution has not taken effect and no resolution has been added.
Let's Encrypt cannot access your website. You can check redirection and proxy issues. Try to access and see if the display is normal. Apply again after it is normal.
If file verification is not available, use DNS verification
If restrictions appear, use third-party website SSL
DNS Verification
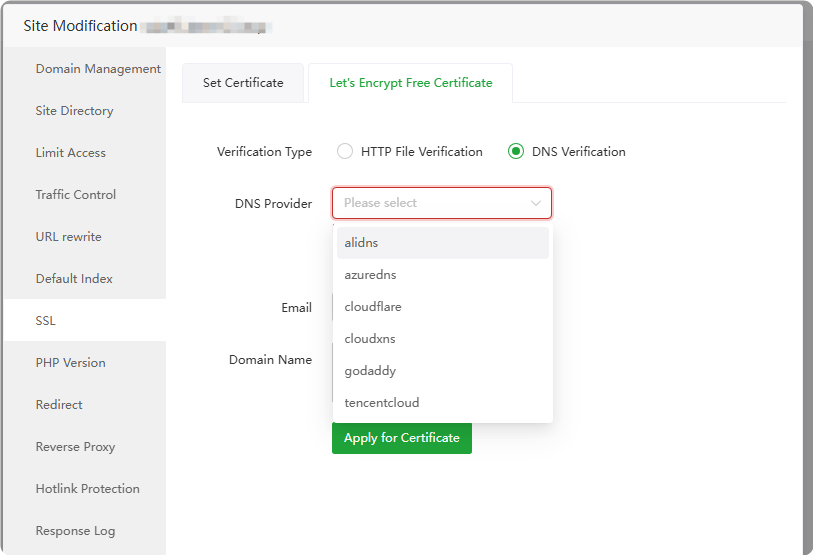
Let's Encryptserver verifies domain name ownership by parsingDNS records.The following domain name resolvers are supported, and the
TXT recordof DNS is added through theAPI to verifythe domain name.alidns
azuredns
cloudflare
cloudxns
godaddy
tencentcloud
PHP Version
Set the
PHP versionused by the current website. Note that Need to first PHP Interface installation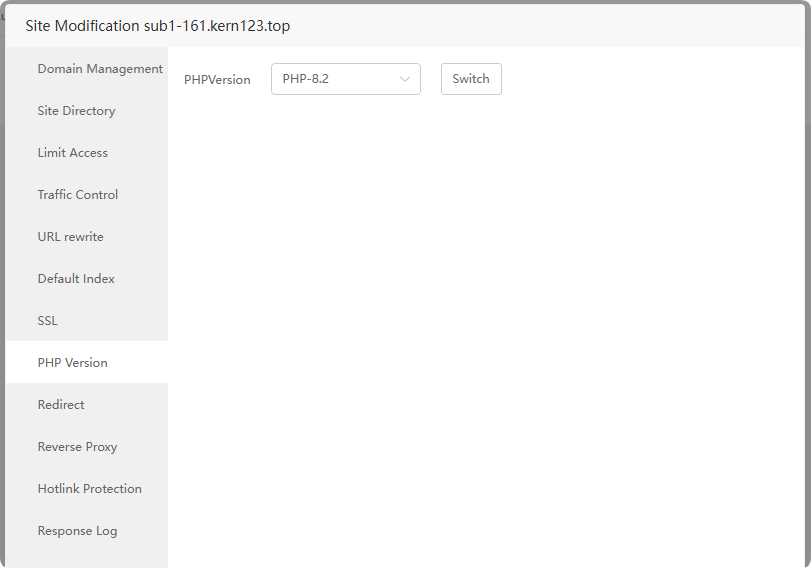
Redirect
Set the current site's specified
domainname ordirectory301/302jump specified address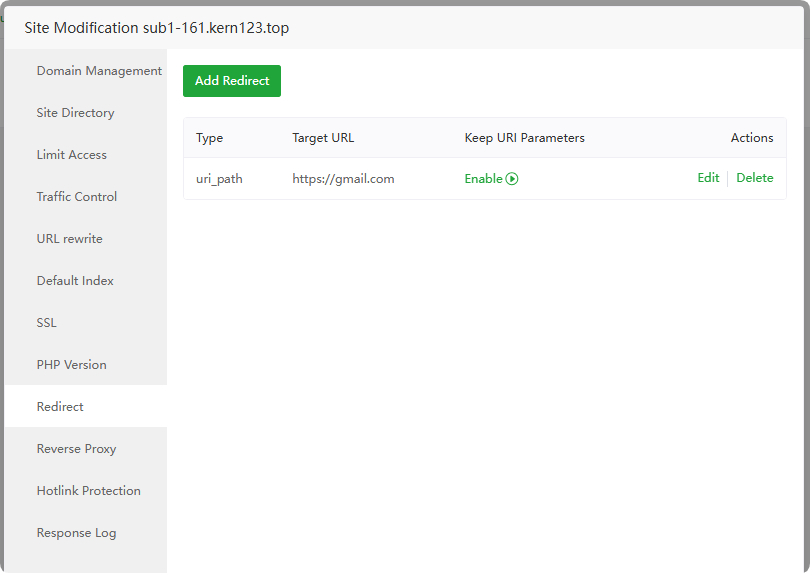
Reverse Proxy
Set the current website
proxyto access resources of other sites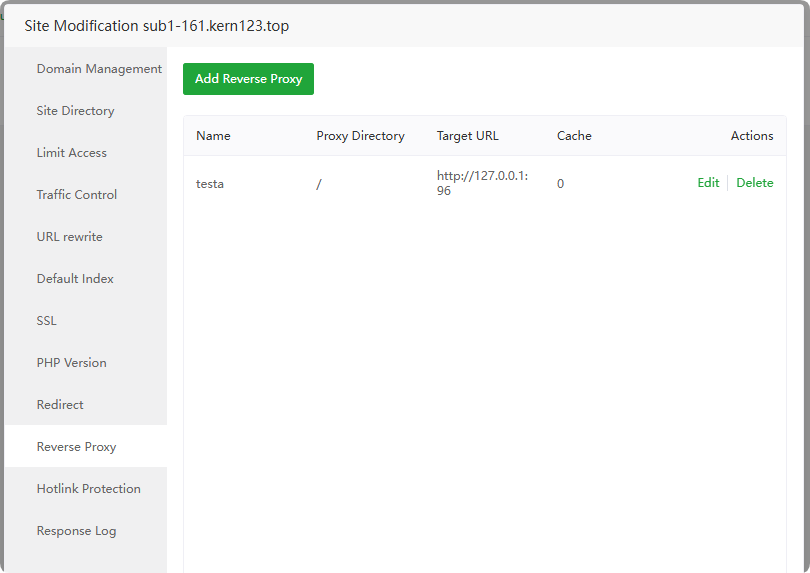
Hotlink Protection
Only the
specified domainname can be used toaccess the resourcesof the current site. If it is not the specified domain name, an error will be returned.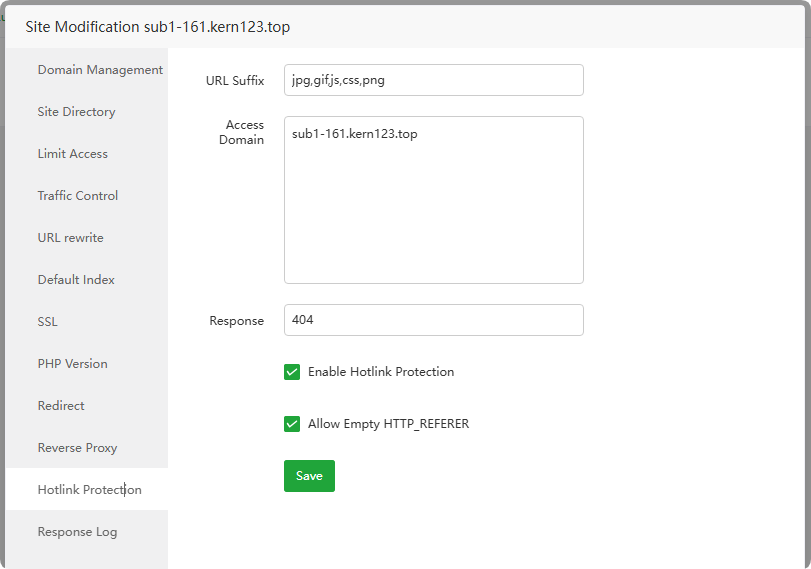
- Response Log
Response Log
Access logof current site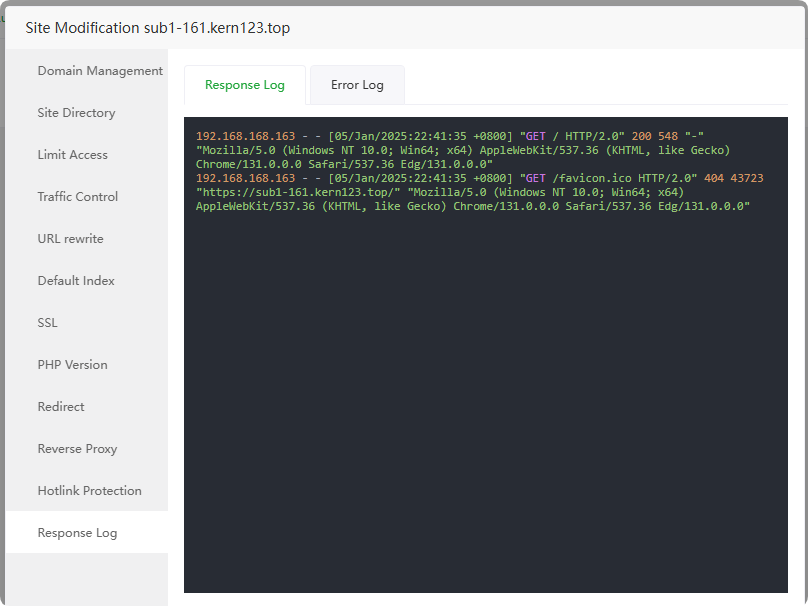
Error Log
Error logfor current site, if there is anerroron the website, you can view this log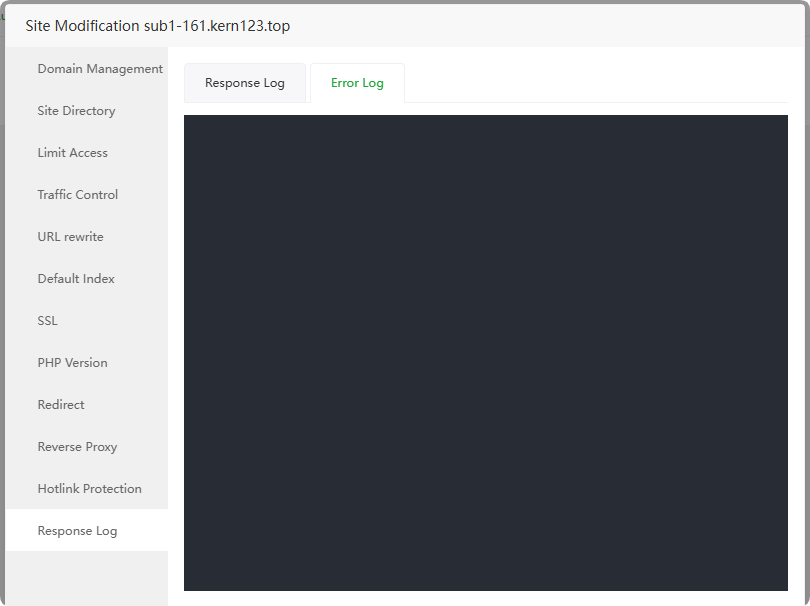
Backup
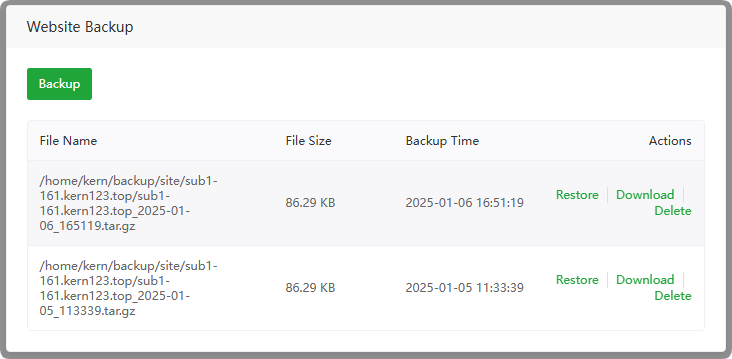
Backup : Click to
back upcurrent website filesFile Name : Display the
file nameandpathof the current backupFile Size : Display the
file sizeof the current backupBackup Time : Display the current backup time
Restore : Click to
restorecurrent website filesDownload : Click to
downloadthe current backup fileDelete : Click to
deletethe current backup file
Usage example
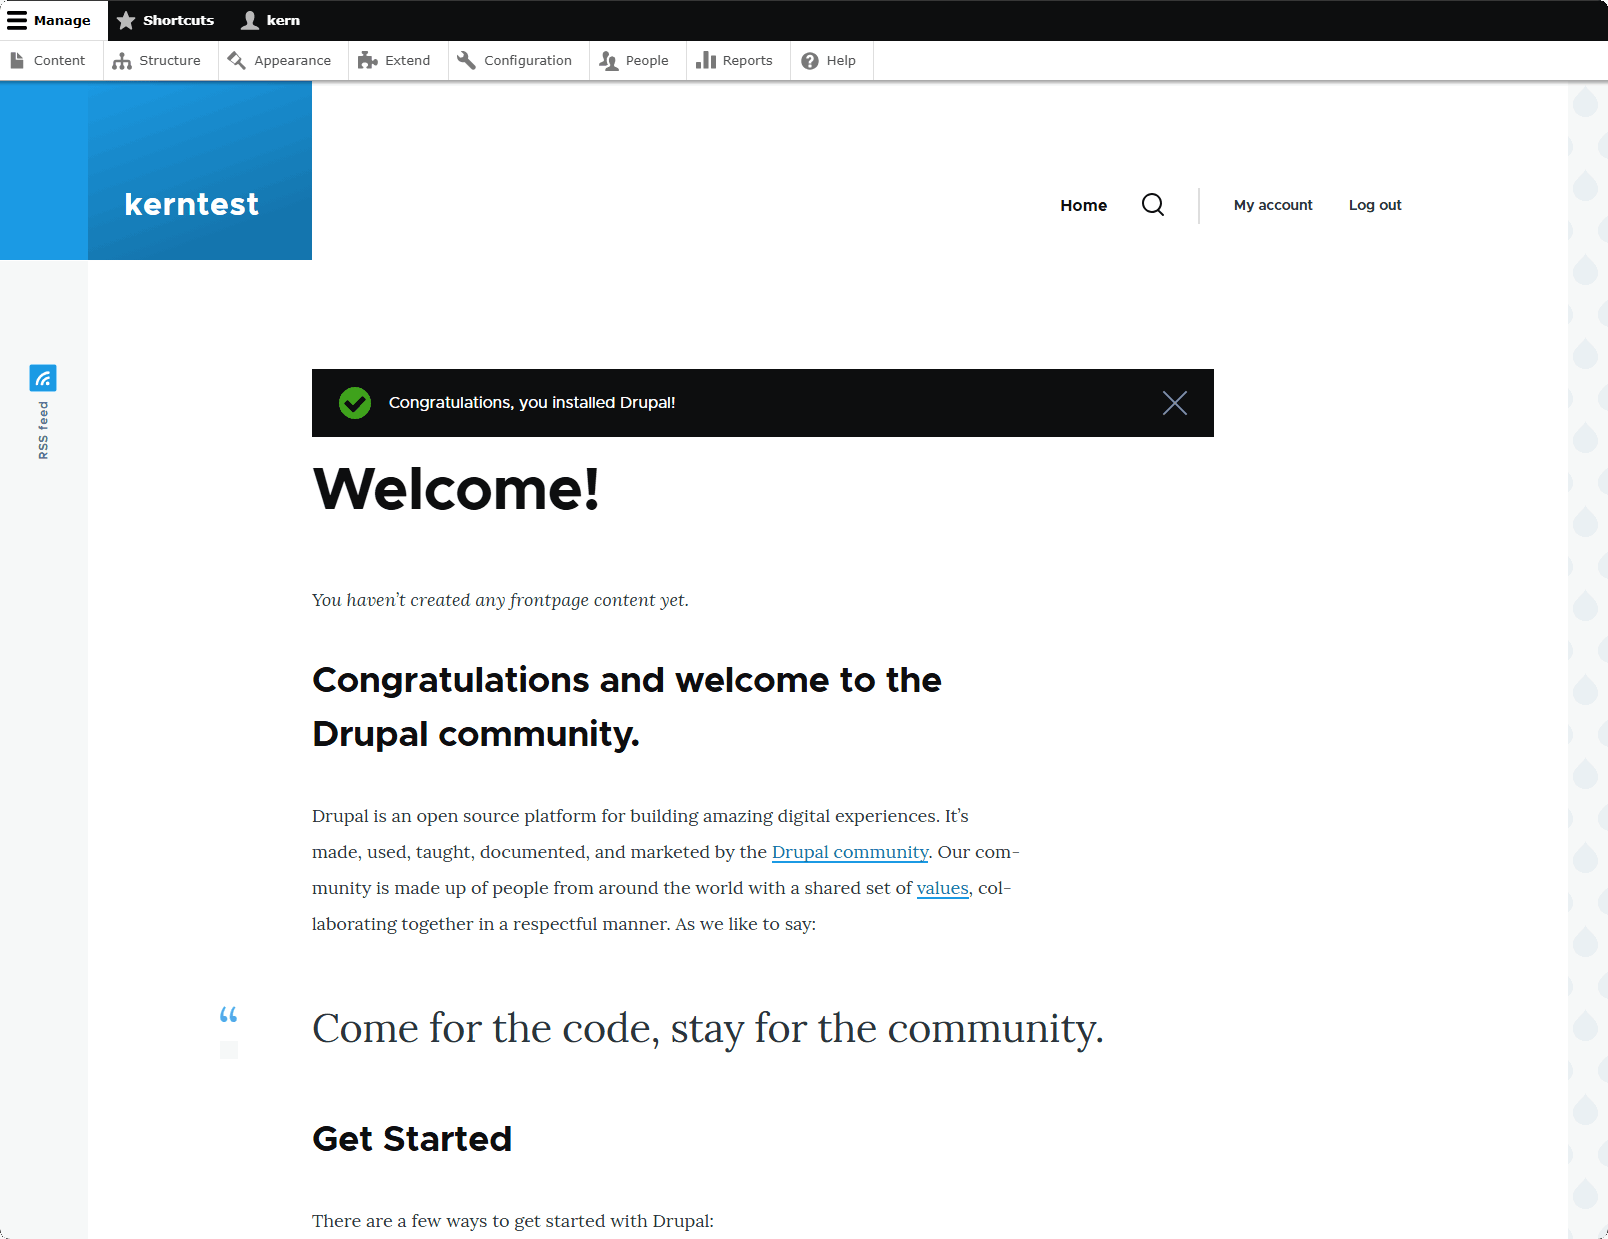
Example: Deploy a Drupal 10.3.11 website
In the Domain name provider website, point the IP of the
Domain A recordof sub1-161.kern123.top to theserver IP, such as 192.168.66.161Domain name and server IP, please replace it with your own domain name and IP

Go to Drupal website to download drupal-10.3.11
Add a
PHPwebsite andSelect Database.Website creation example:
Websitecreated successfully:
Databasecreated successfully:
After successfully creating the website,
deploy the SSL certificate. If SSL is not deployed, you can only usehttpVisit website
Click
PathEnter the File interface anduploadthe drupal file such as: drupal-10.3.11.tar.gz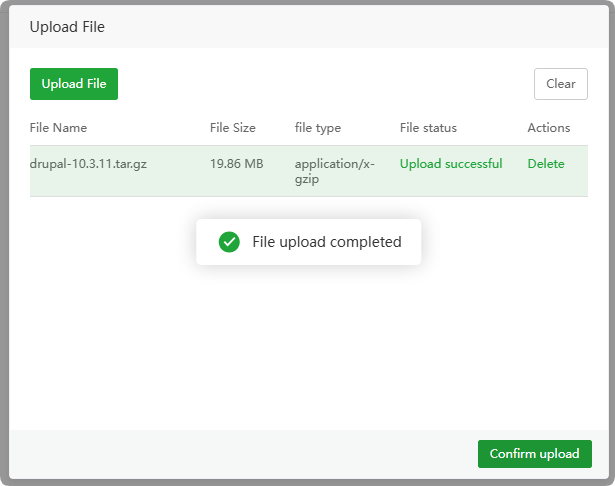
After successfully uploading the file,
right-clickthe file todecompressit.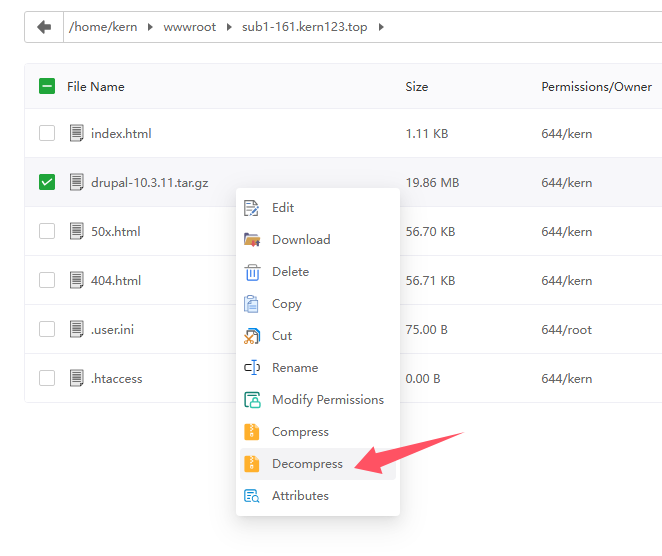
- After decompression is complete, a
drupal-10.3.11directory will be displayed.
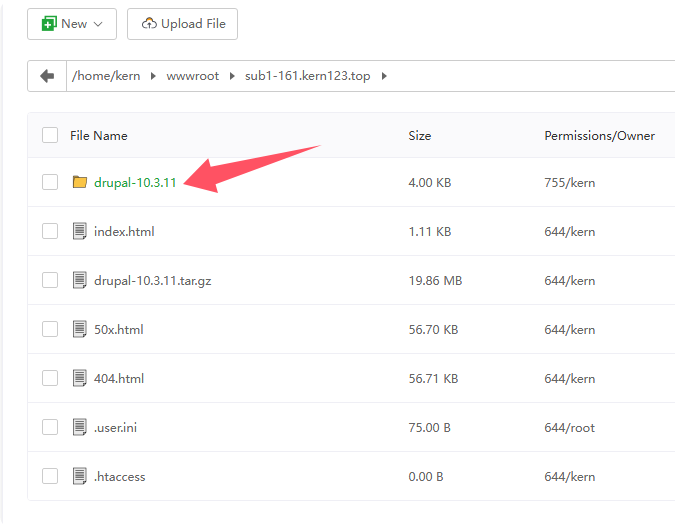
- After decompression is complete, a
Enter the directoryand enter according to the decompressed directory, such as:drupal-10.3.11Reference: /home/kern/wwwroot/sub1-161.kern123.top/drupal-10.3.11
After
selecting all,copyorcutall directories and files to theroot directoryof the websiteReference: /home/kern/wwwroot/sub1-161.kern123.top
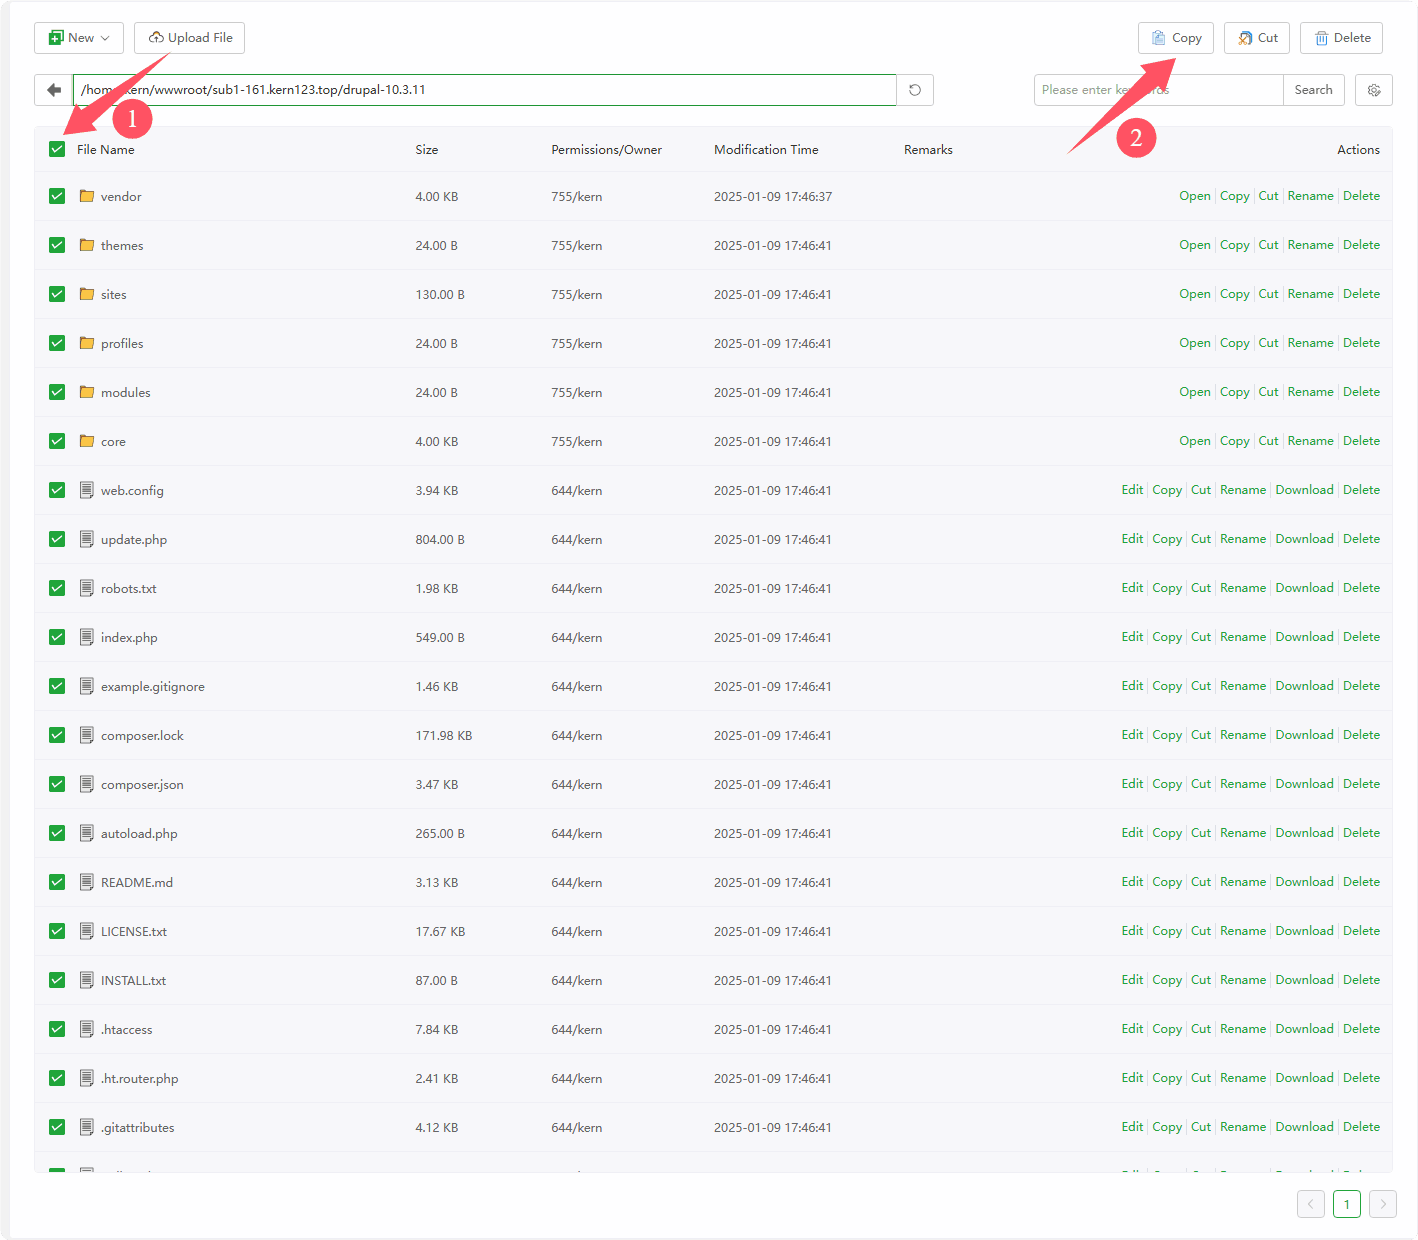
Copy or cut and
pasteit into theroot directoryof the websiteReference: /home/kern/wwwroot/sub1-161.kern123.top
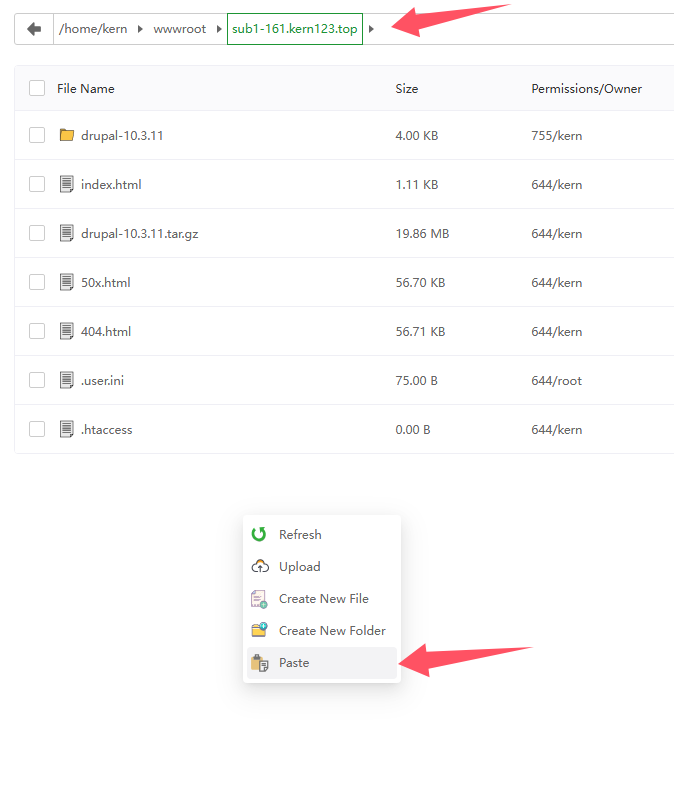
- After the pasting is completed, the display is as follows:
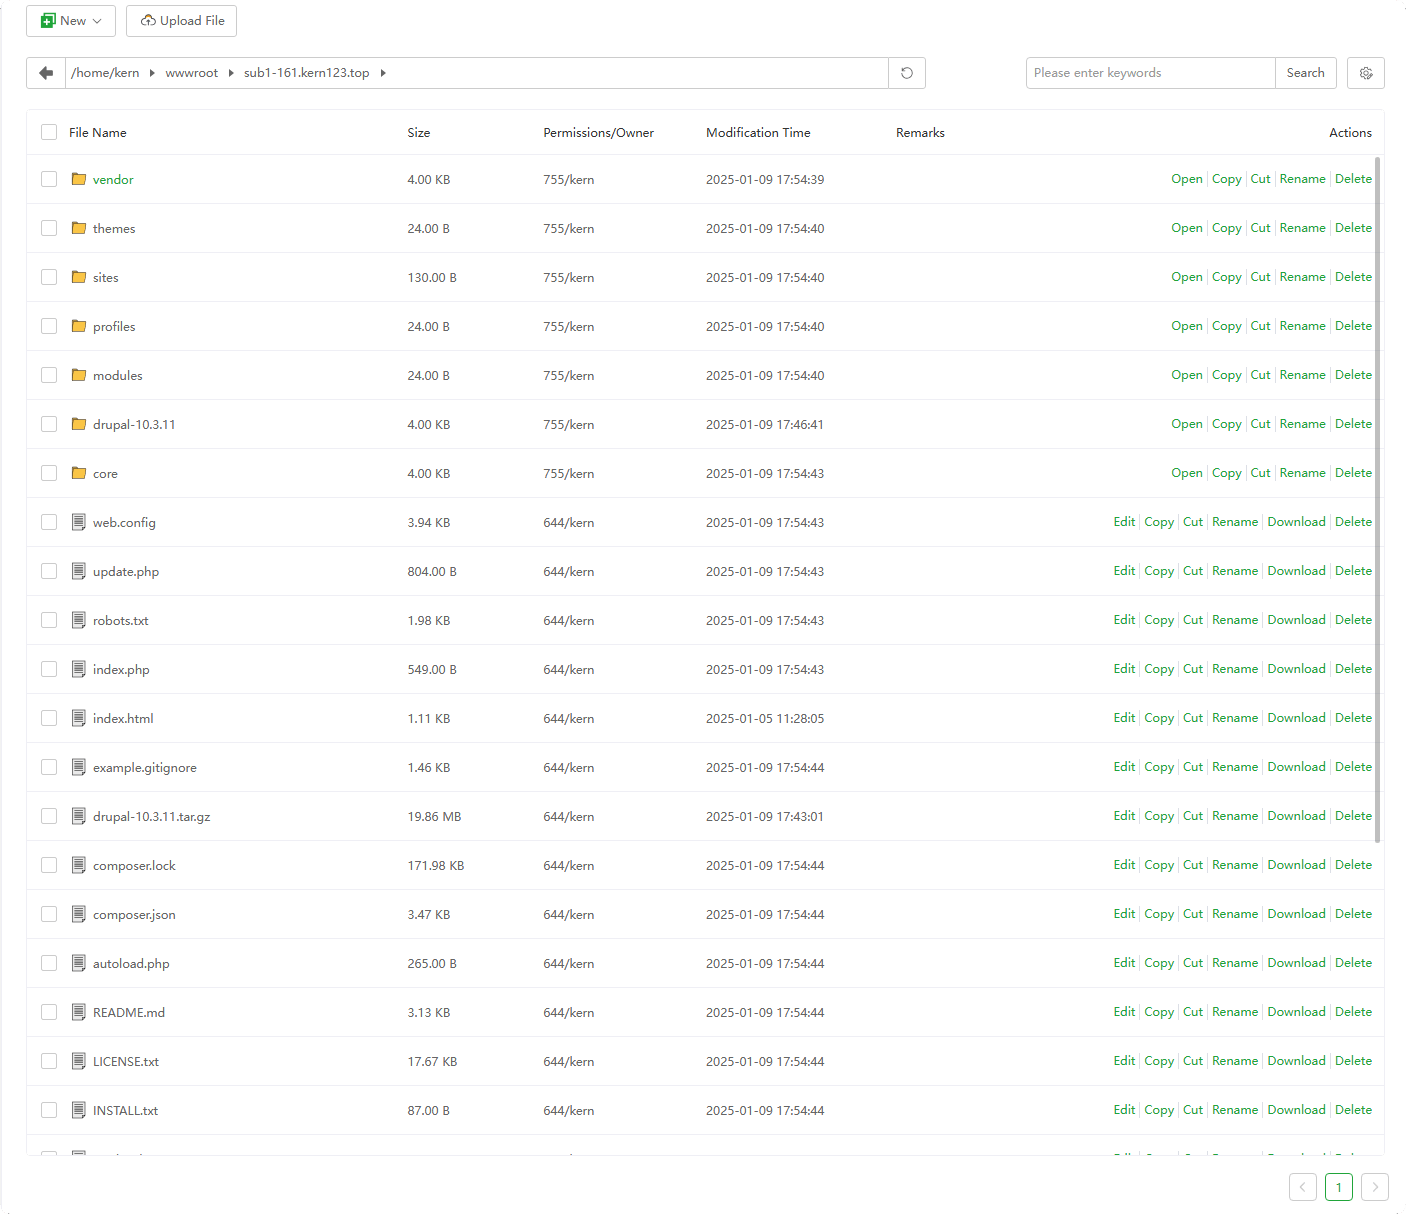
- After the pasting is completed, the display is as follows:
Use a
browser to accessthe website and follow the prompts to install it.If SSL is not deployed, you can only access the website using
http
After following the prompts,
4. Set up databaseYou can go to the Database interface and copy
Database Name,Username,Password, paste into the website before continuingIf the password is incorrect, please check
Database Name,Usernamewhether there are spaces,PasswordIs it correct.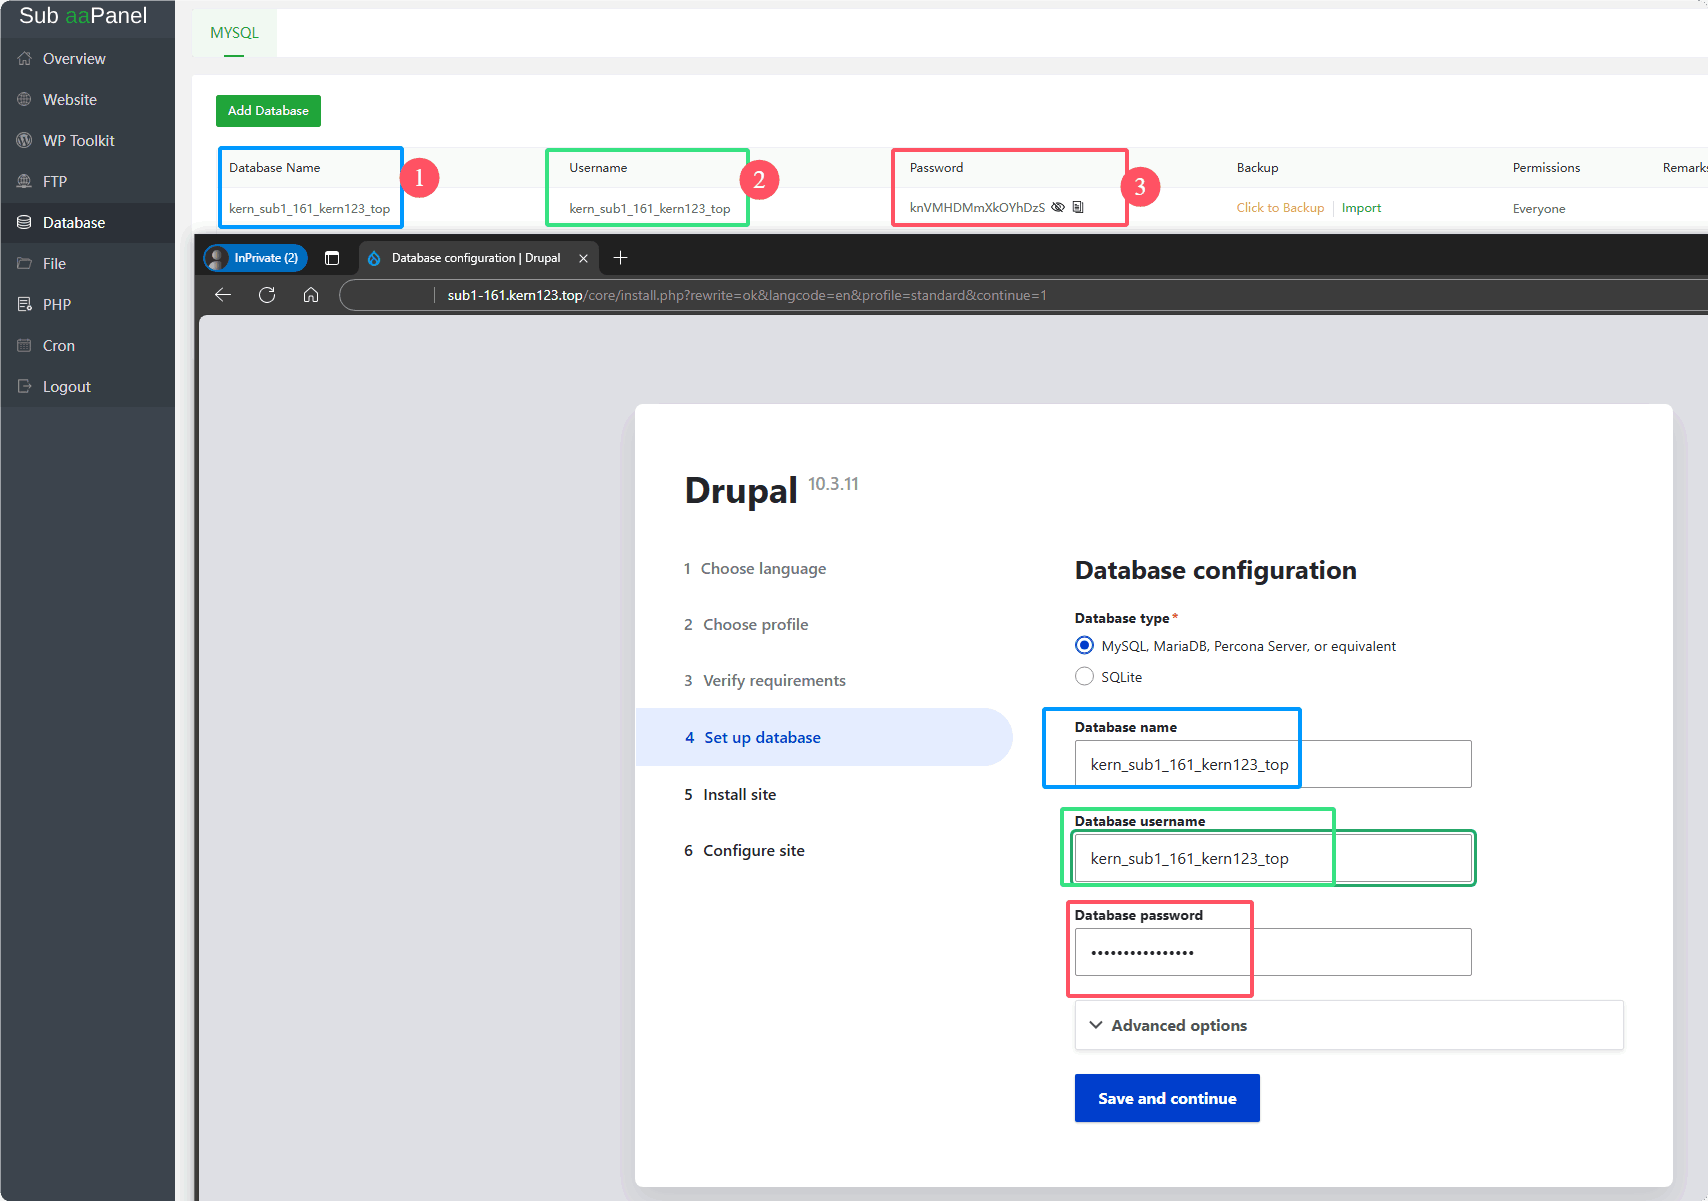
Finally
Configure site, enter your own information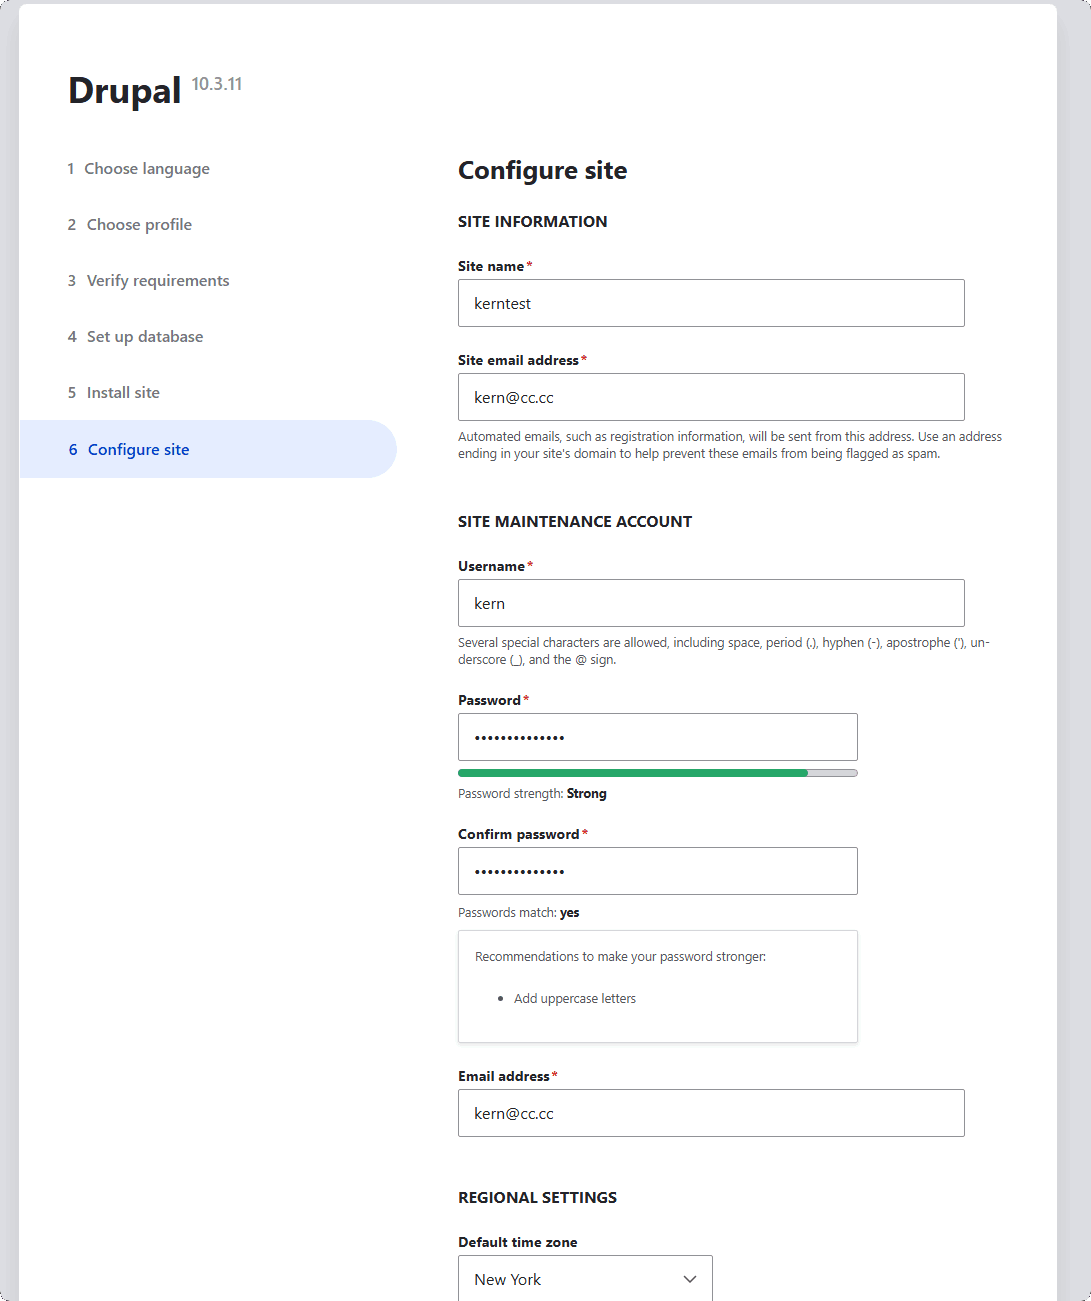
Complete installation