
How to Build Your Own DNS Server
Use aaPanel as the primary DNS server
- Requirements: Own a domain, have a static public IP address
Install Self-Hosted DNS Server
Domains --> Domain Management --> Install Self-built DNS
Access the interface and click
Install Self-built DNSto start the installation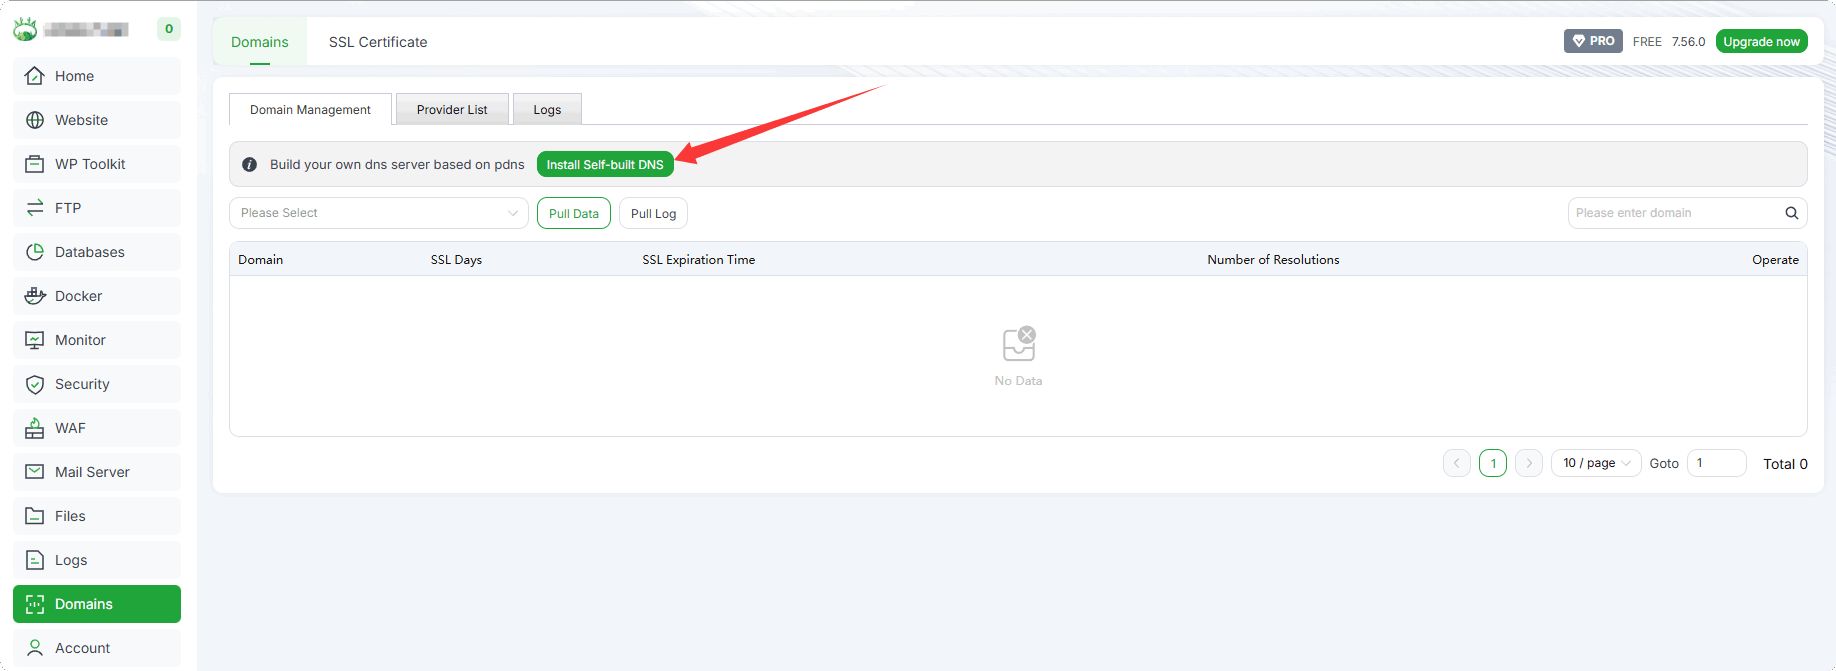
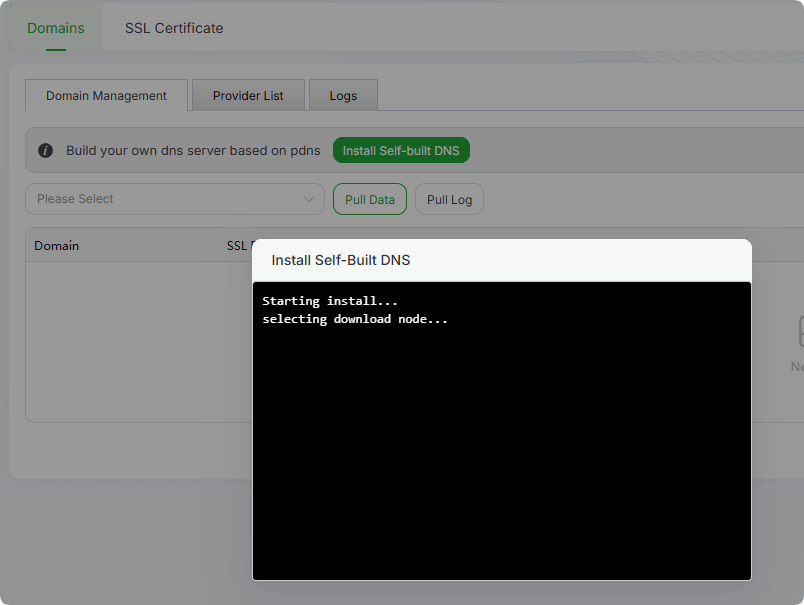
Installation process
Installation completion
Configure Self-Hosted DNS Server
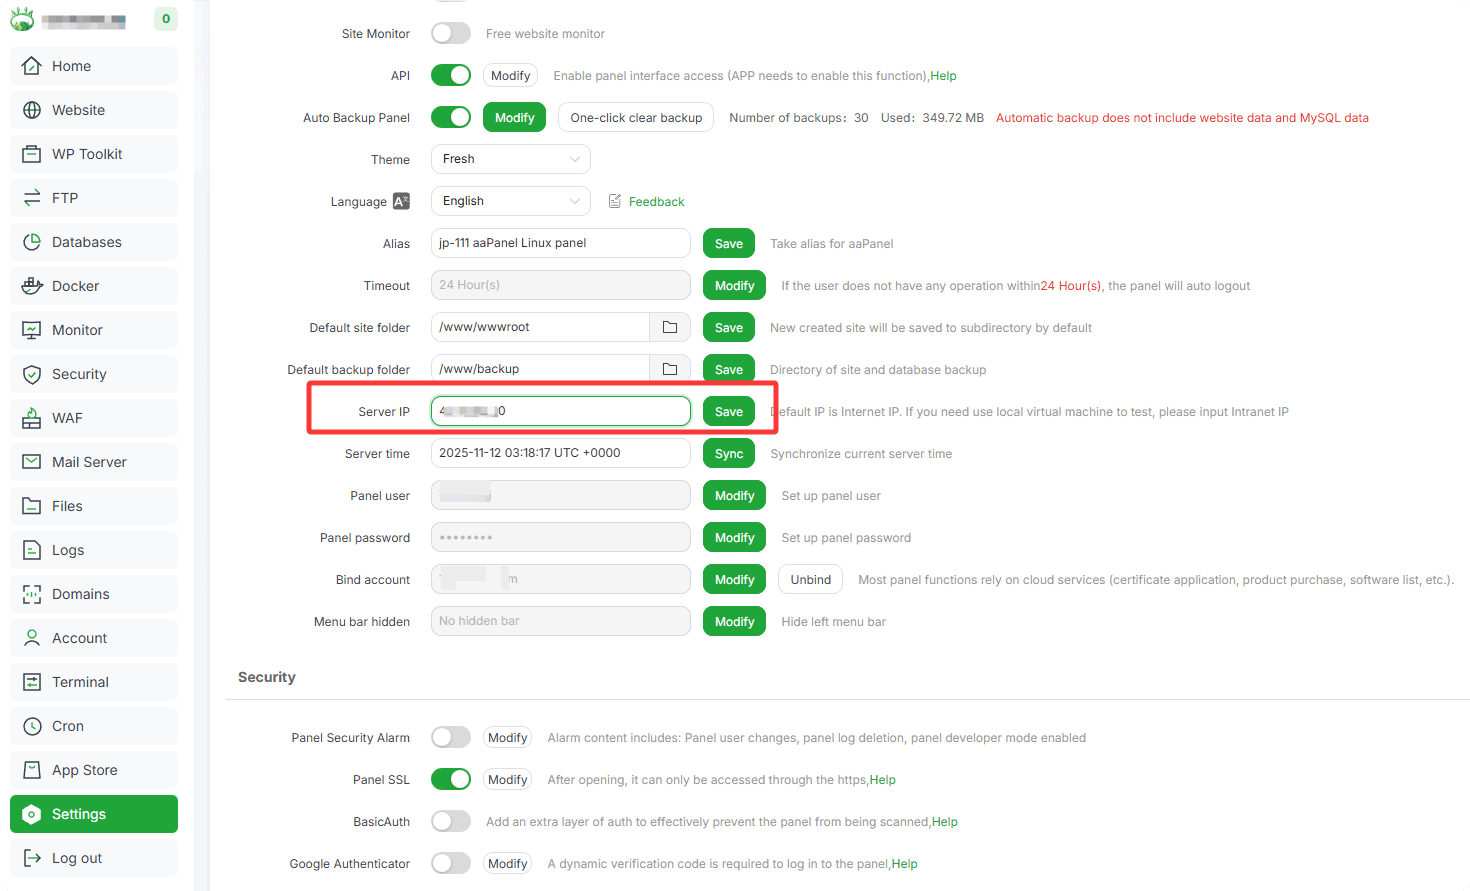
Confirm whether the server IP is correct: Go to Settings --> Server IP
It is usually a static IP address for the Internet.
If it is incorrect, please modify it, e.g., 123.123.123.123
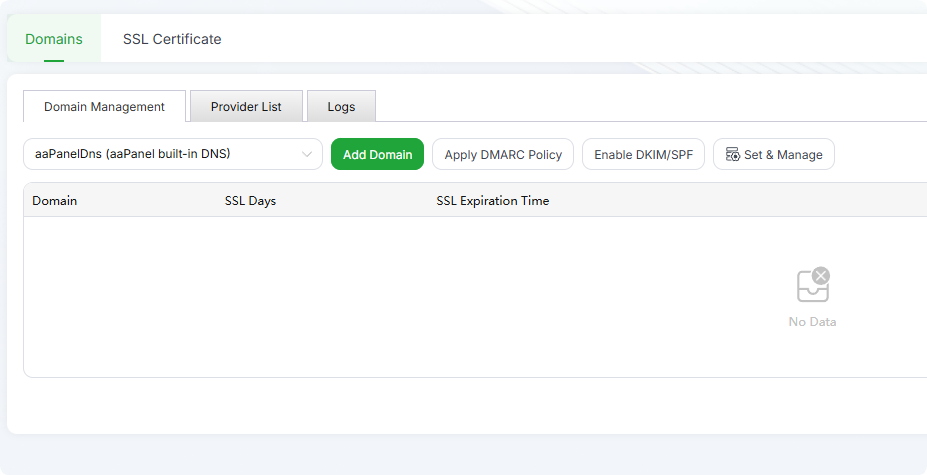
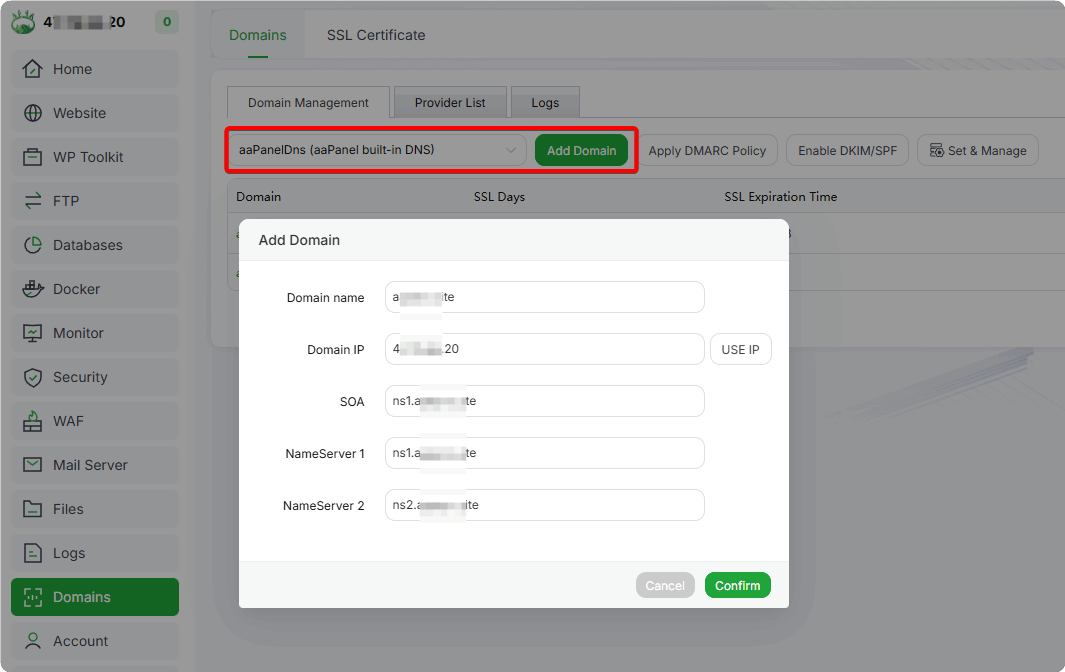
Add your domain to aaPanelDns (aaPanel built-in DNS)
Domains --> Domain Management --> aaPanelDns (aaPanel built-in DNS) --> Add Domain
Domain name:
your_domain.com, e.g., aapanel.comDomain IP:
your_server_ip, e.g., 123.123.123.123; this is usually the server's IPSOA:
ns1.your_domain.com, e.g., ns1.aapanel.comNameServer 1:
ns1.your_domain.com, e.g., ns1.aapanel.comNameServer 2:
ns2.your_domain.com, e.g., ns2.aapanel.com
- View the added domain records
aaPanelDns (aaPanel built-in DNS) --> Your_Domain_Name

Port Opening
When installing DNS Server via aaPanel, the system's port 53 is enabled by default.
If your server provider has a security group, please allow access to port 53 with the following configurations:
DNS Server Port: 53
Protocol: TCP, UDP
Source: Any (Allow access from all sources)
Action: Allow
Modify NAMESERVERS and Glue Records in the Domain Registrar
Critical step: Determines whether the server can function as the primary DNS server
About glue records
Example using the Namecheap registrar
Make the following modifications in your domain registrar’s platform:
Modify
glue records(terminology may vary across different registrars)Modify
NAMESERVERSorNameservers
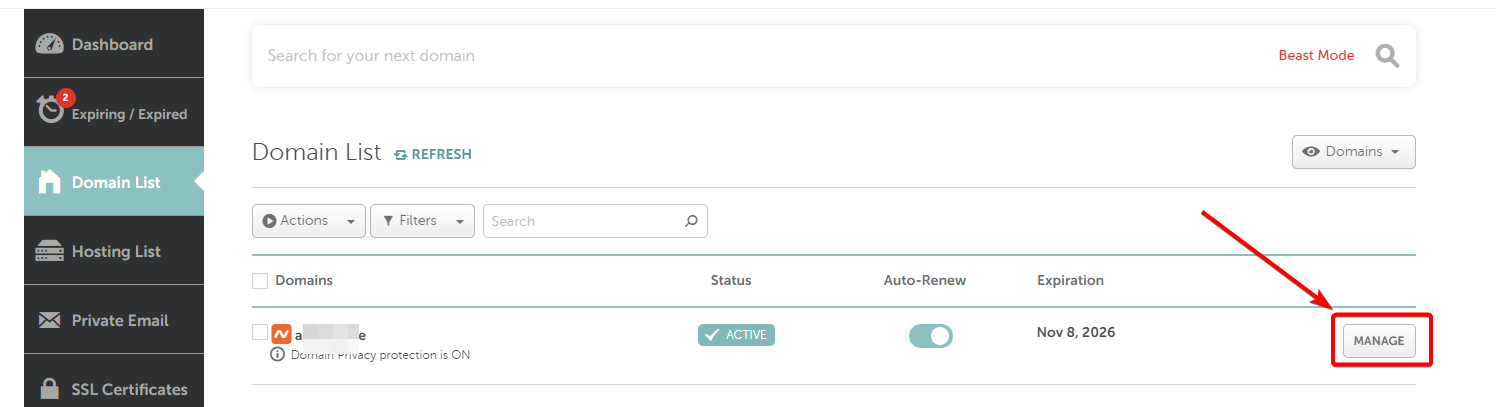
1. Log in to your domain registrar and locate the corresponding domain
2. Ensure DNSSEC is disabled
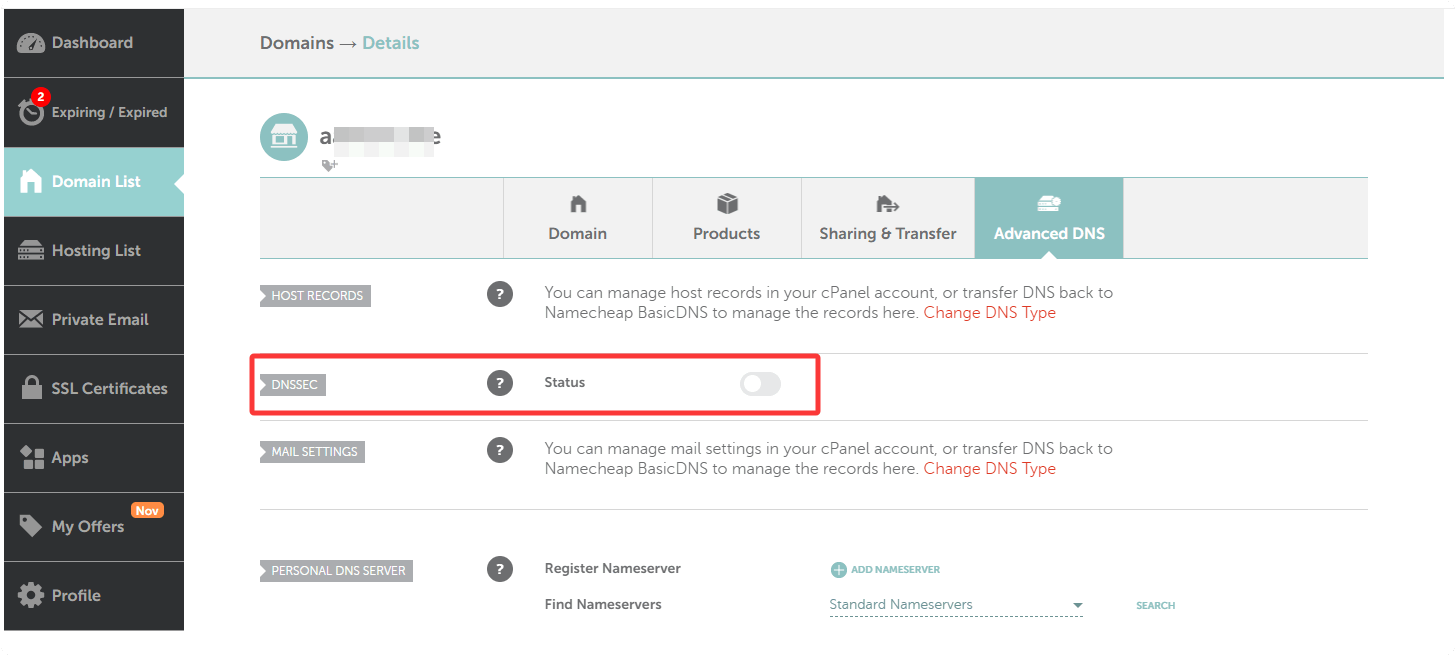
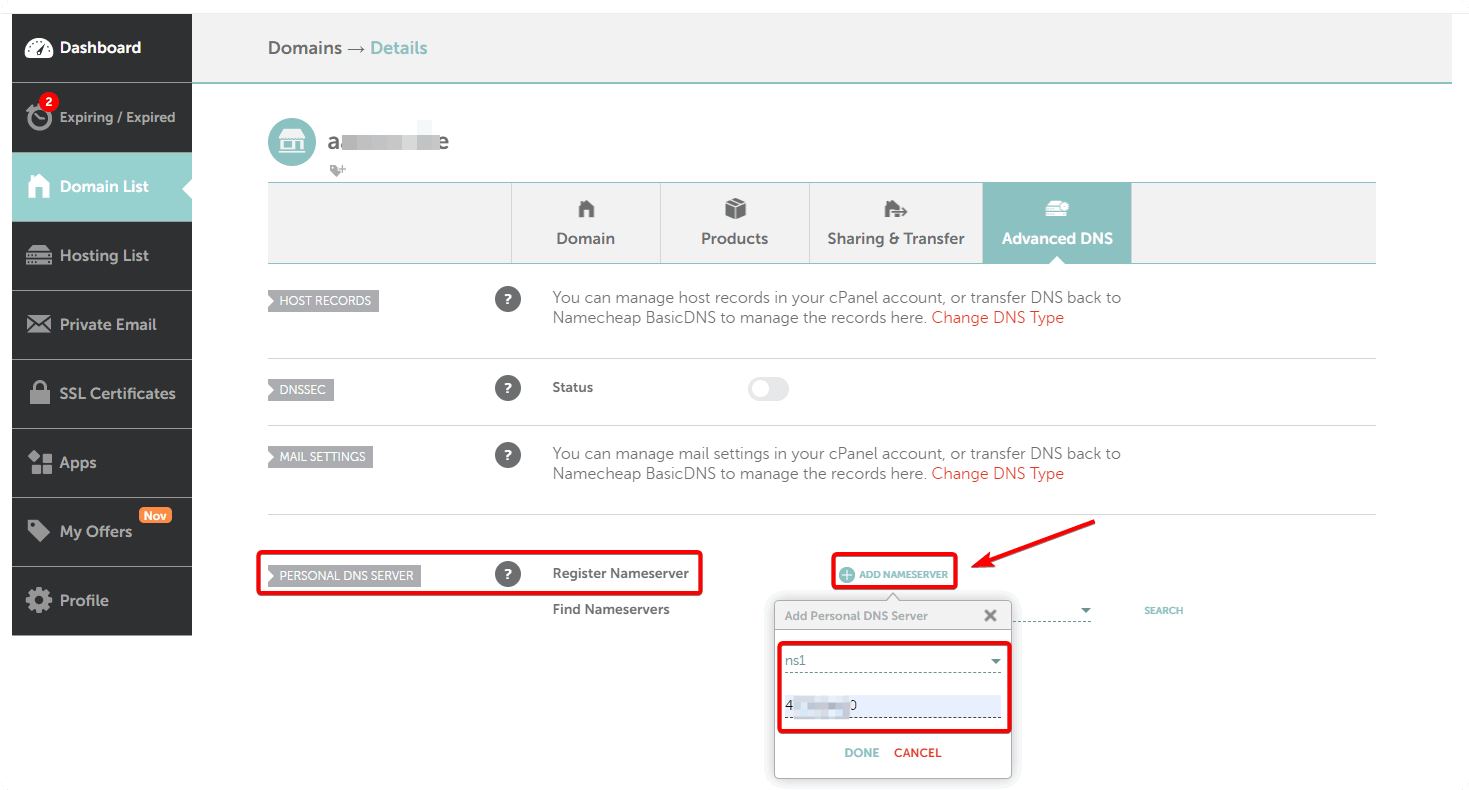
3. Navigate to the Advanced DNS section of the corresponding domain, find the PERSONAL DNS SERVER section, select Register Nameserver, and click ADD NAMESERVER
This step configures glue records
- Select
ns1, enter the IP address of your self-hosted DNS server, and clickDONEafter completion
- Click
ADD NAMESERVERagain, selectns2, enter the IP address of your self-hosted DNS server, and clickDONEafter completion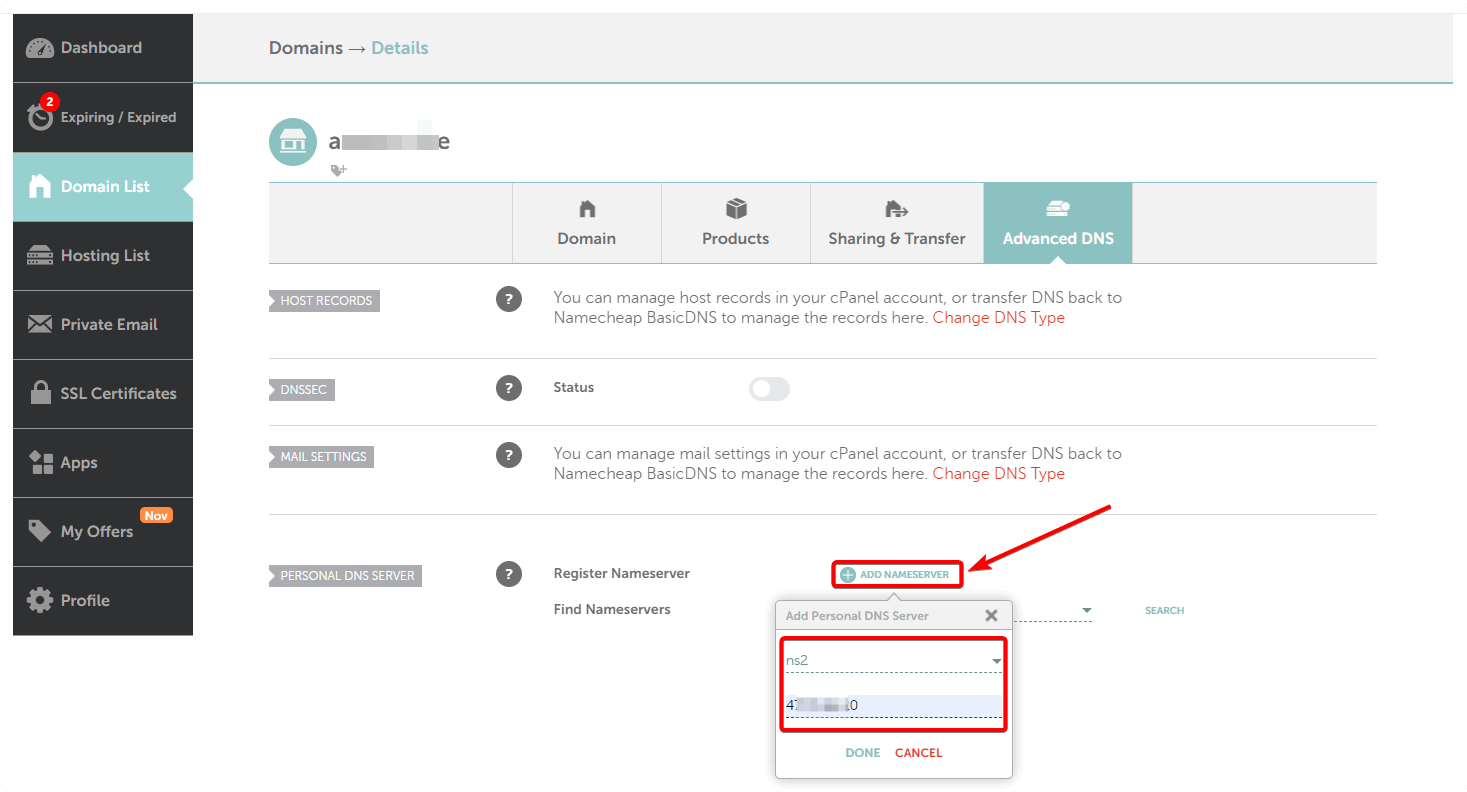
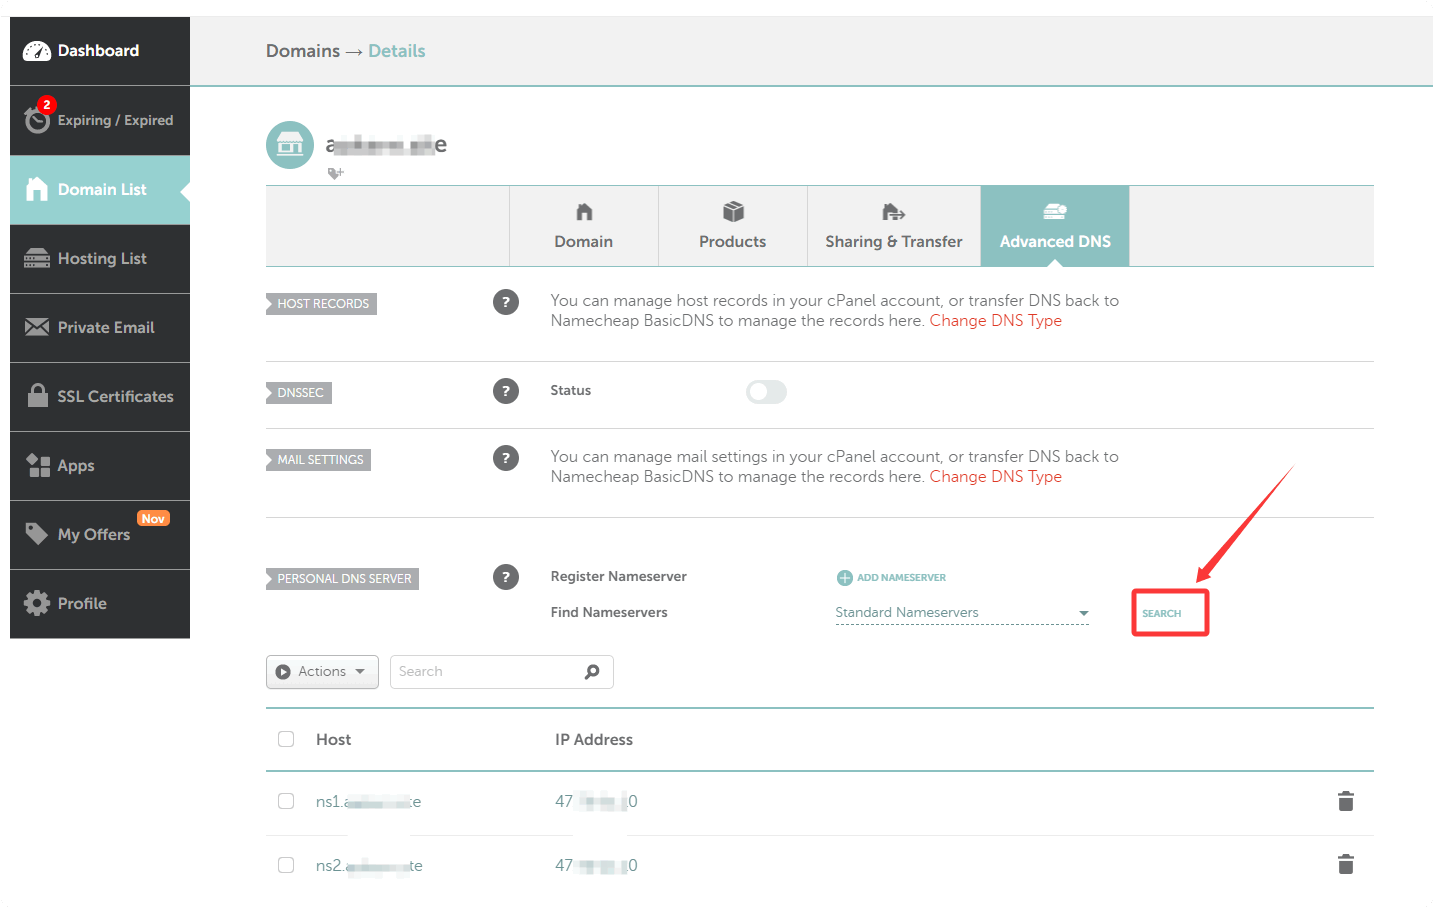
4. Click SEARCH to view the ns1 and ns2
5. In the NAMESERVERS interface, select Custom DNS
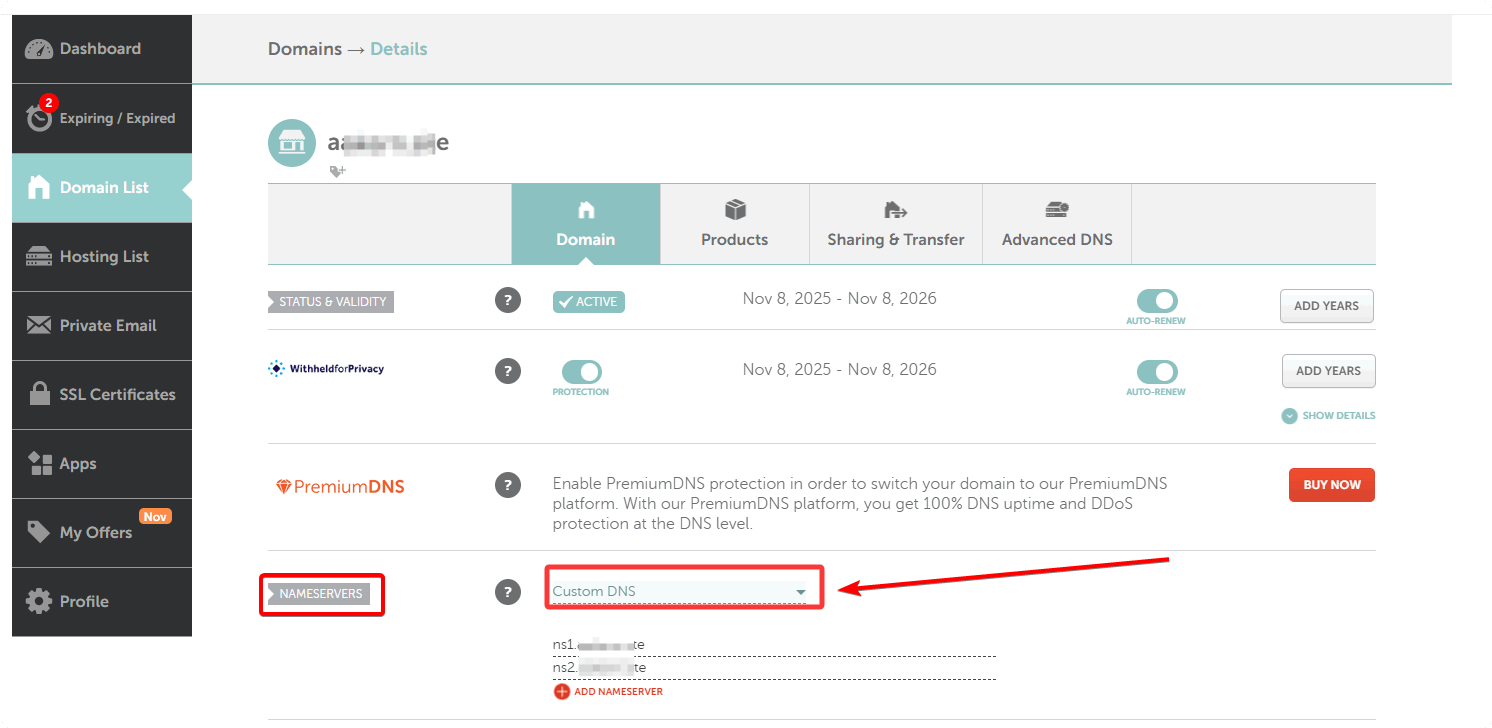
- Note: After modifying NS records, it may take few minutes to 48 hours for the changes to take effect.
6. Verify if the domain’s NS records have taken effect
You can check the domain’s NS records using this website: https://www.whatsmydns.net/#NS/
Steps to check the domain’s NS records:
- Enter the domain, e.g.,
aapanel.com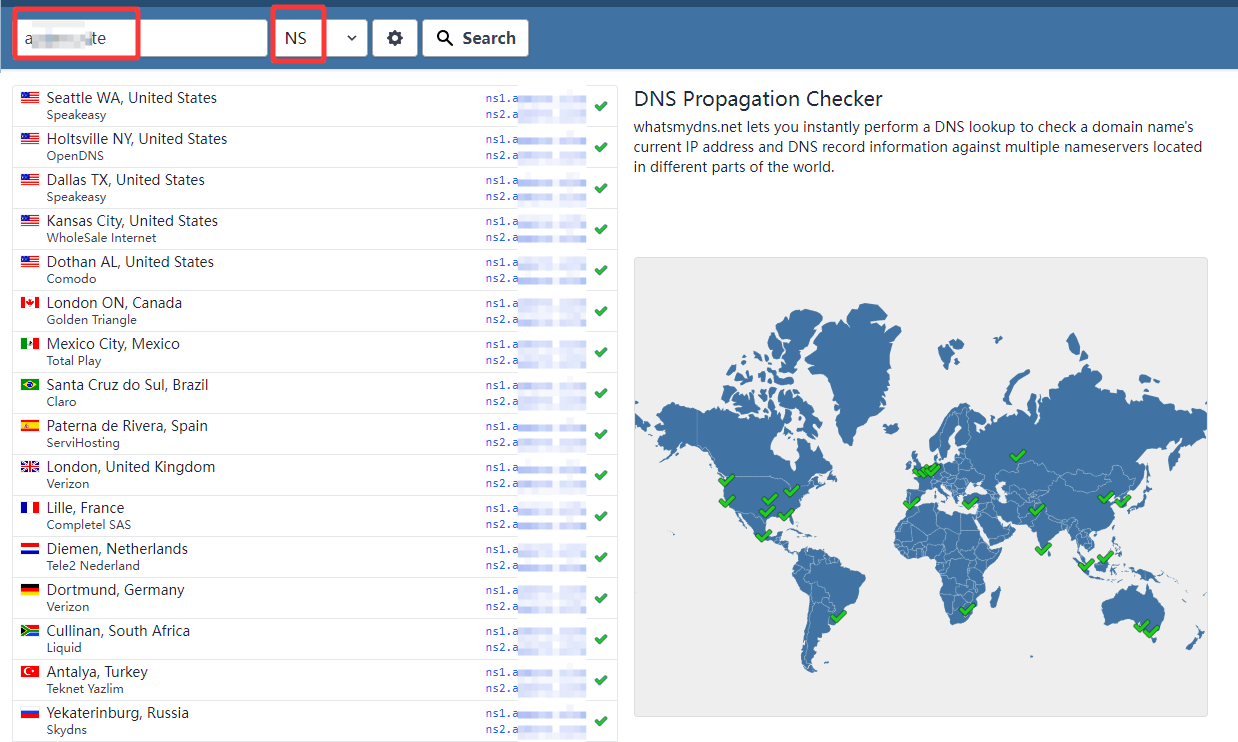
- Enter the domain, e.g.,
Check the A records of the domain’s NS (ns1 and ns2): https://www.whatsmydns.net/#A/
Enter the NS, e.g.,
ns1.aapanel.comEnter the NS, e.g.,
ns2.aapanel.com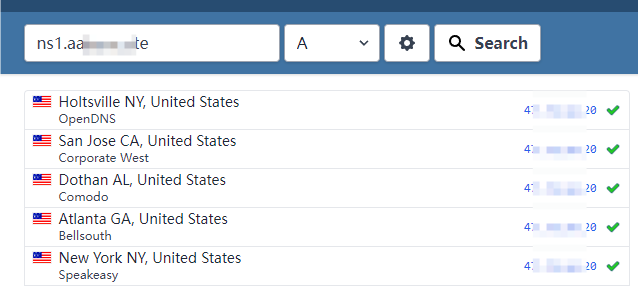
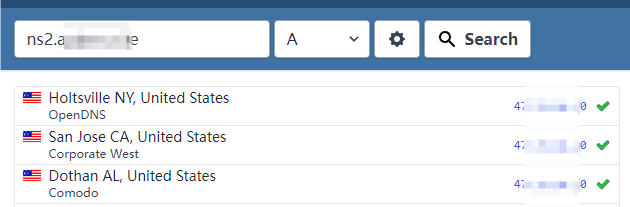
The A records of the NS should point to the
IP address of your DNS server.
7. Add test TXT record in aaPanel to verify if the self-hosted DNS server works properly
Domains --> Domain Management --> aaPanelDns (aaPanel built-in DNS) --> Your_Domain_Name --> Add Resolution
Add test TXT record as follows:
Record:
dnstestType:
TXTRecord Value:
dnstest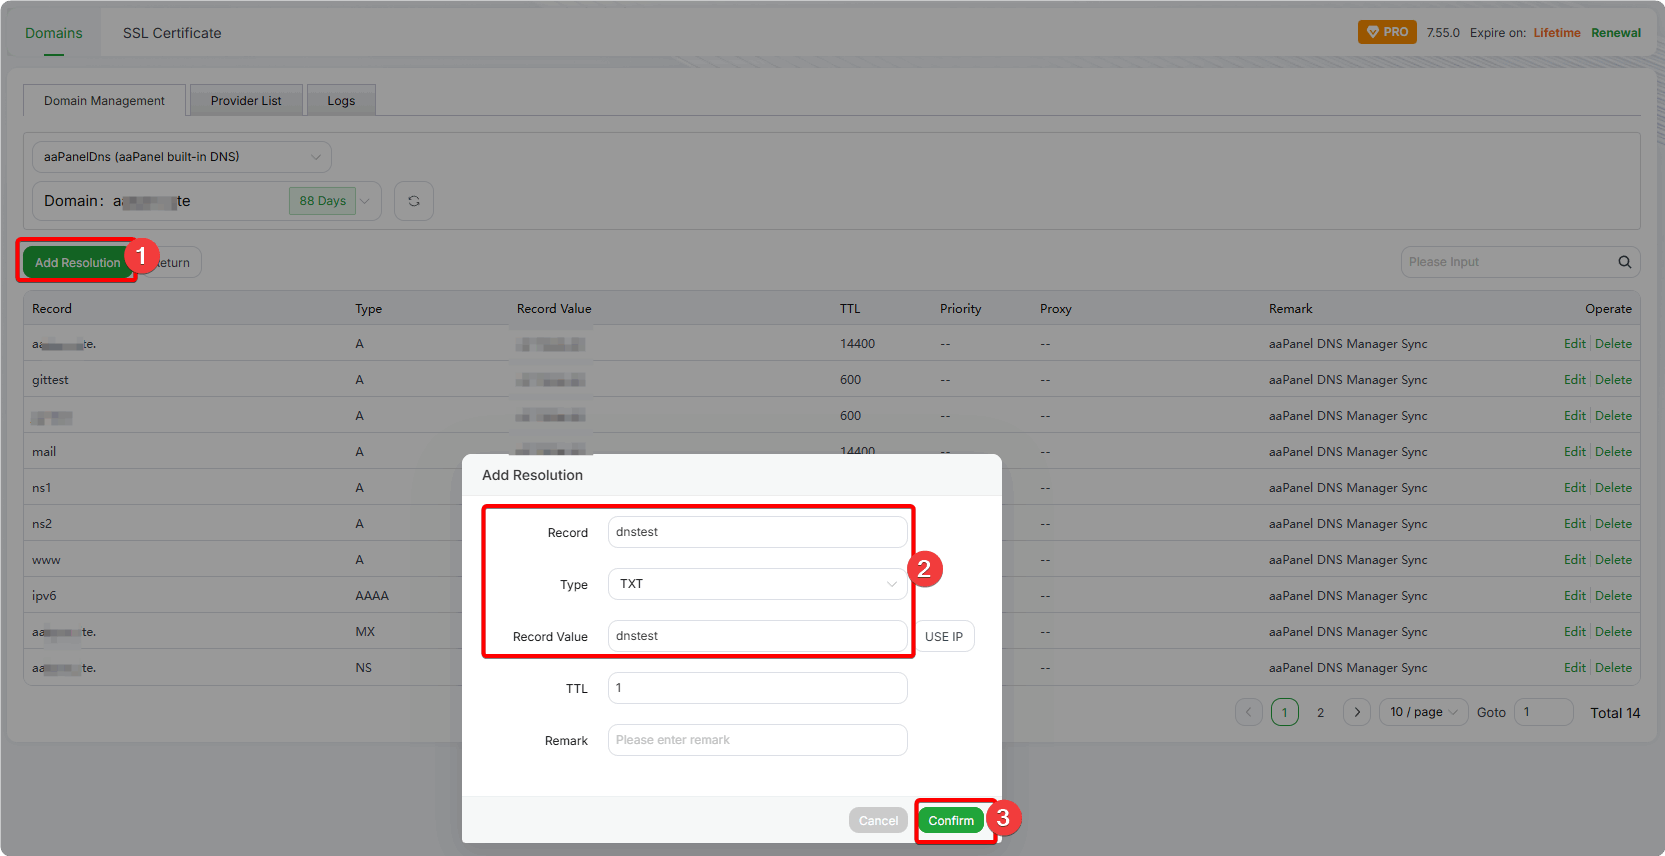
The added record may take few minutes to take effect.
Check the TXT record result: https://www.whatsmydns.net/#TXT/
- Enter the TXT record, e.g.,
dnstest.aapanel.com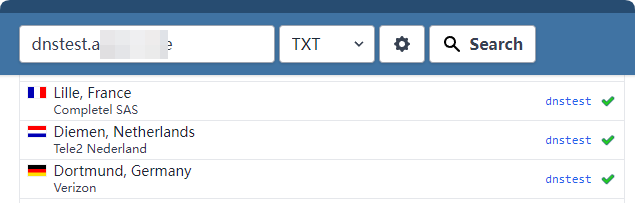
- Enter the TXT record, e.g.,
Local server testing
Install the nslookup command:
For Debian/Ubuntu:
sudo apt install -y dnsutilsFor CentOS/RHEL:
yum install -y bind-utilsTest the TXT record and NS record:
nslookup -type=txt dnstest.your_domain.com 127.0.0.1
nslookup -type=ns your_domain.com 127.0.0.1