
Settings
- There are many setting options, it is recommended to use
search
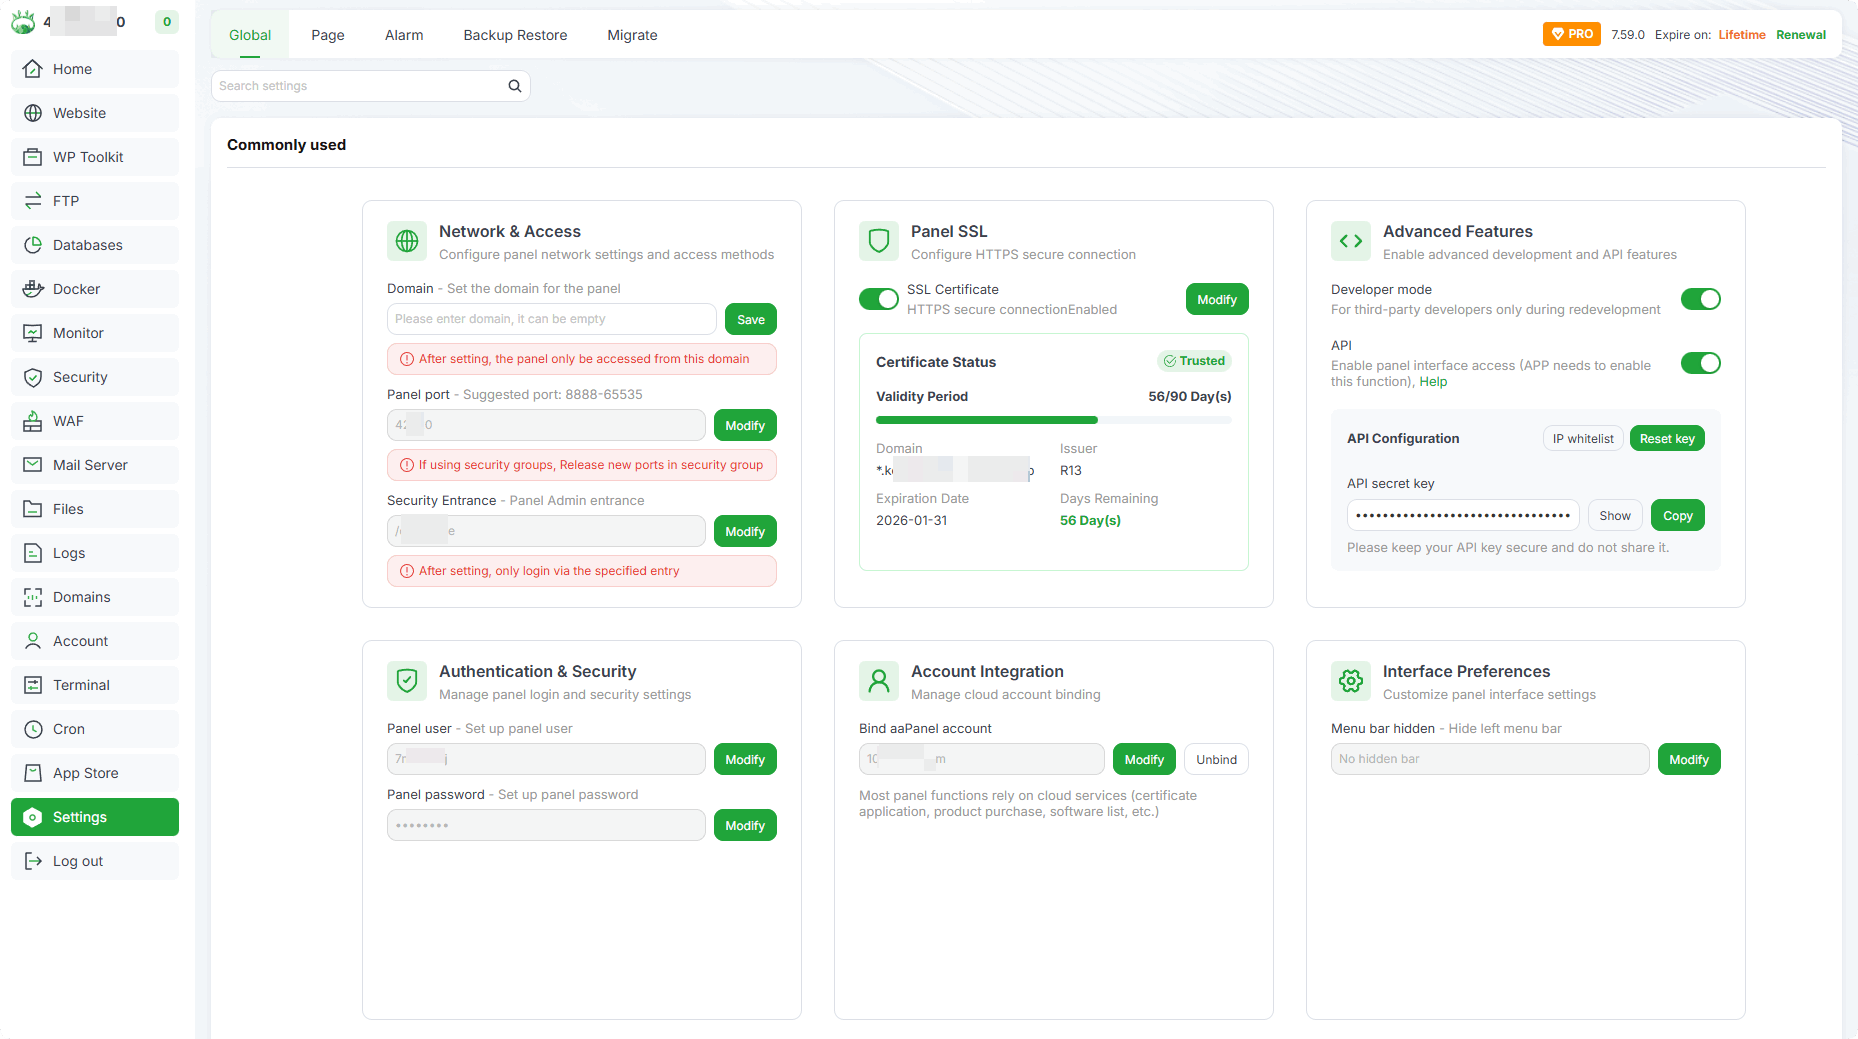
Panel Settings
In the
Global
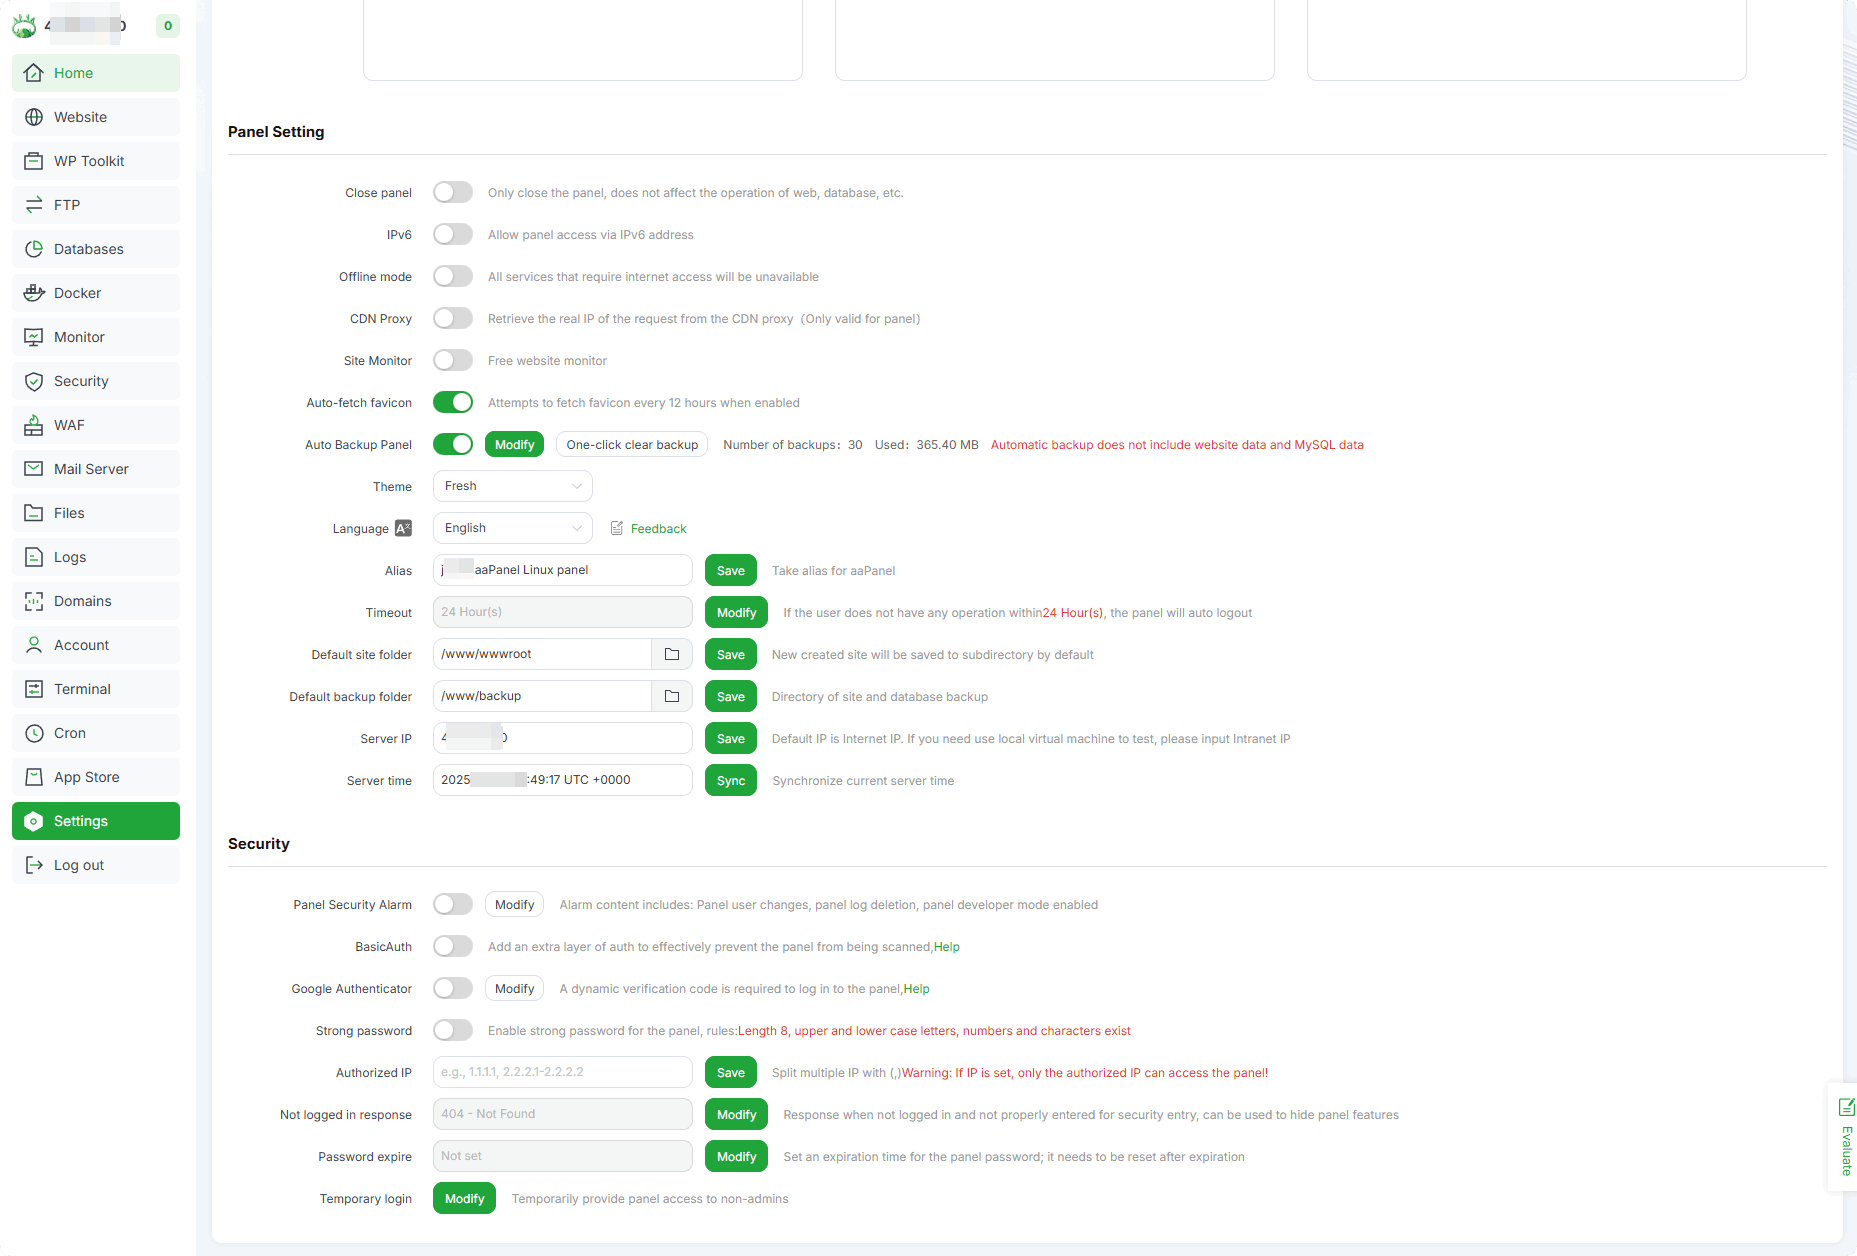
Close panel :
Only close the panel, does not affect the operation of web, database, etc.IPv6 : Allow panel access via IPv6 address. If
websitealso needs to monitorIPv6, please enable this option.Offline mode : All services that require internet access will be unavailable
CDN Proxy : Retrieve the real IP of the request from the CDN proxy(Only valid for panel)
Site Monitor : Turn on/off Free website monitor
Auto-fetch favicon : Attempts to fetch favicon every 12 hours when enabled
Auto Backup Panel : Set the data of the backup panel itself
Theme : Change theme
Developer mode : Only used by third-party developers in the
development stageAPI : Enable panel interface access (aaPanel Mobile needs to enable this function)
Language : Select display language Support
Traditional Chinese,English,Deutsch,Frangais,Español,PortuguésAlias : Give the panel a separate name for use in
web page titlesTimeout : If the user does not have any operation within
N Hour(s), the panel willauto logoutDefault site folder :
New created sitewill be saved to subdirectory by default :/www/wwwroot/Default backup folder : Directory of site and database etc.
backup Directoryby default :/www/backup/Server IP : The server IP address
displayed in the upper left corner. PS: Themail serverwill also check whether this matches theA record.Server time : Display server time,
Synchronizecurrent server timePanel user : Display the
user of aaPanel, Set up panel userPanel password : Set up panel password
Bind account :
Replaceandunbindthe boundaccount of aaPanel. Some functions cannot be used after unbinding.Menu bar hidden :
Hide left menubar
Security
In the
Global
Panel Security Alarm : Alarm content includes:
Panel user changes, panellog deletion, paneldeveloper mode enabledPanel SSL : Enable certificate encryption access panel, use
self-signed certificateby default, Can paste thecertificate in nginx format, or useLet's EncryptcertificateBasicAuth : Add an extra layer of
auth to effectively preventthe panel from being scanned- If you
forget BasicAuth account or password, you can use theSSH toolto connect to the server, useroot privileges, and execute the command:bt 23cancel it
- If you
Google Authenticator : A dynamic
verification codeis required to log in to the panel- If
Google Authenticator cannot be usednormally, you can use theSSH toolto connect to the server, useroot privileges, and execute the command:bt 24cancel it
- If
Strong password : Enable strong password for the panel, rules:
Length 8, upper and lower case letters, numbers and characters existDomain : Bind an access domain name to the panel. Note:
After binding the domain name, the panel can only be accessed through the domain name. TheIPwill prohibit access and display403 error.- If you cannot access the domain name after binding it, you can use the
SSH toolto connect to the server, useroot privileges, and execute the command:bt 12cancel it
- If you cannot access the domain name after binding it, you can use the
Authorized IP :
Split multiple IPwith (,) Warning: If IP is set,only the authorized IP can access the panel!- If you cannot access the IP after binding it, you can use the
SSH toolto connect to the server, useroot privileges, and execute the command:bt 13cancel it
- If you cannot access the IP after binding it, you can use the
Panel port : Check and
changethe panel port Note: For servers with security groups, please release the new port in thesecurity group in advance.Security Entrance :
Panel Admin entrance. Canonly log into the panel through thespecified Security Entrance, e.g. /021e887b- If you forget the secure entrance, you can use the
SSH toolto connect to the server, useroot privileges, and execute the command:bt 14view it
- If you forget the secure entrance, you can use the
Not logged in response : Response when not logged in and
not properly entered for security entry, can be used to hide panel features, such as404Password expire : Set an
expiration timefor the panel password; it needs to be reset after expirationTemporary login : Temporarily provide panel access to non-admins
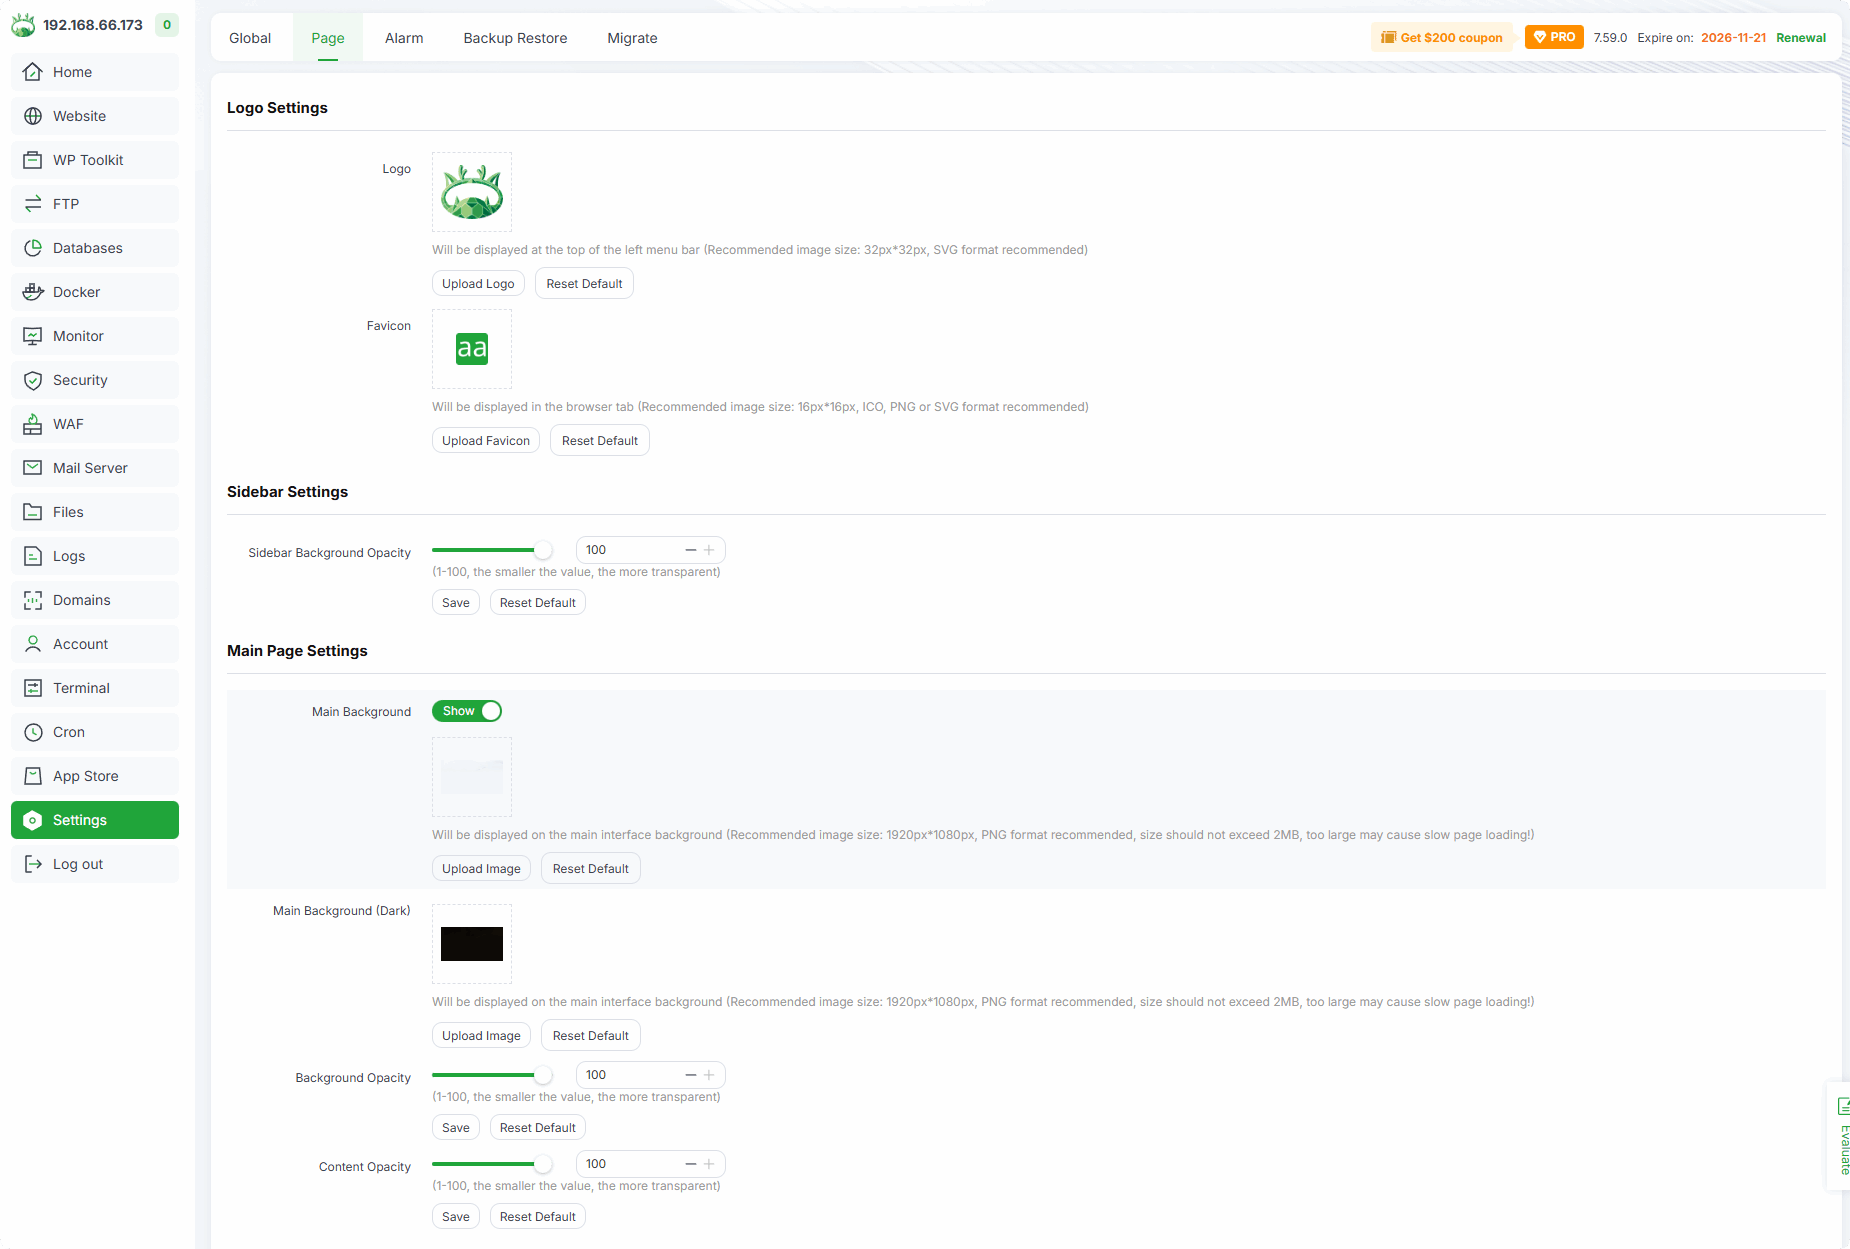
Page
Customize panel background and icon display
Alarm
- Alarm Settings :
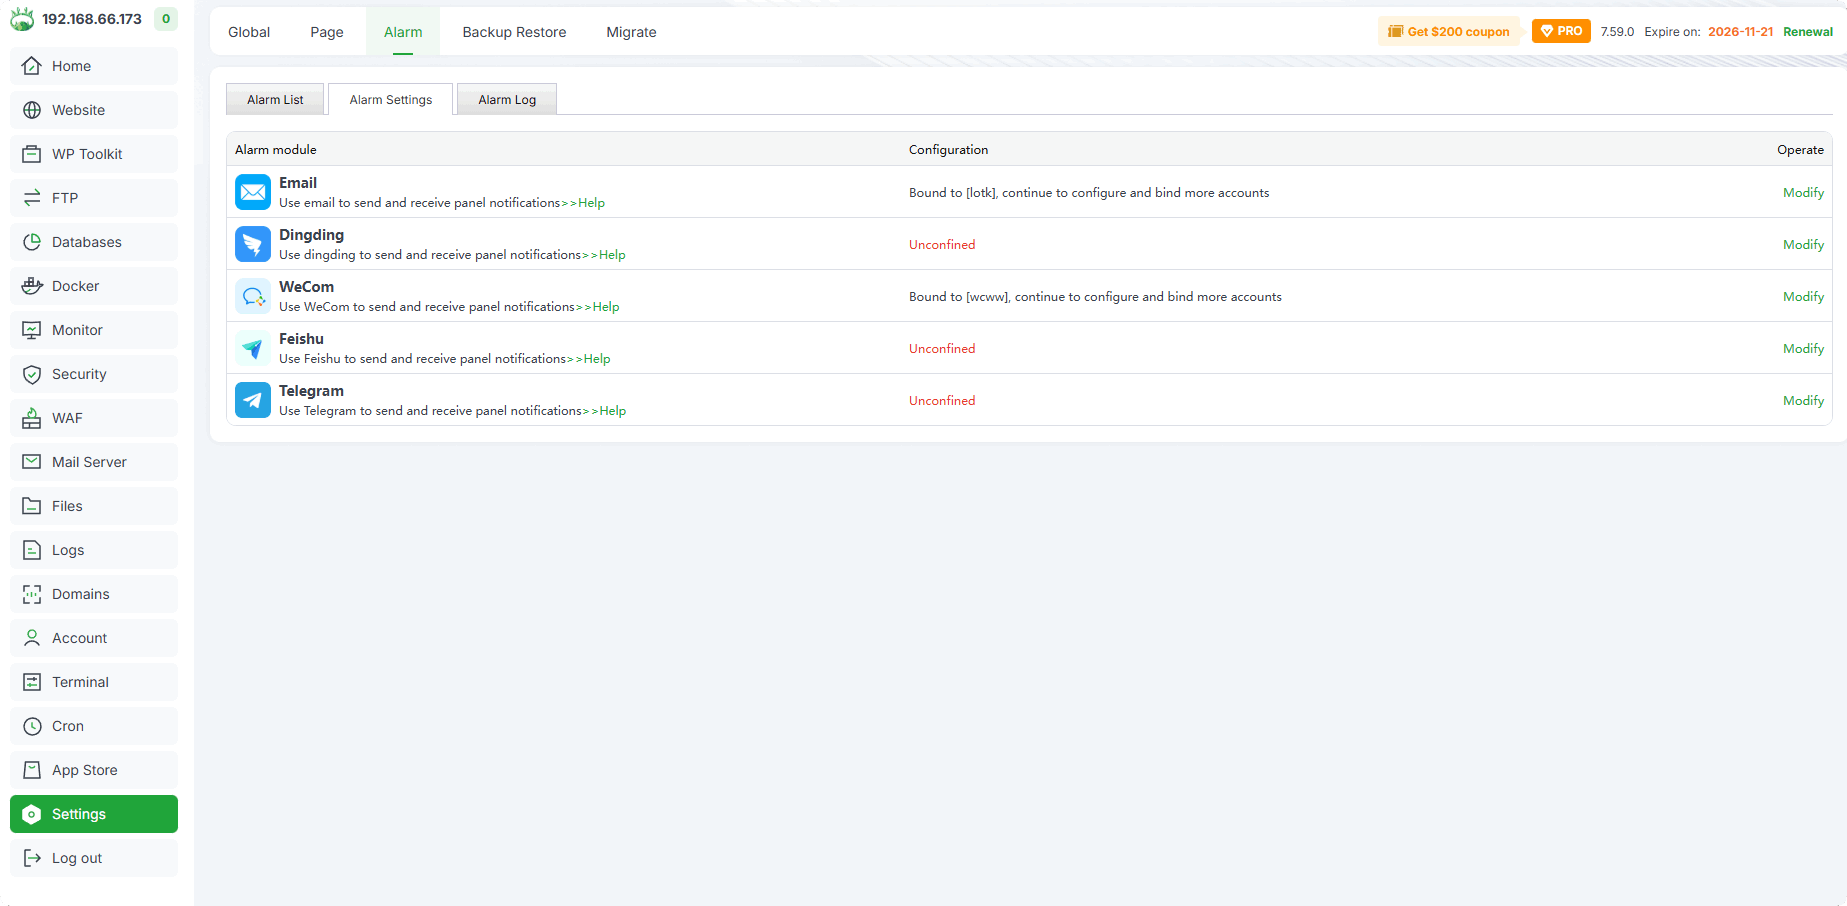
Email

Add / Edit email
Currently does not support adding Gmail, Outlook Yahoo, etc.
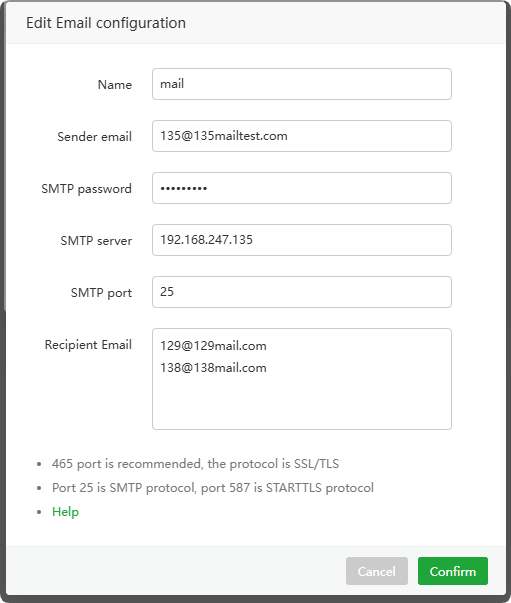
Name : Enter a
channel namefor identificationSender email : Enter the
sender's email addressto send the emailSMTP password : Enter the
SMTP passwordof the sender's email addressSMTP server : Enter the
smtp serverof the sender's email addressSMTP port : Enter smtp port
Recipient Email : Enter the
recipient's email addressto receive notifications
Status :
Enable/disablethis notification channelTest :
Test whether the email is sent successfully. Will receive a test email after success.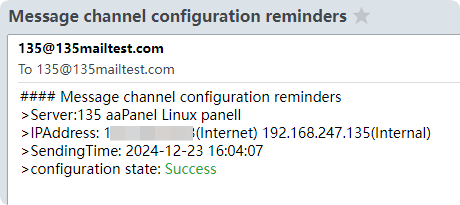
Unbind : Delete this notification channel
Dingding
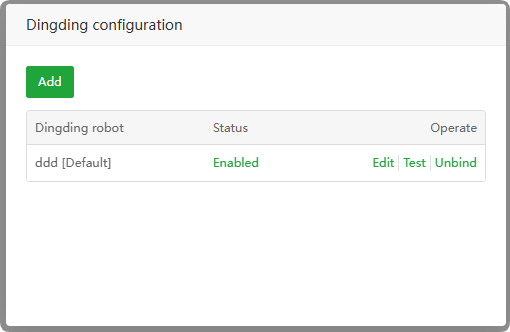
Add / Edit dingding
Security settings,please use the keywordpanel
Name :Enter a
channel namefor identificationURL : Paste the url of the
Dingding robot
Status :
Enable/disablethis notification channelTest :
Test whether the transmission is successful. Will receive a test notification after success.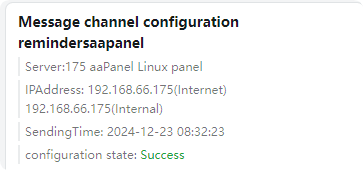
Unbind : Delete this notification channel
WeCom
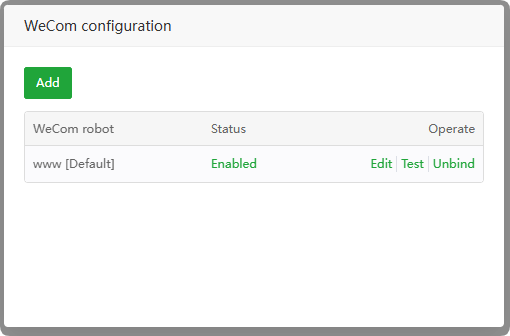
Add / Edit WeCom
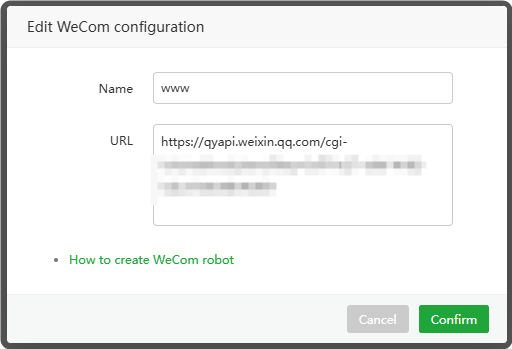
Name :Enter a
channel namefor identificationURL : Paste the url of the
WeCom robot
Status :
Enable/disablethis notification channelTest :
Test whether the transmission is successful. Will receive a test notification after success.
Unbind : Delete this notification channel
Feishu / Lark
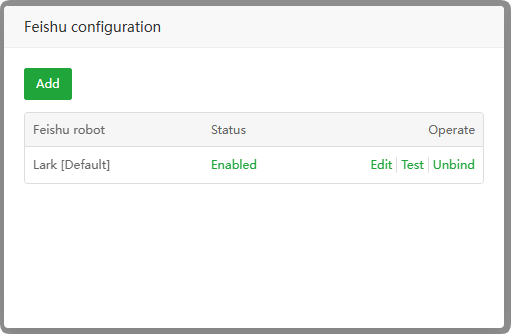
Add / Edit Feishu
Security settings,please use the keywordpanel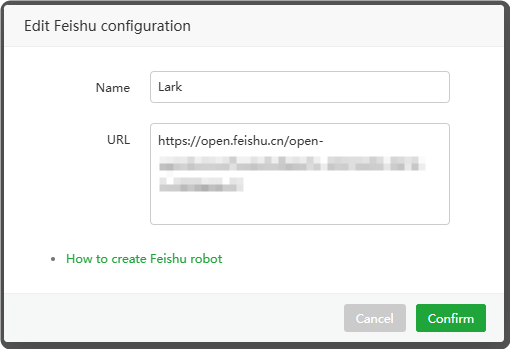
Name :Enter a
channel namefor identificationURL : Paste the url of the
Feishu/Lark robot
Status :
Enable/disablethis notification channelTest :
Test whether the transmission is successful. Will receive a test notification after success.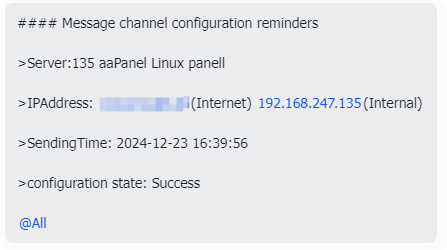
Unbind : Delete this notification channel
Telegram
Click view: How to add Telegram Bot
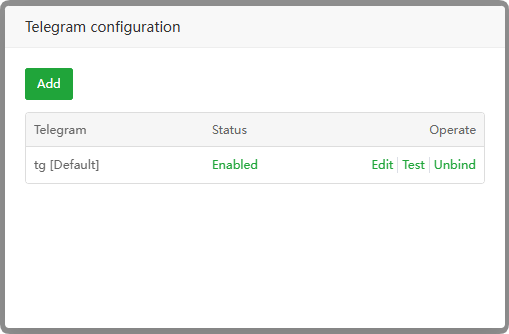
Add / Edit Telegram
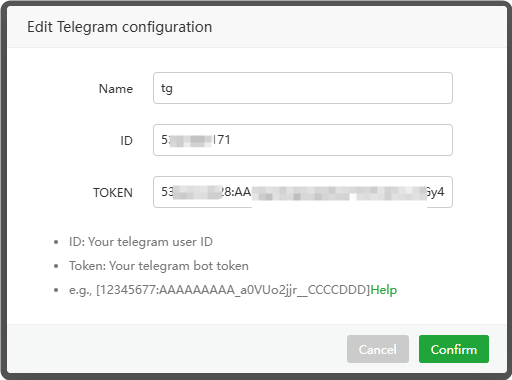
- Name :Enter a
channel namefor identification - ID : Paste the
ID of the telegram bot - TOKEN : Paste the
TOKEN of the telegram robot
- Name :Enter a
Status :
Enable/disablethis notification channelTest :
Test whether the transmission is successful. Will receive a test notification after success.Unbind : Delete this notification channel
Alarm List
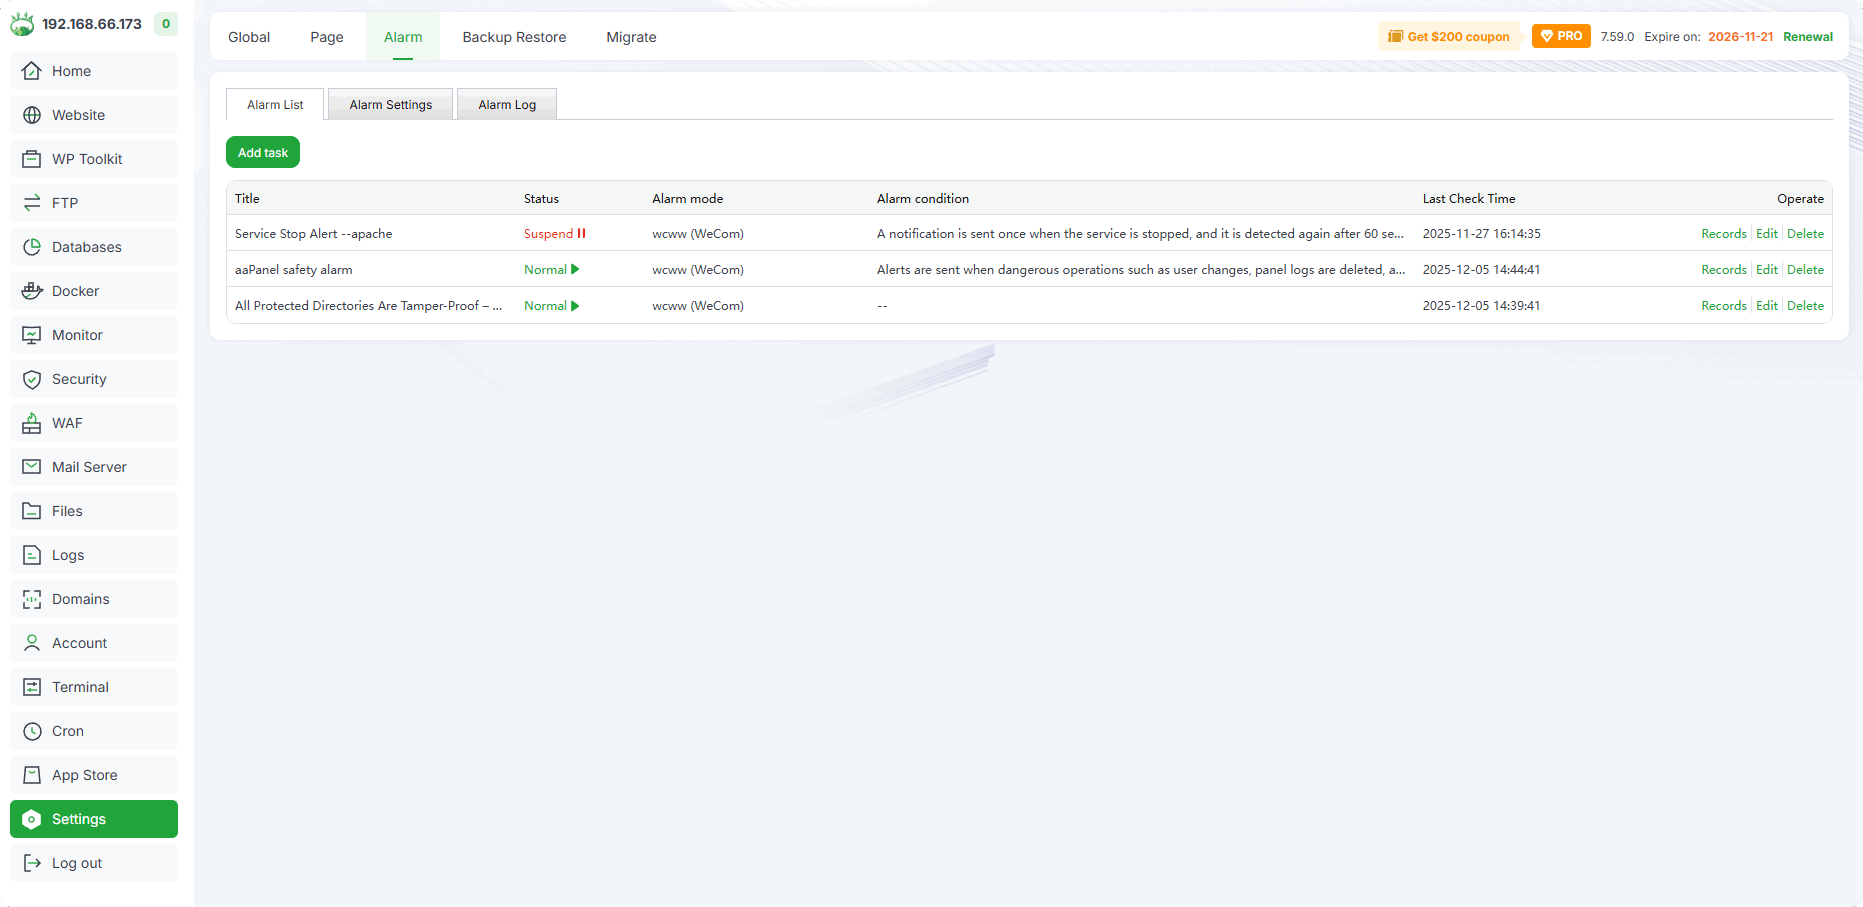
Add task : Add
alarm taskTitle : Alarm task name
Status :
Enable/disablethis alarm taskAlarm mode : Alarm
notification channel methodAlarm condition : Alarm notification will be sent only when this
condition needsto be met.Last Check Time : The time of the last detection task
Records : View
alarm recordsEdit : Edit alarm task
Delete : Delete alarm task
Add task (Alarm List)
- Added example:
Home disk alerts
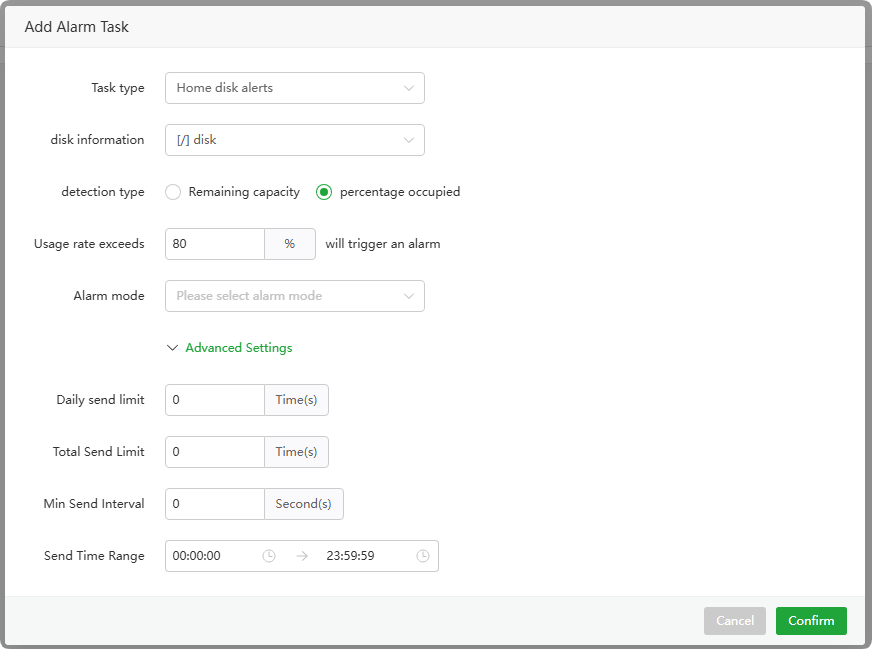
Task type : Alert task type:
Home disk alertsdisk information : Select a
mount partition directory: [/] diskdetection type : Select a
trigger conditionRemaining capacity : Usage exceeds
percentage occupied : Usage rate exceeds
Alarm mode : Select
oneormorenotification channels, which need to be configured inAlarm Settingsfirst.Advanced Settings
Daily send limit :
Maximum numberof sendings perdayTotal Send Limit : The
maximum number of timesthis task can be sentMin Send Interval : Minimum sending
intervalunitsecondsSend Time Range : Select the
time rangefor sending alarm information. No alarm will be sent outside this time range.
Supports the following alarm task types
Site Certificate (SSL) expiration
Website expiration
aaPanel password expiration date
SSH login failure alarm
Service Stop Alert
aaPanel security alarms
SSH login alert
aaPanel login alarm
Home disk alerts
Home CPU alarms
Home load alerts
Home memory alarms
Domain expiration
Certificate expiration
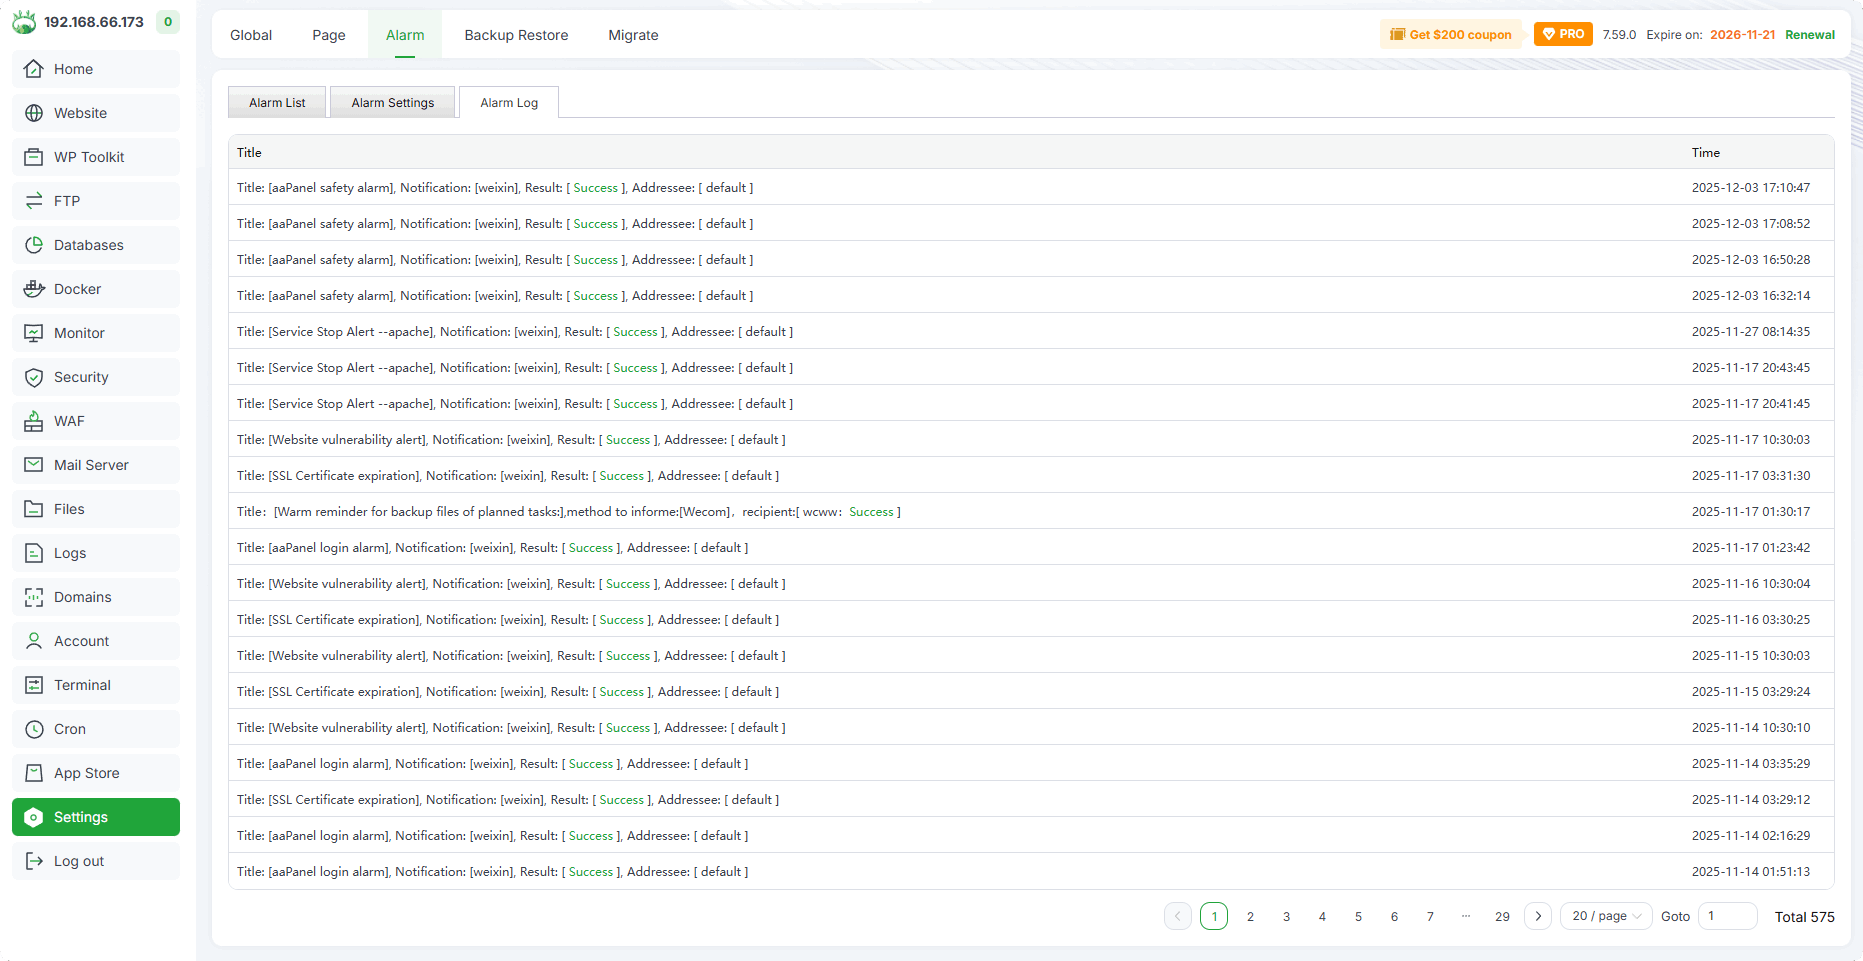
Alarm Log : View the logs sent by alarms
Backup Restore
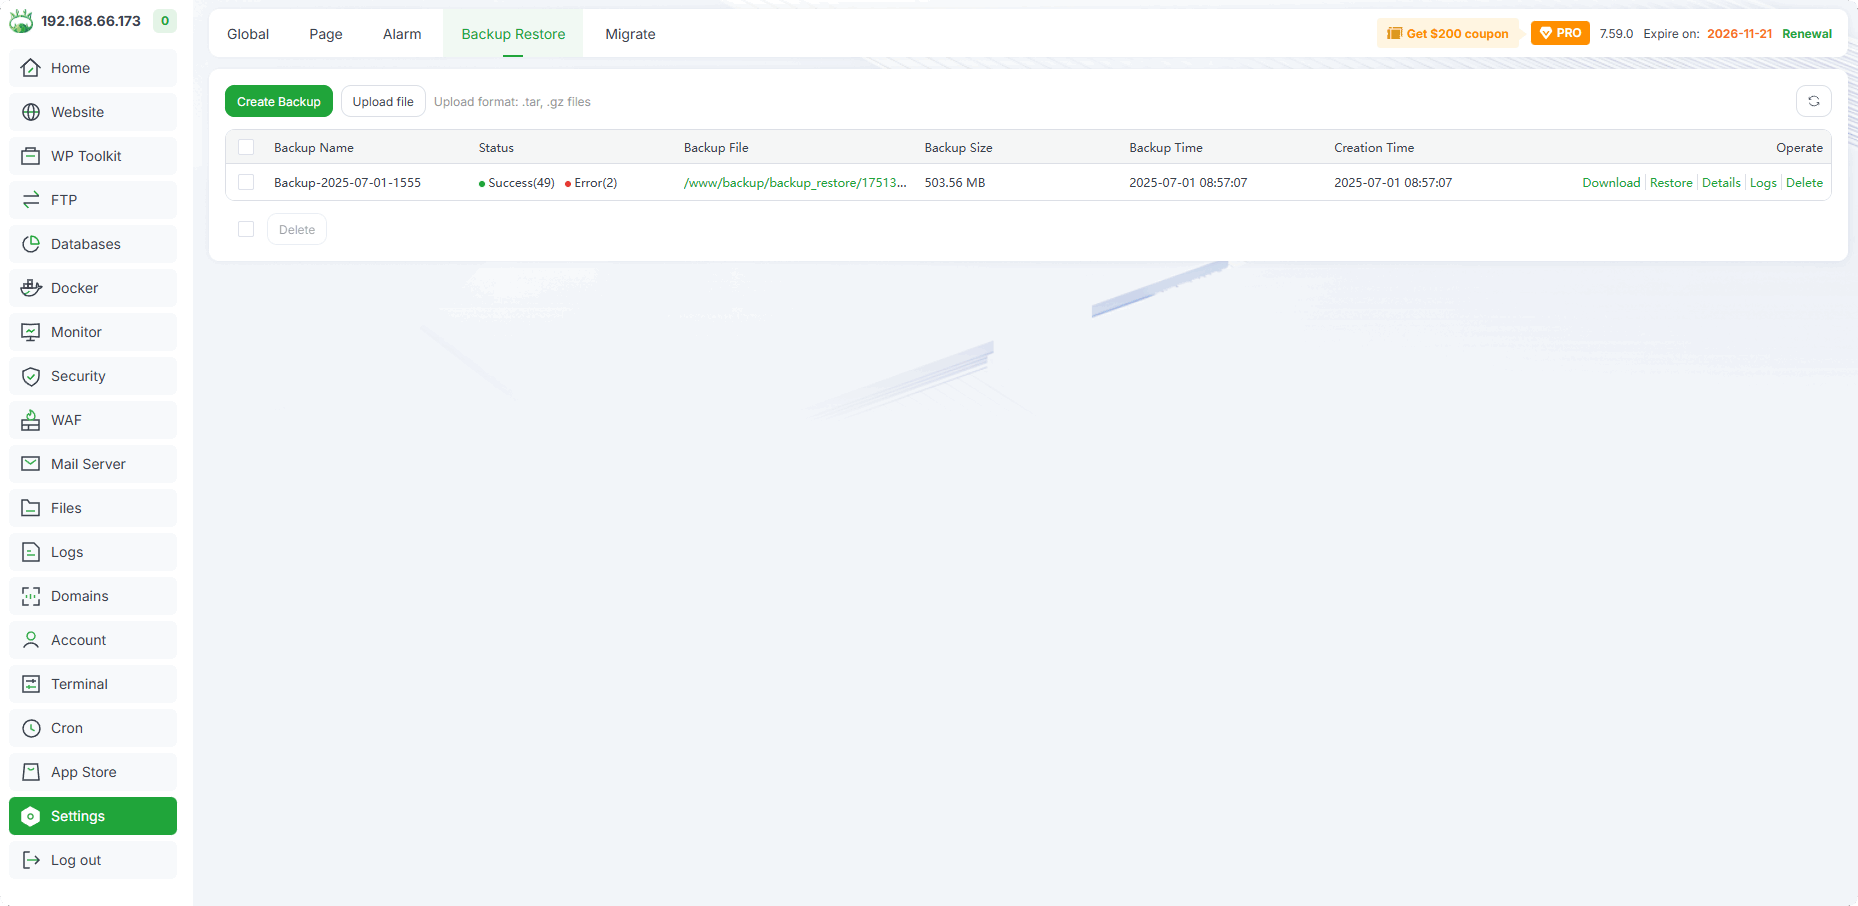
By default, backups are stored in:
/www/backup/backup_restore/
Put the backup files into the /www/backup/backup_restore/ directory, and they can also be displayed and restored
Backups require a relatively large amount of space, so please make sure there is enough space
Create Backup : Create a backup. For the specific backup data supported, please check the displayed data, and pay attention to the information with the

yellow iconandred text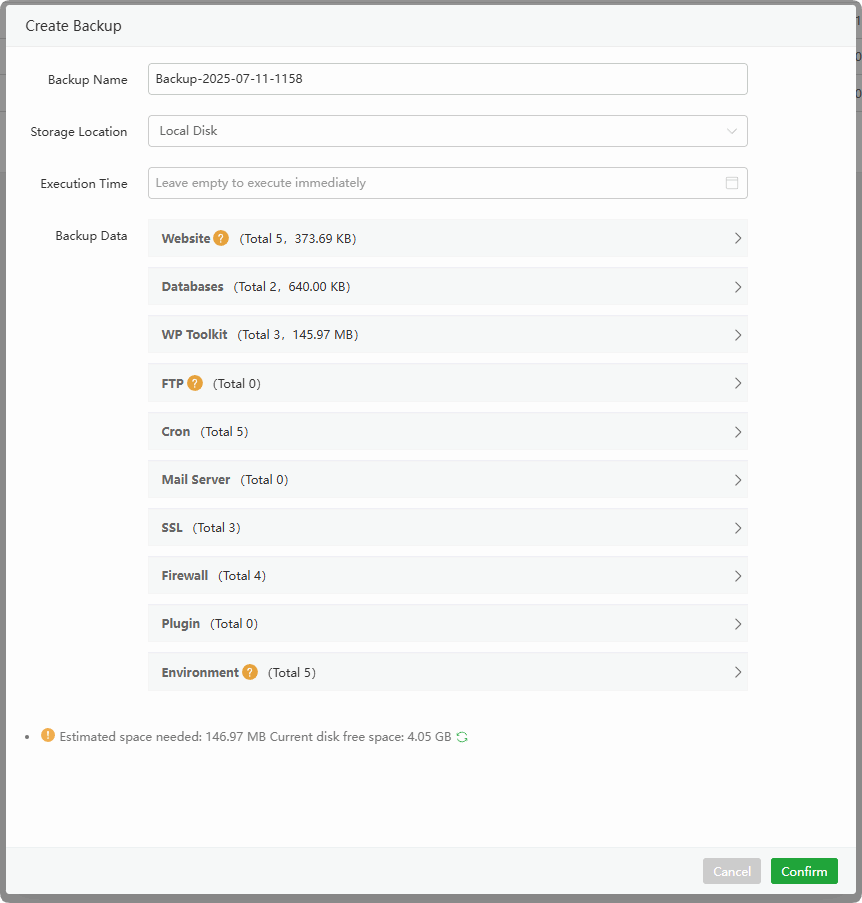
Upload file :Upload backup file. It also supports directly placing the file into the
/www/backup/backup_restore/directory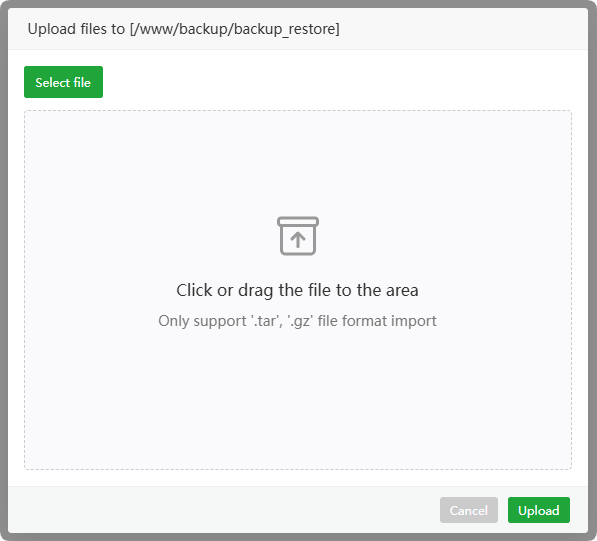
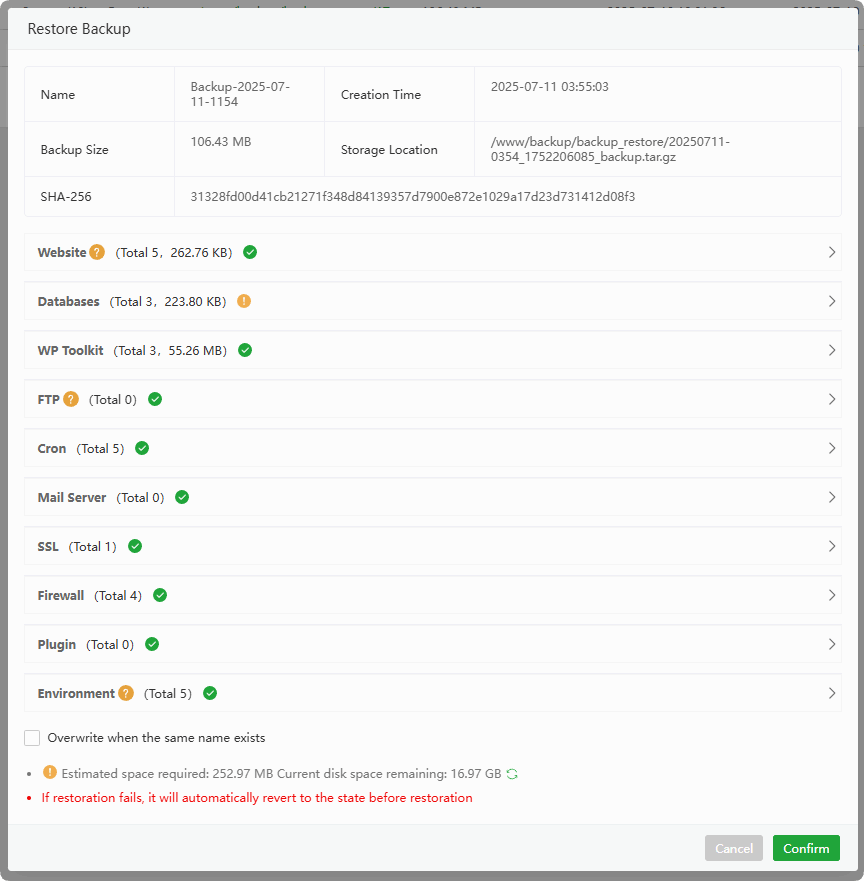
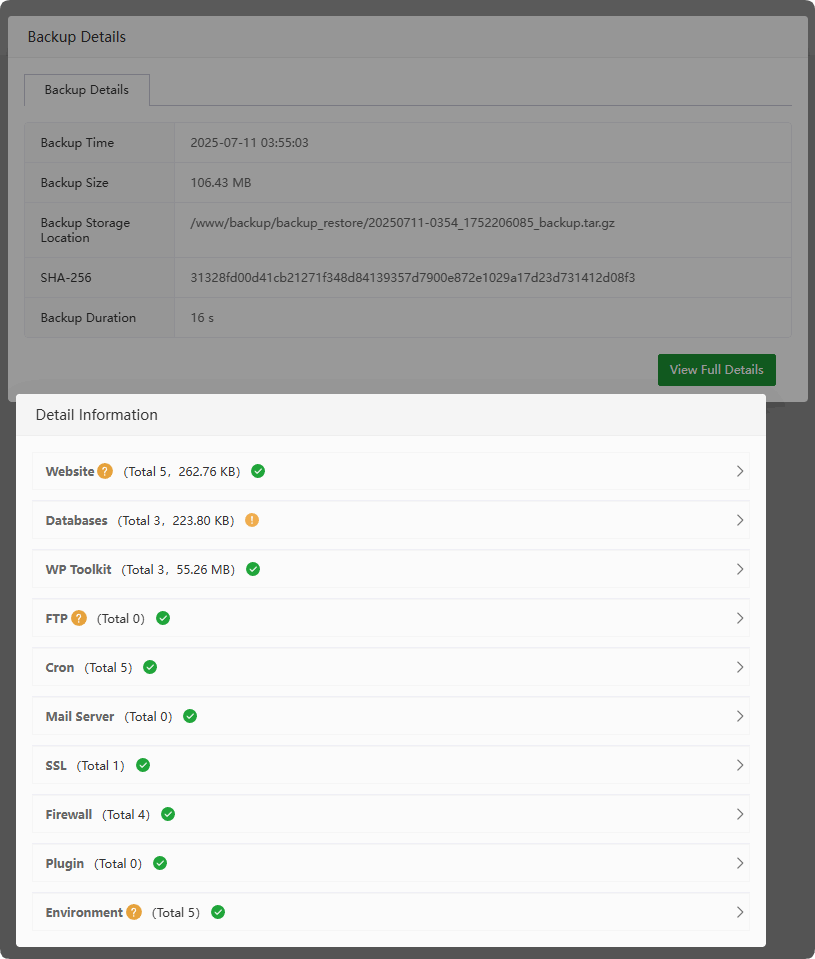
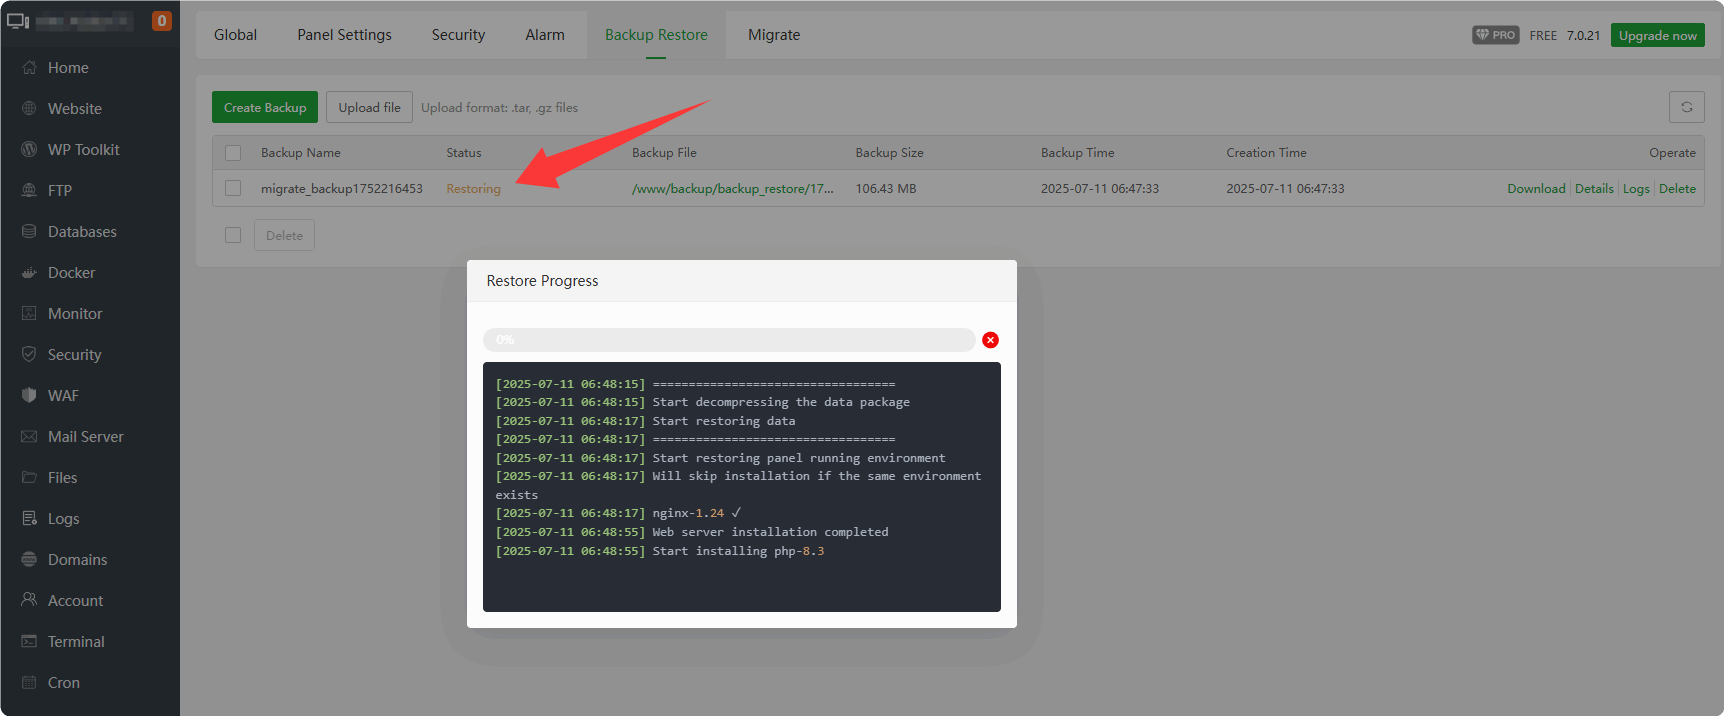
Backup Name:The displayed backup name
Status : Backup status. Click to view the process log of backup/restore. During the restoration process, you can click
Restoringto view the recovery progressBackup File : Displays the directory of the backup file. Click to enter the directory
Backup Size : Displays the size of the backup file
Backup Time : Displays the backup time
Creation Time : Displays the creation time of the backup
Download : Download the backup file
Restore : Use this backup file to
restore data. It is recommended to back up theserver snapshotbefore restoring to avoid data lossOverwrite when the same name exists: When selected, if there is the same data, it will be overwritten. Please choose carefully.
Please check the integrity of the data after restoration
Details : View detailed information of the backup info
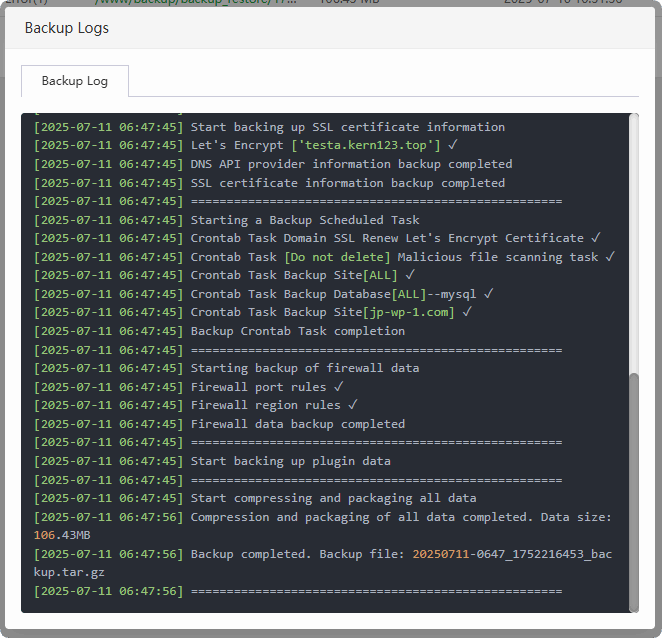
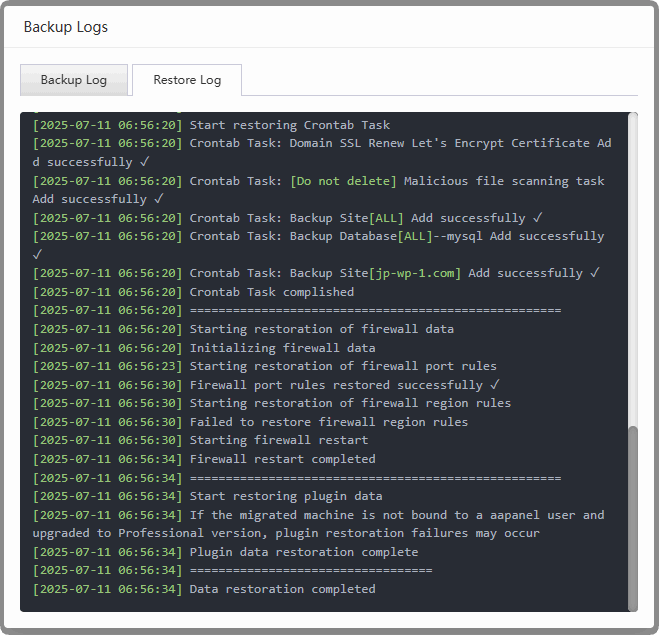
Logs : View the logs of backup/restore
Backup Log: View the backup log
Restore Log: View the restore log
Delete : Delete the backup file
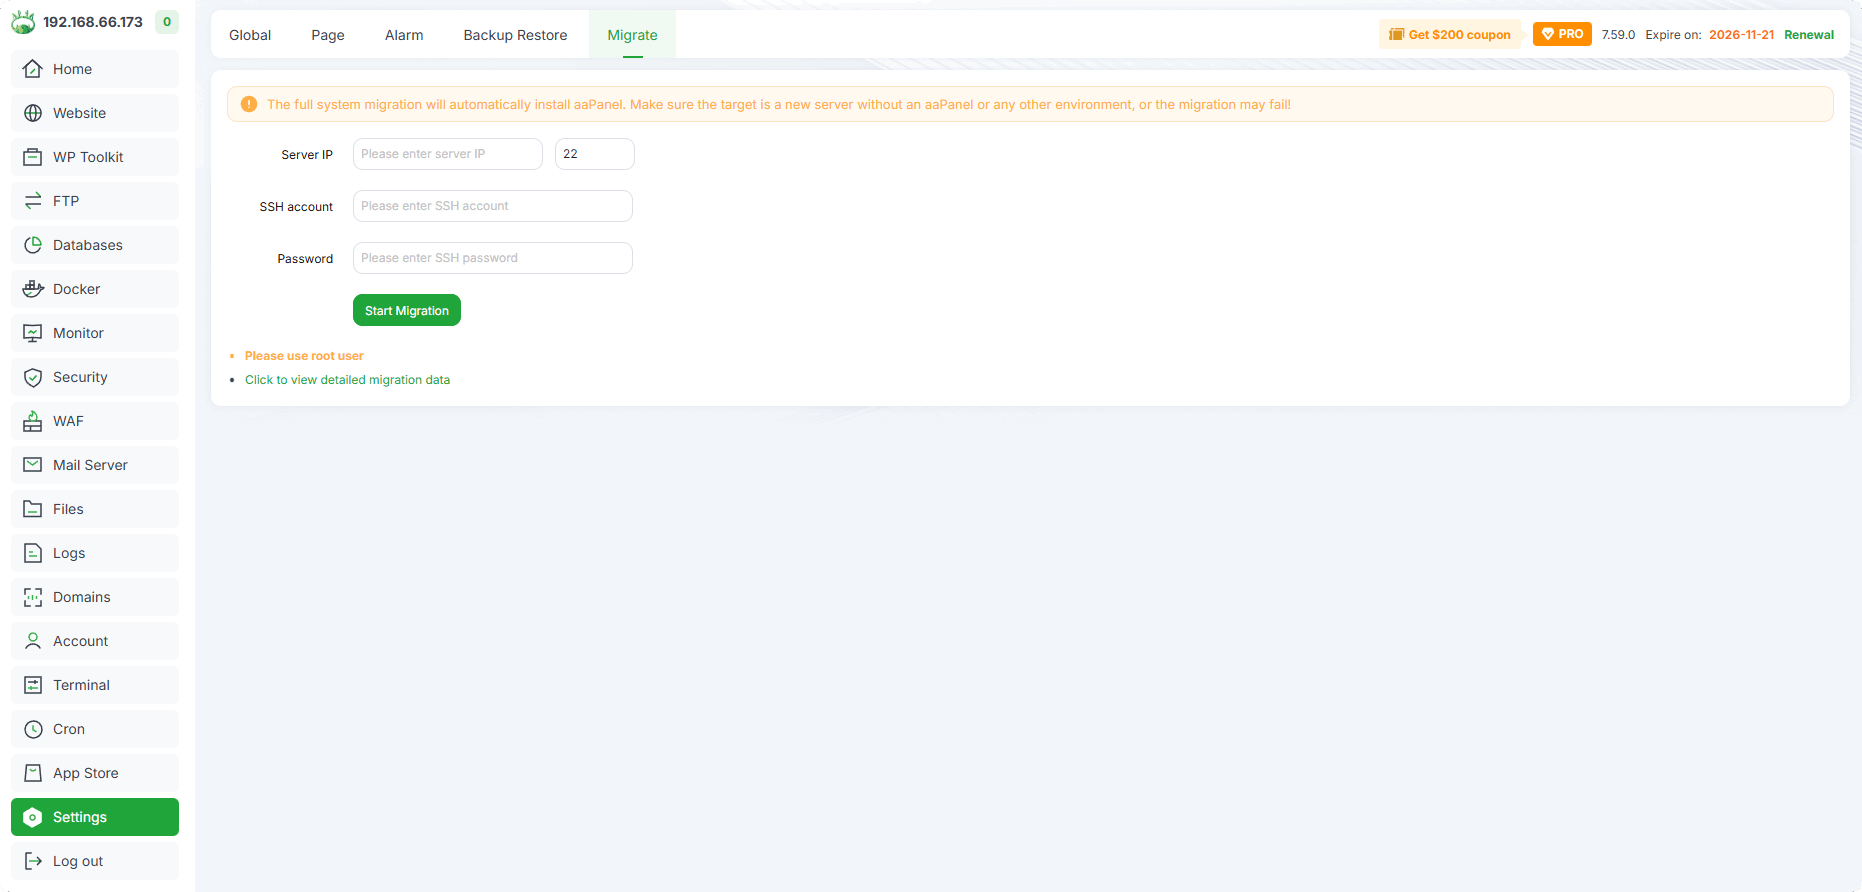
Migrate (aaPanel Migrate)
Back up the data of this server and migrate/restore it to another server (it is recommended to use
brand-new serverto avoid overwriting existing data)
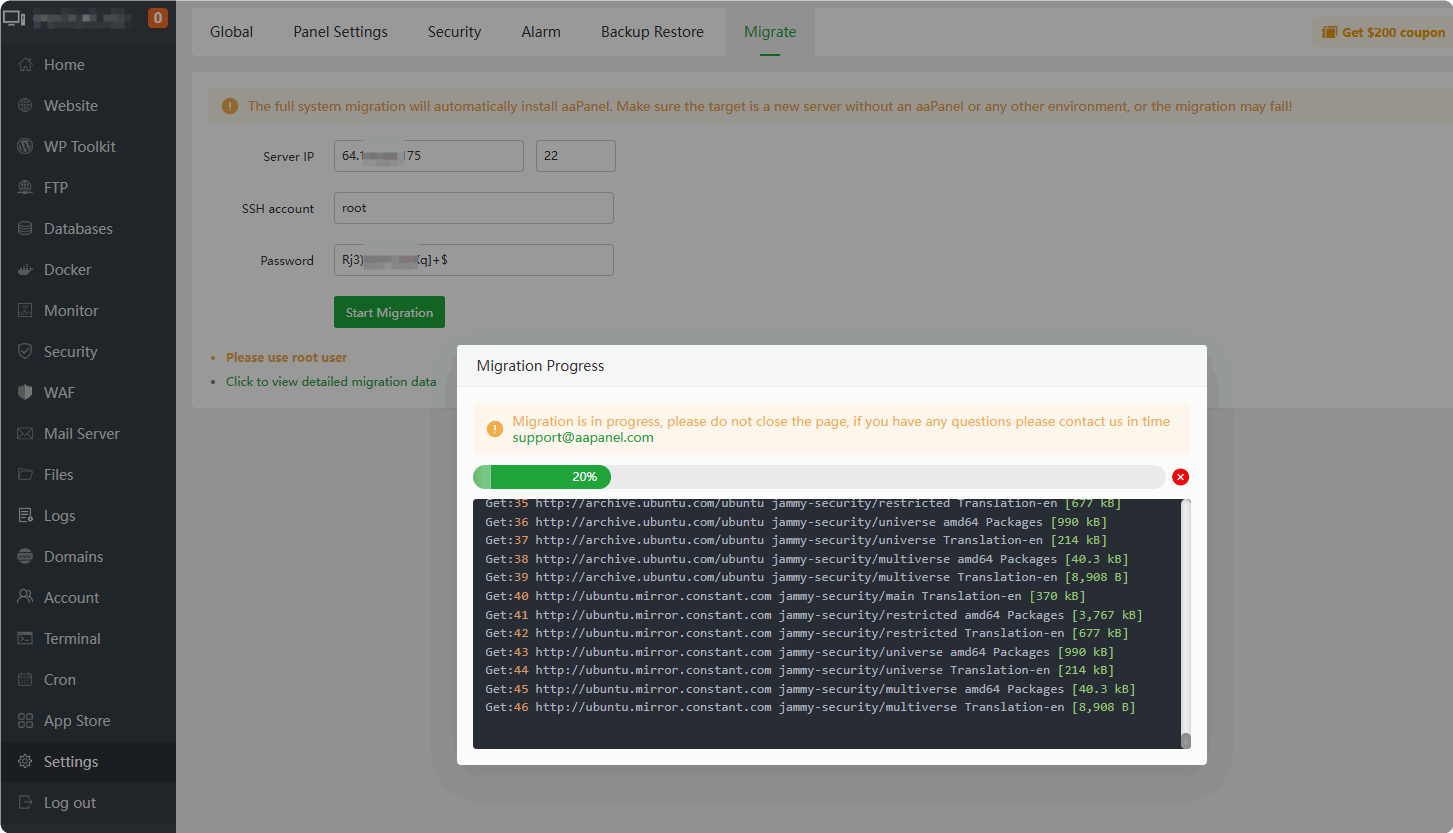
During the migration process, the corresponding data will be backed up, aaPanel will be automatically installed and then restored to the target server
If migrating to a server that already has aaPanel installed, it is recommended to create
snapshot backupbefore proceeding to prevent data loss
Migrating:
Migration completed:
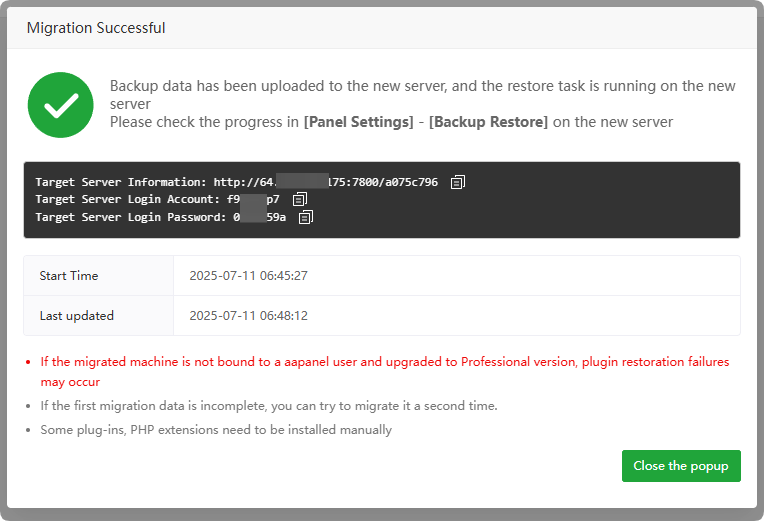
Please log in to the aaPanel of the target server according to the displayed information to check the restoration details:
Settings-->Backup Restore, and verify data integrity.
- New server is automatically restoring:
During the restoration process, some software and plugins will be installed automatically. If there is an installation error, please install them in the
App Storefirst and then perform the restoration again.
PHP extensions need to be installed manually again:
App Store-->PHP-x.x-->Install extensions
After the restoration is completed: Please check if the data is complete.
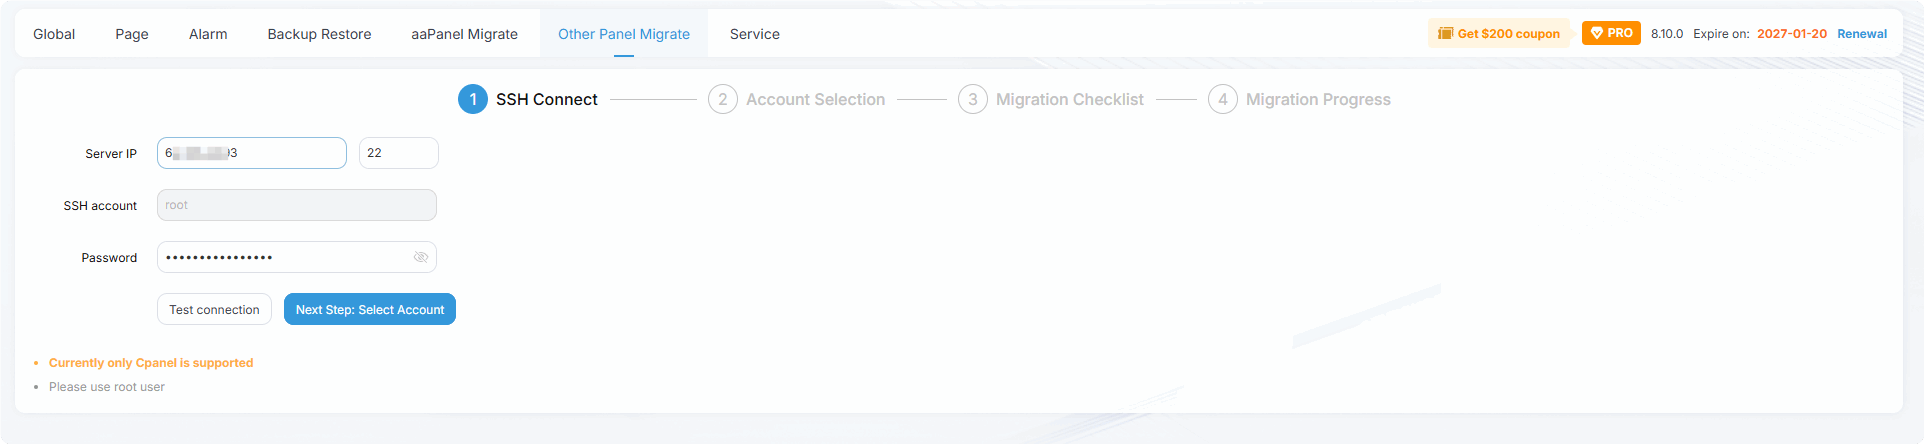
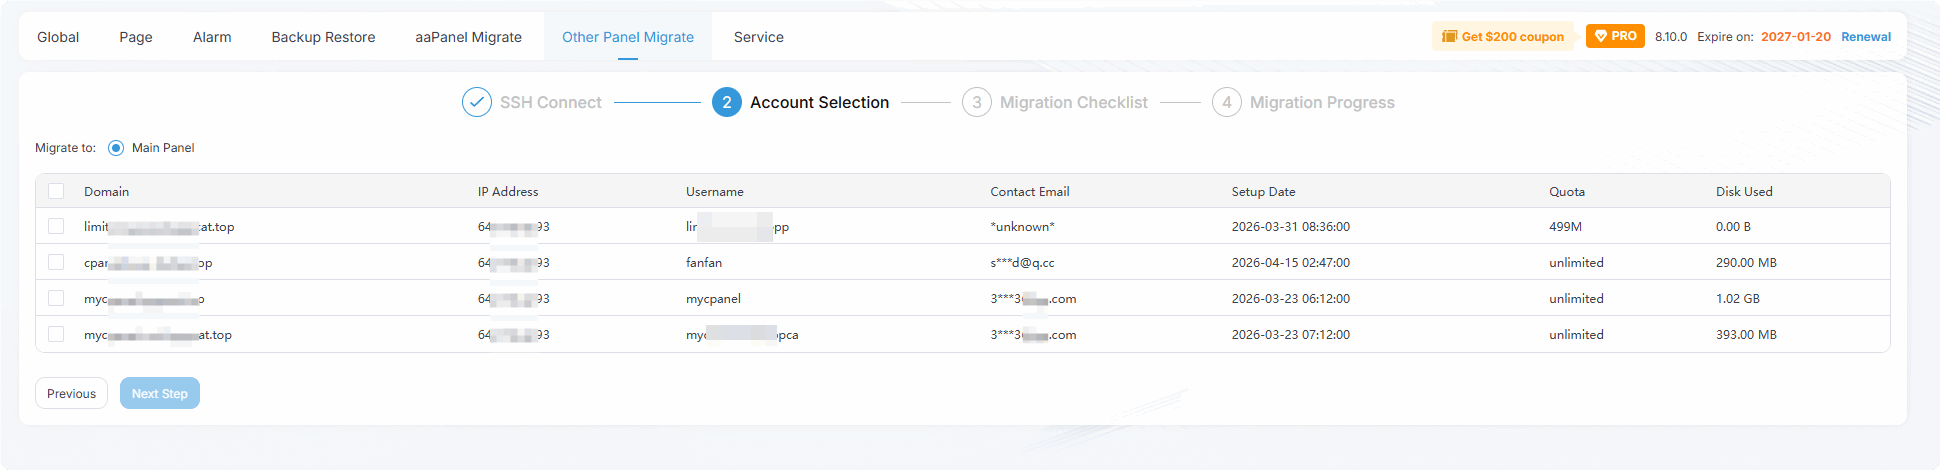
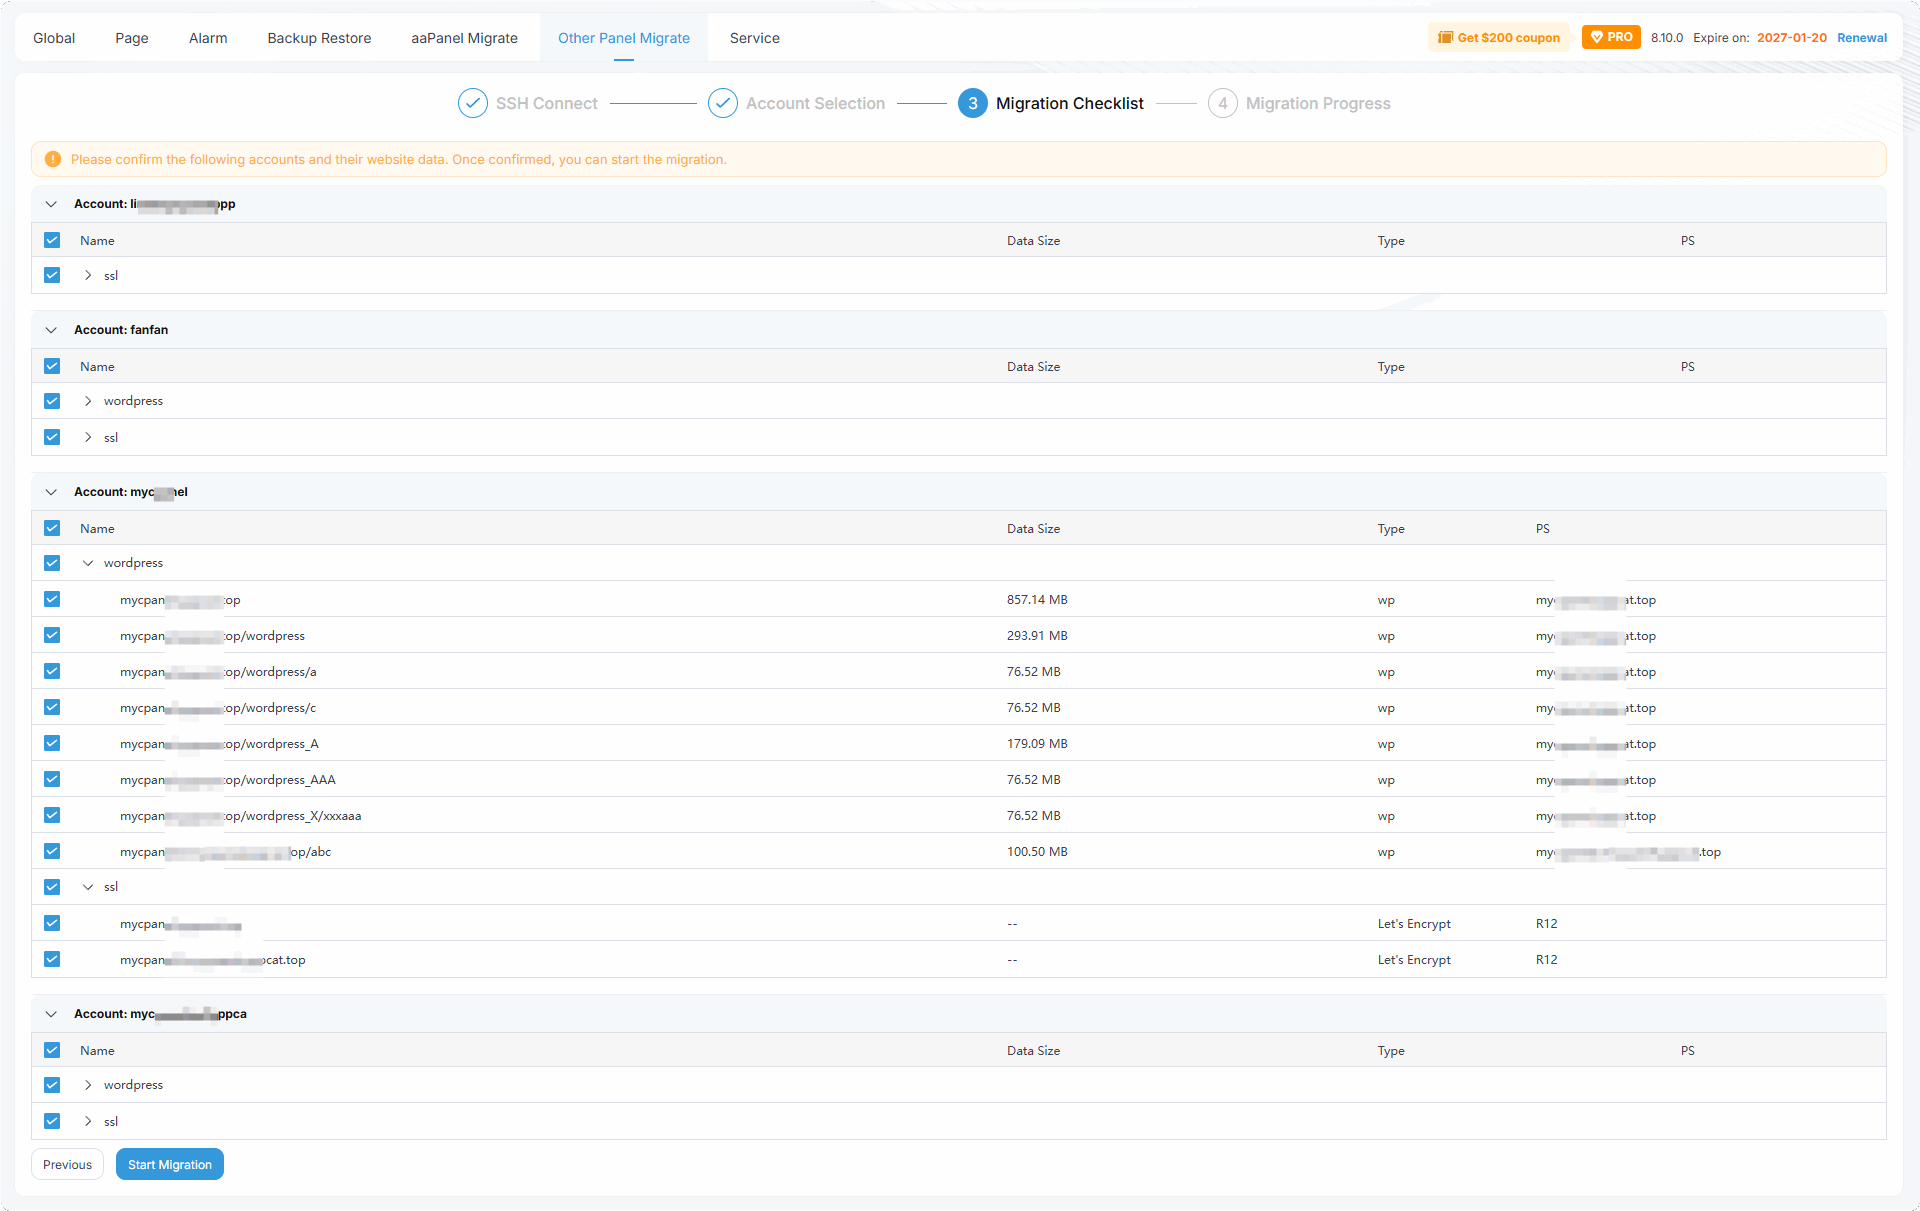
Other Panel Migrate
Currently only supports migrating from cPanel to aaPanel.
Only WordPress sites can be migrated to WP Toolkit
Enter the source server's SSH credentials
Select the accounts to migrate
Confirm the data to be migrated
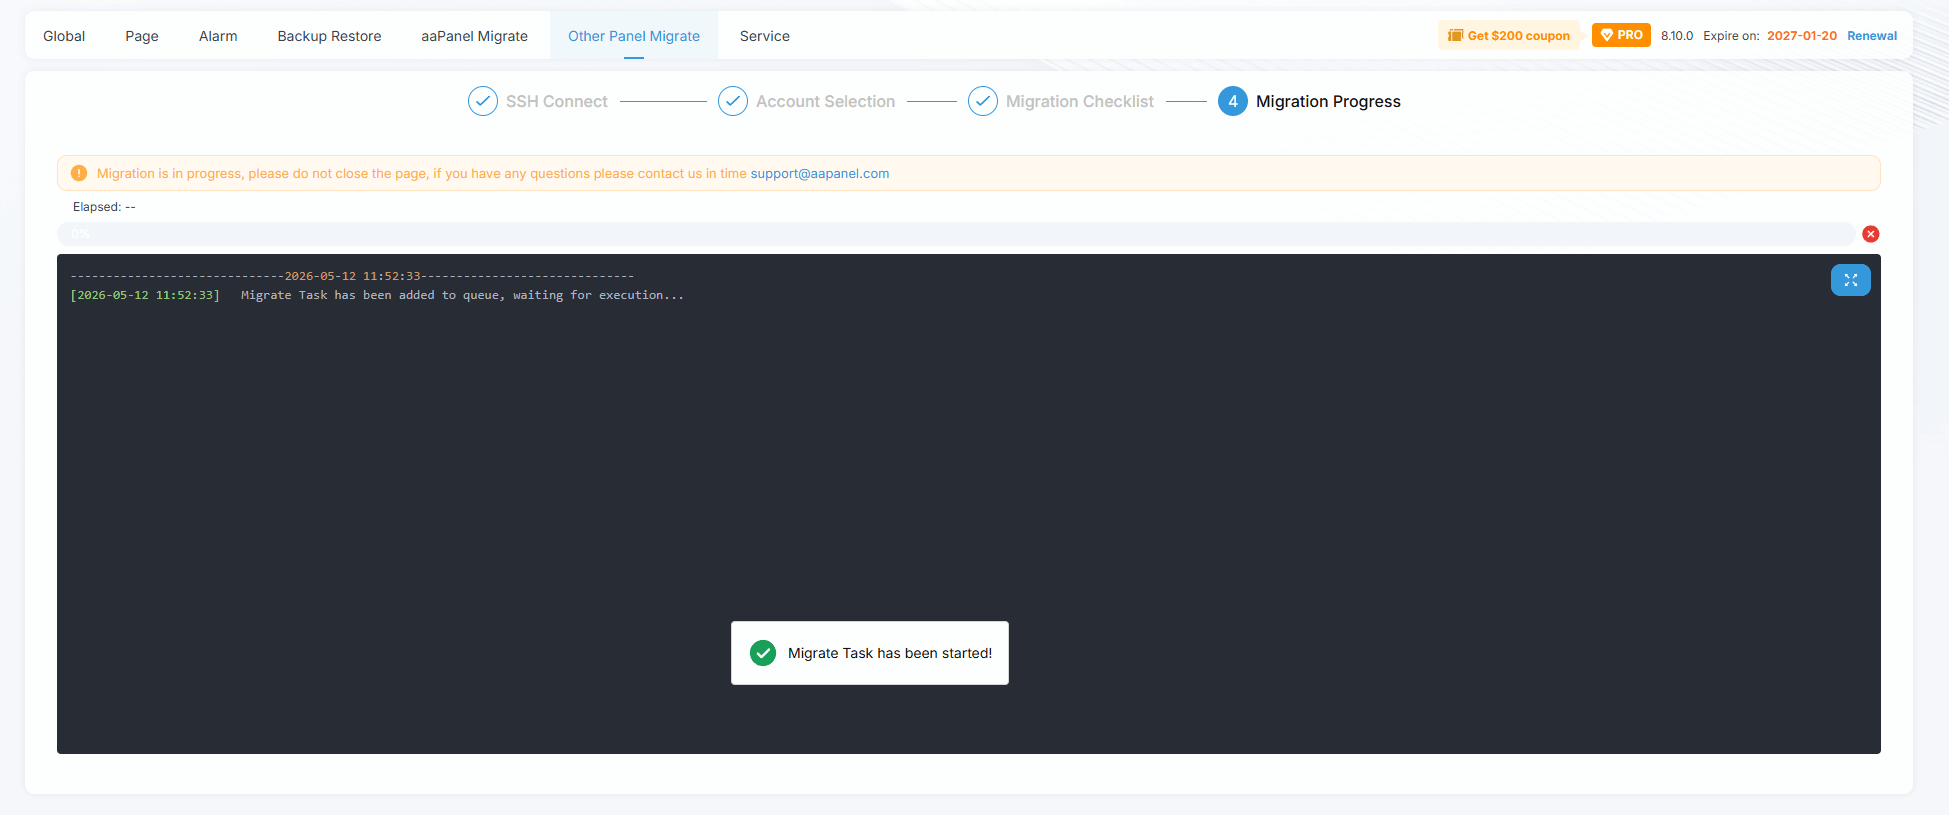
Migration in progress
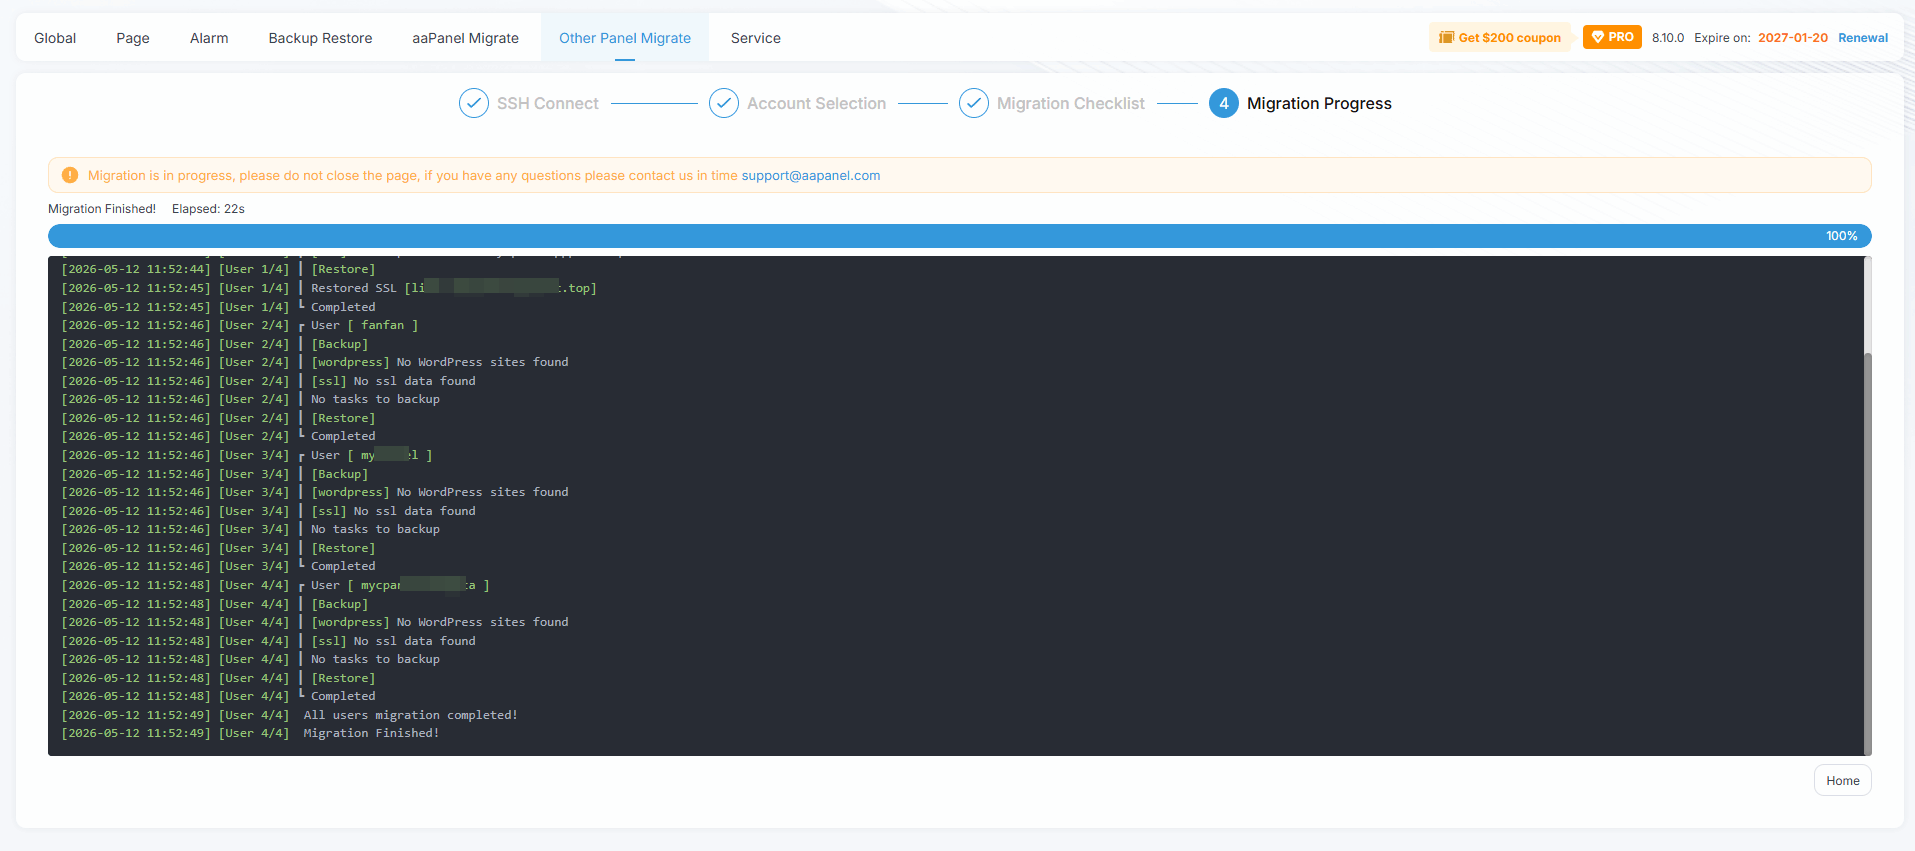
Migration completed
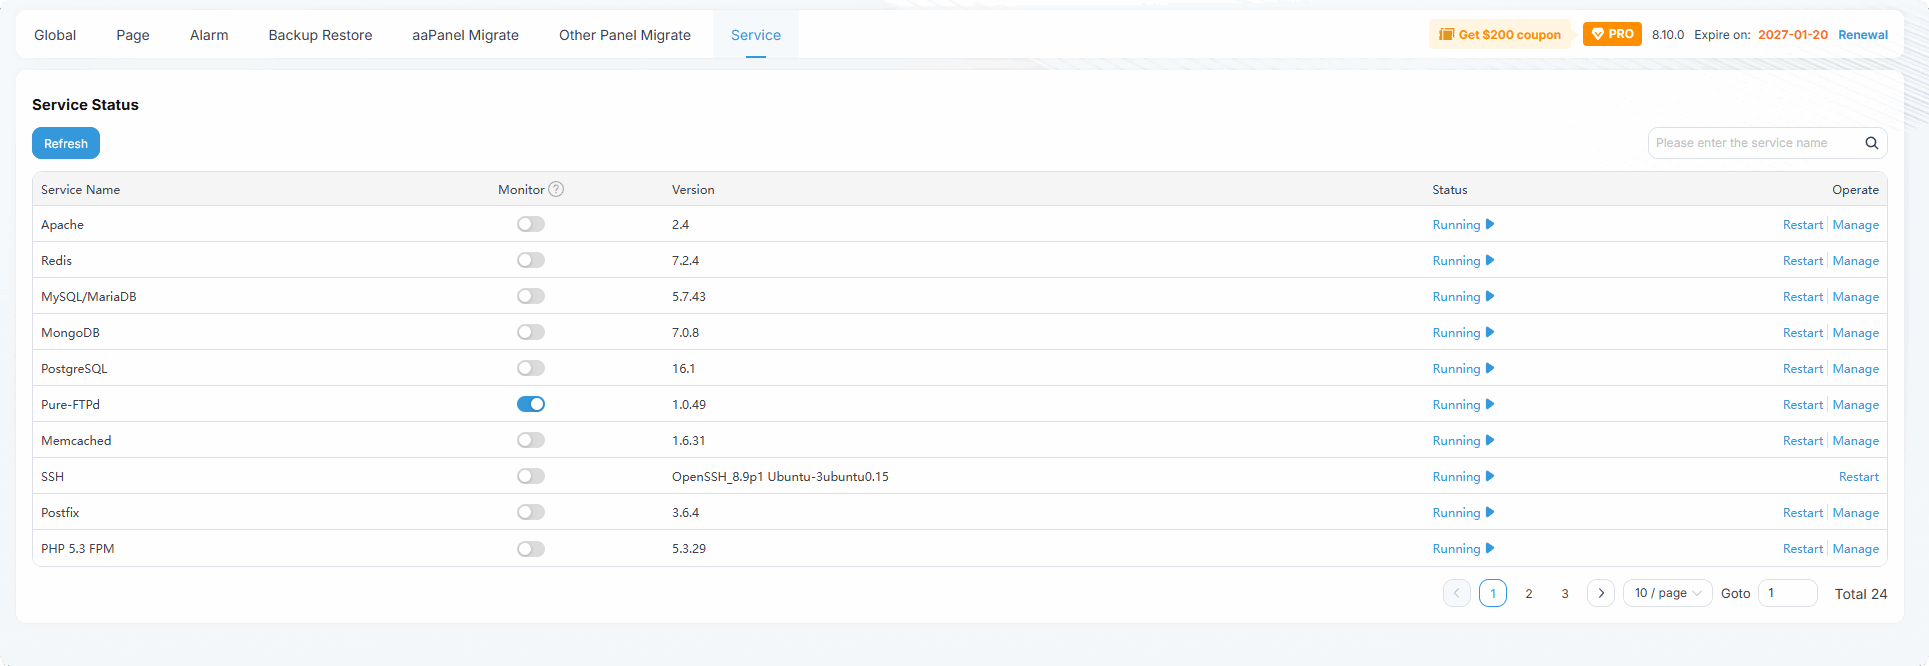
Service
- Manage the status of services installed by aaPanel
Feedback or Suggestions
If you encounter problems or suggestions during use, please contact us through the following methods:
- (Please describe in
detailor providescreenshots)
Email: [email protected]
Discord: https://discord.gg/Tya5yceBpd
Telegram: https://aapanel.com/tg
GitHub: https://github.com/aapanel/aapanel
If you like aaPanel, please give it a Star