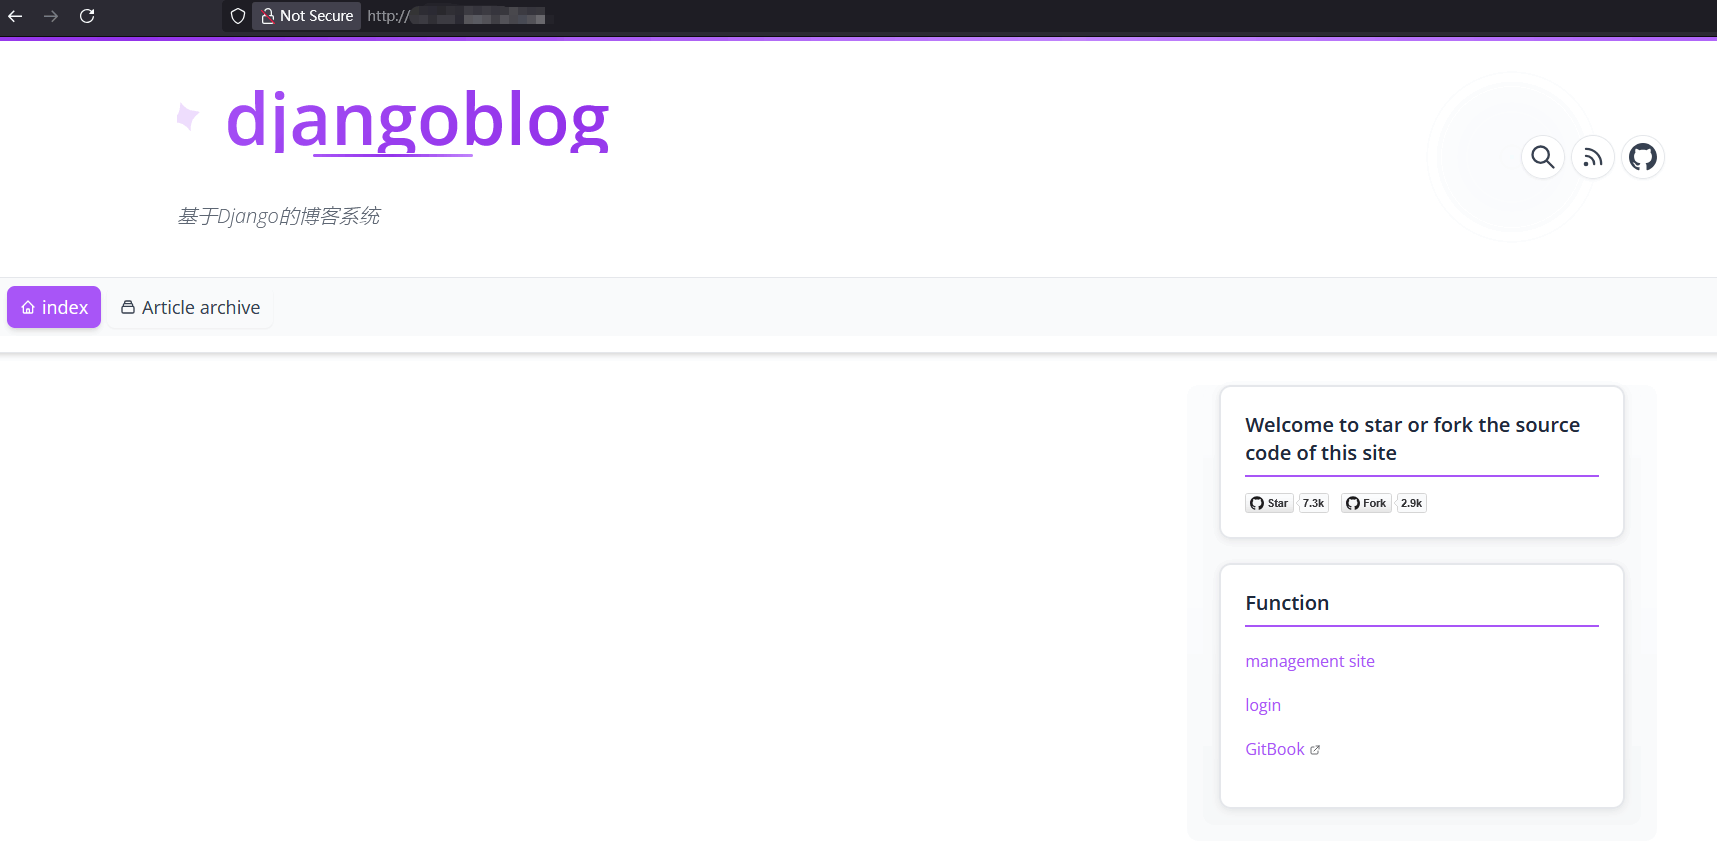
How to Deploy DjangoBlog with Python Project in uWSGI Mode
Deploy DjangoBlog using Python Project in uWSGI mode
Tutorial Environment:
- Python 3.14.3
- MySQL 8.0.36
- Npm
- Nginx
- aaPanel 8.2.0 Beta Version
Install Node.js and verify npm command
Search for and install
Node.js version managerin theApp Store, then install Node.js (e.g., select version v24.14.0)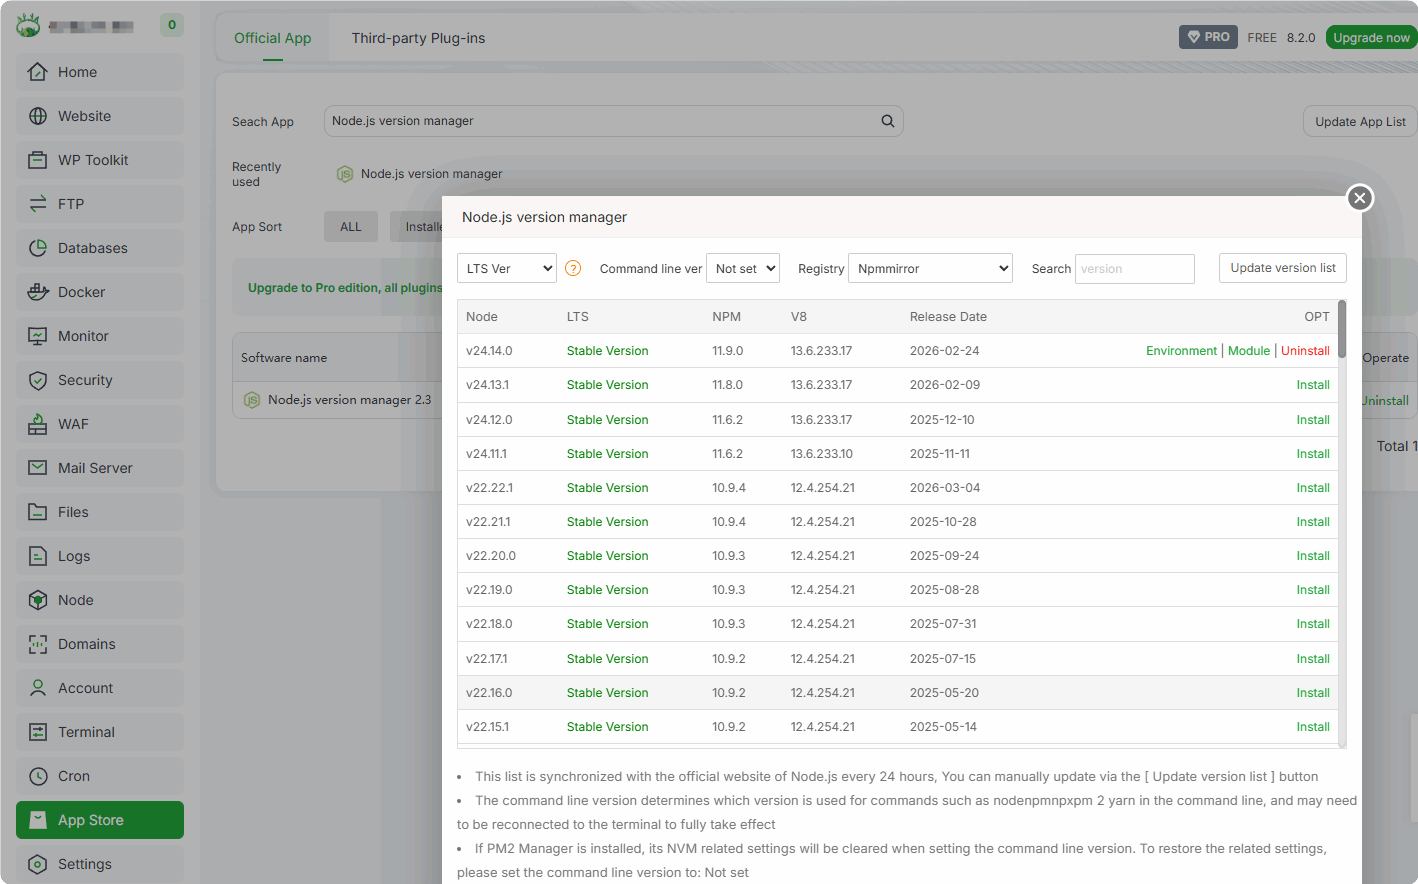
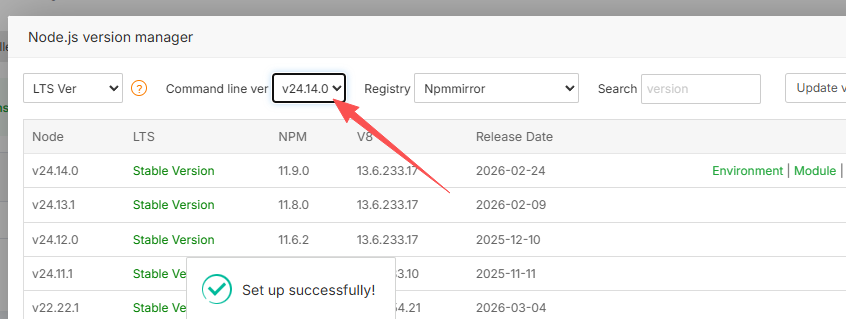
Configure command-line environment variables to use the npm command
Verify the npm command
node -v
npm -v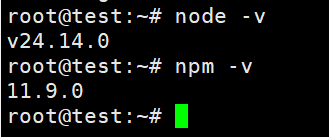
Install MySQL 8.0.36 and Create Database for DjangoBlog
MySQL installation steps are omitted here
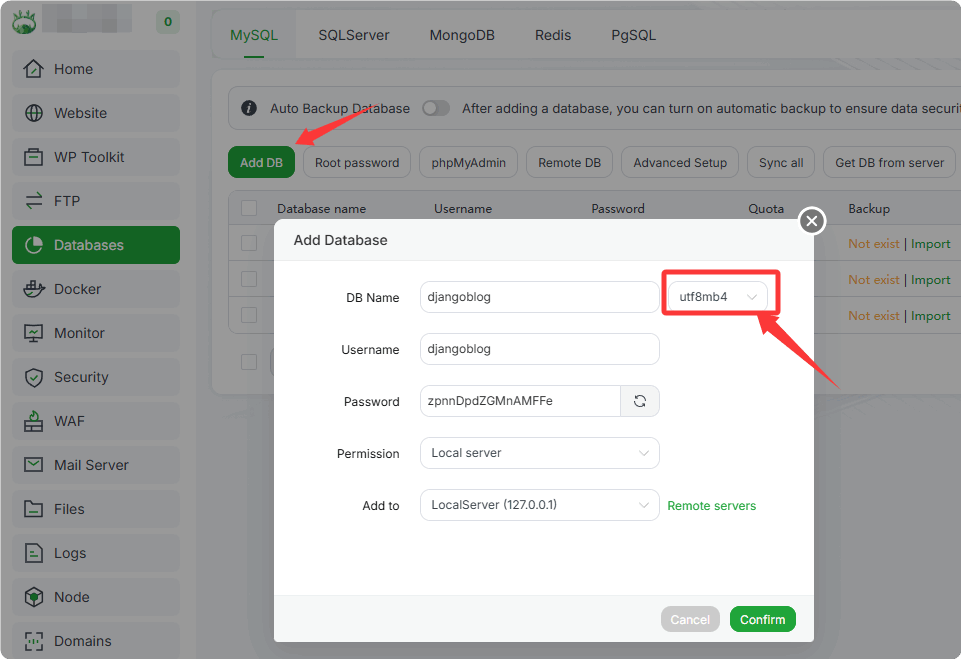
Create database:
djangoblogNote: Select character set
utf8mb4when creatingPlease save the database name and password for later use
Install Python 3.14 and Create Virtual Environment
Install Python 3.14.3 in aaPanel's Python Project:
WebSite->Python Project->Python Environment->Version management->All version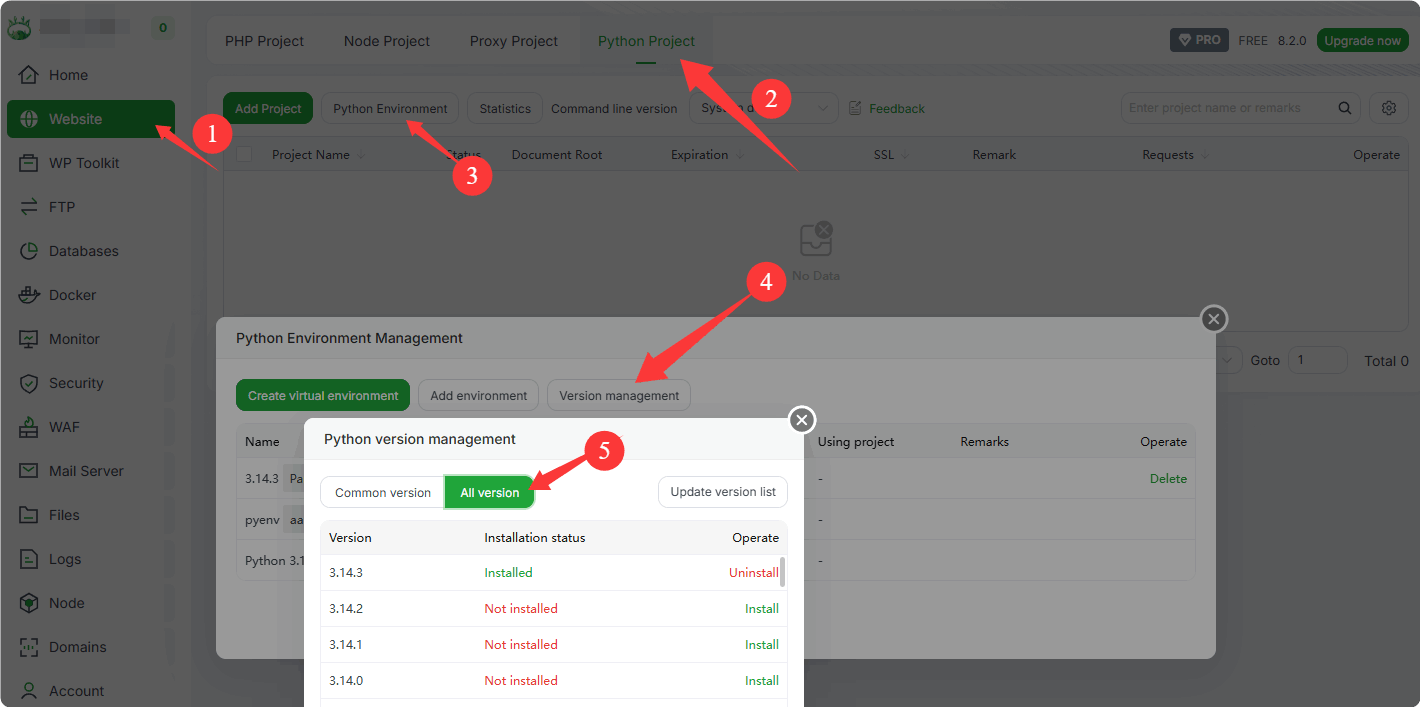
- Select the version to install (installation process omitted here)
Create a virtual environment for Python 3.14.3
Python Project->Python Environment->Create virtual environment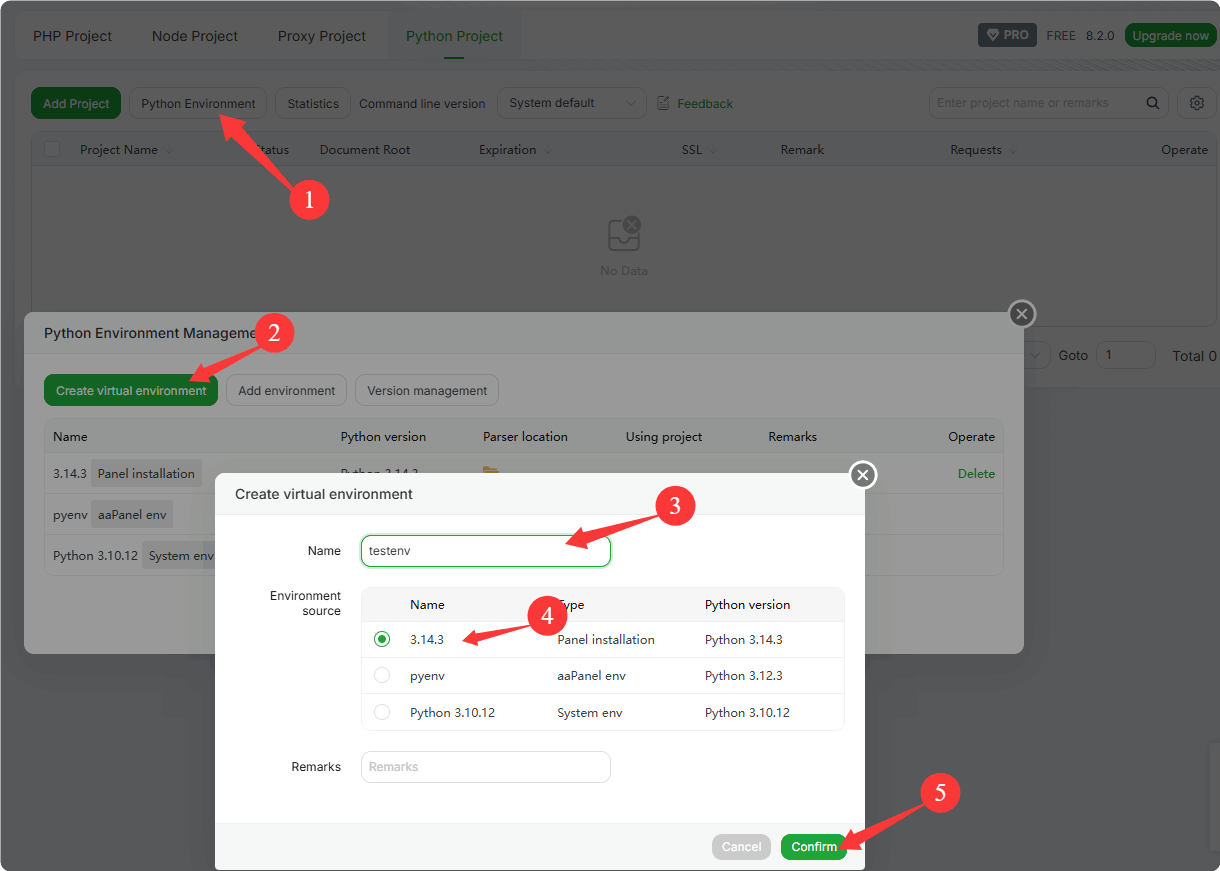
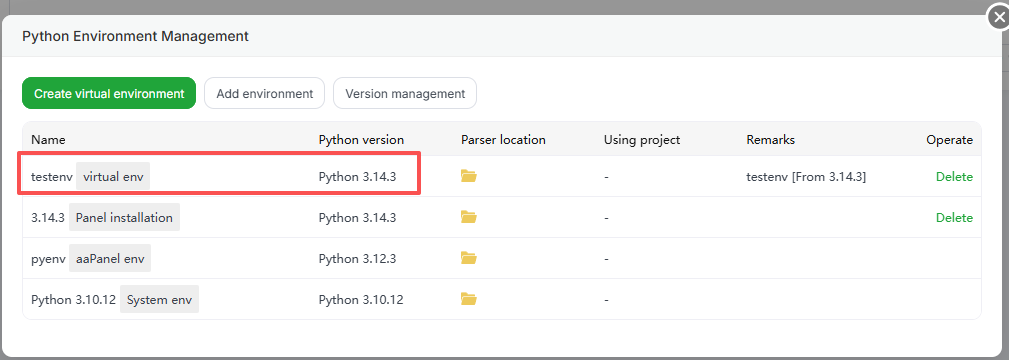
- Select Python
3.14.3to create a virtual environment named:testenv
- Select Python
Clone the DjangoBlog Project:
First install git
- RedHat/CentOS:
yum install git -y- Debian/Ubuntu:
apt-get update -y && apt-get install git -yClone the DjangoBlog repository
cd /www/wwwroot/
git clone https://github.com/liangliangyy/DjangoBlog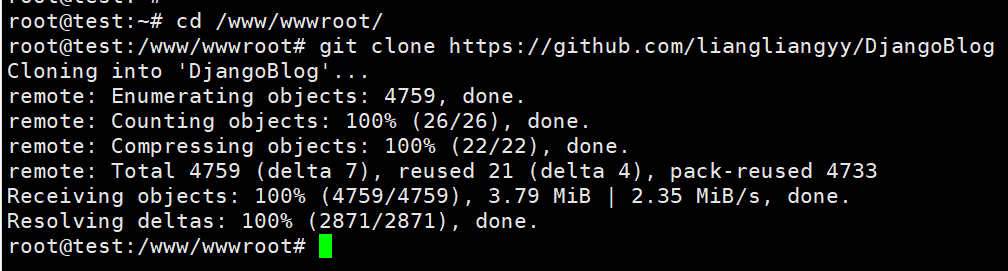
Modify DjangoBlog Configuration Information
Navigate to the DjangoBlog directory, then enter the djangoblog subdirectory and modify the configuration file: settings.py
/www/wwwroot/DjangoBlog/djangoblog/settings.pyModify database configuration
Comment out the original database configuration, then add the following content. Note to replace with your database name, username, and password, and pay attention to the case sensitivity of the database information.
Use the MySQL database information created earlier
pythonDATABASES = { 'default': { 'ENGINE': 'django.db.backends.mysql', 'NAME': 'djangoblog', 'USER': 'djangoblog', 'PASSWORD': 'zpnnDpdZGMnAMFFe', 'HOST': 'localhost', 'PORT': 3306, 'OPTIONS': {'charset': 'utf8mb4'}, } }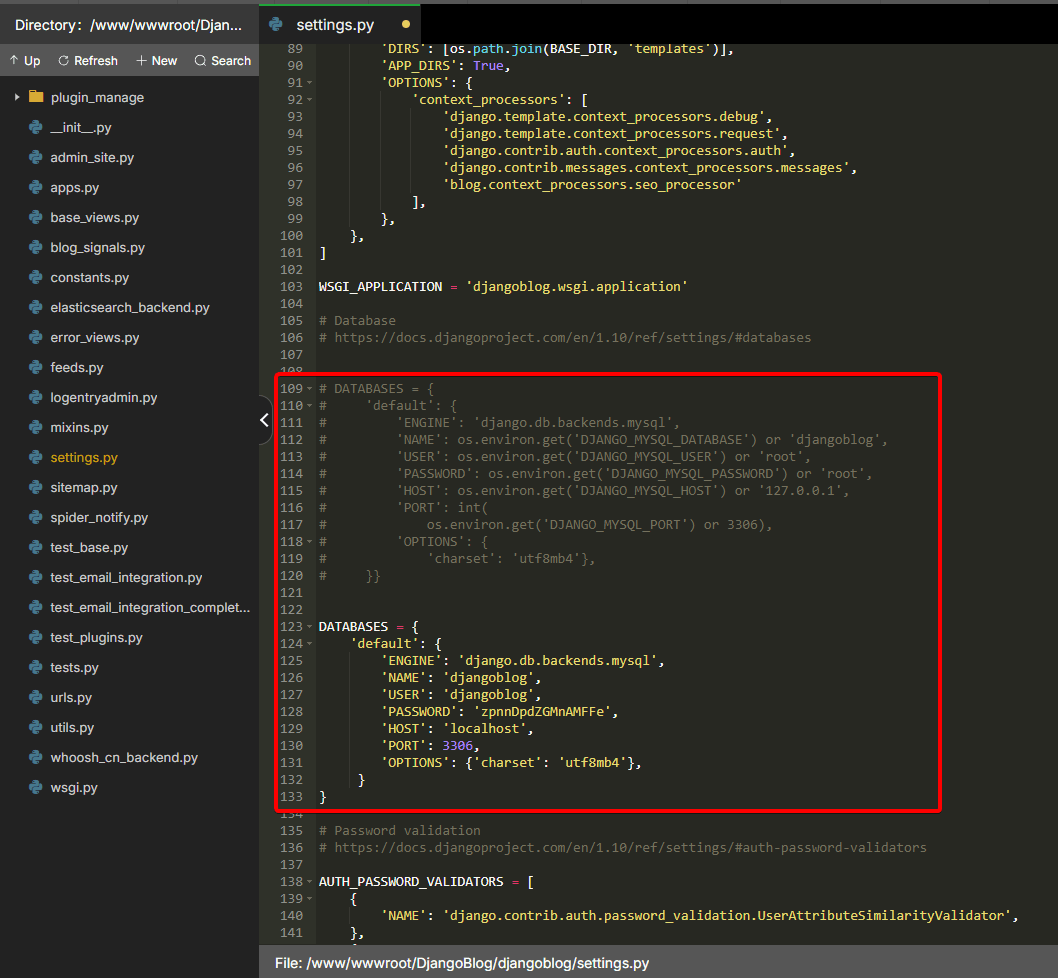
Modify language and time zone
pythonLANGUAGE_CODE = 'en' TIME_ZONE = 'America/New_York'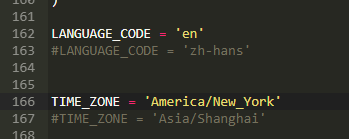
Create DjangoBlog Project in Python Project
Enter Python Project
WebSite->Python Project->Add Project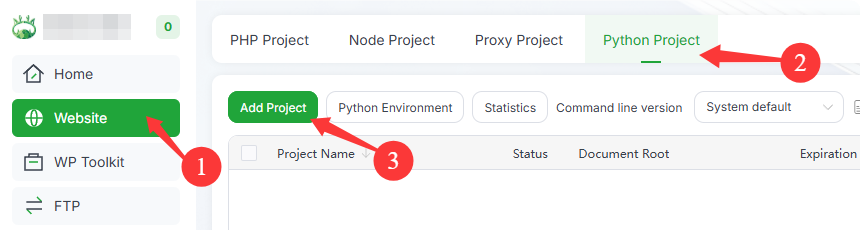
Add DjangoBlog project
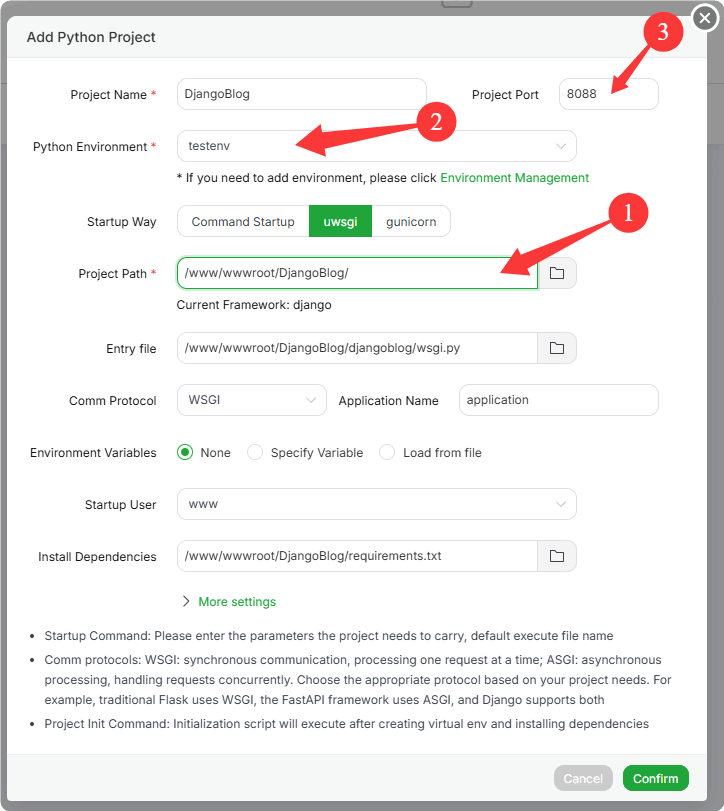
First select the project directory, which will automatically identify the project type as:
djangoand detect theuwsgistartup file and other informationFill in the project name:
DjangoBlogEnter the port number:
8088Select the virtual environment:
testenv
After confirmation, the system will automatically install the dependent environment
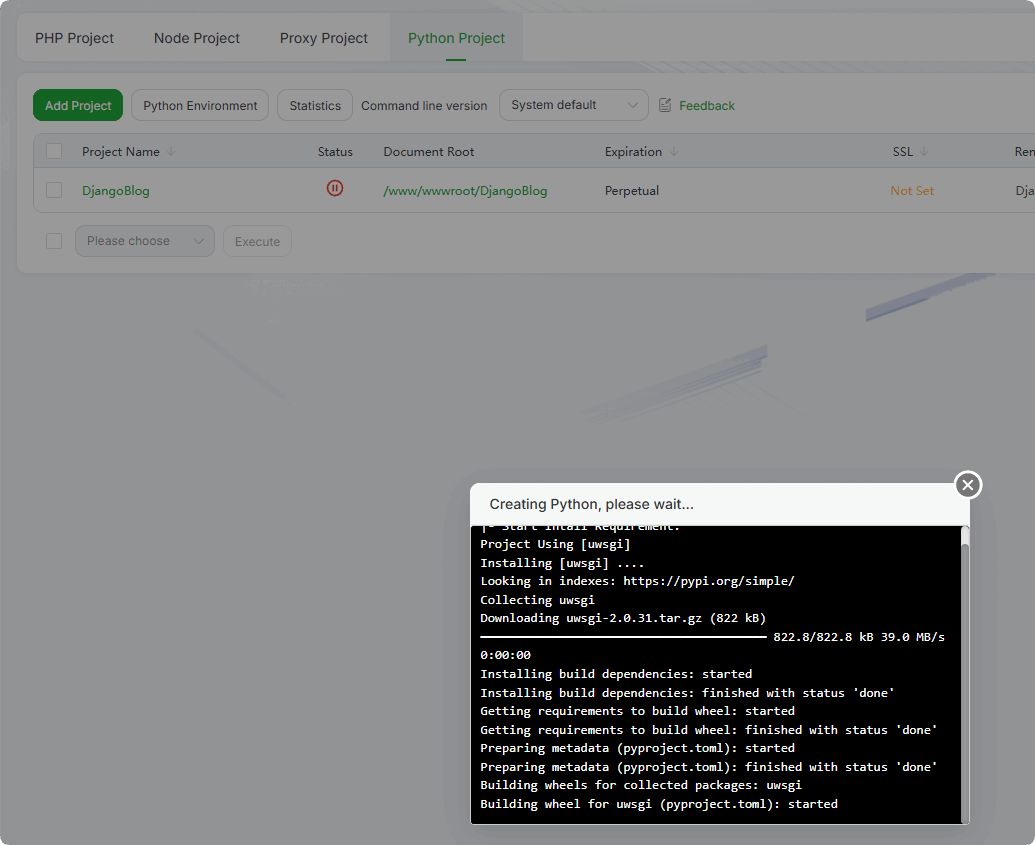
Completion of dependency installation
Initialize DjangoBlog
CAUTION
You must enter the virtual runtime environment first
Enter the virtual runtime environment of the DjangoBlog project with root privileges
Method 1: Directly enter through the project
Terminal
Method 2: Get the Python virtual environment path and manually enter it in the terminal
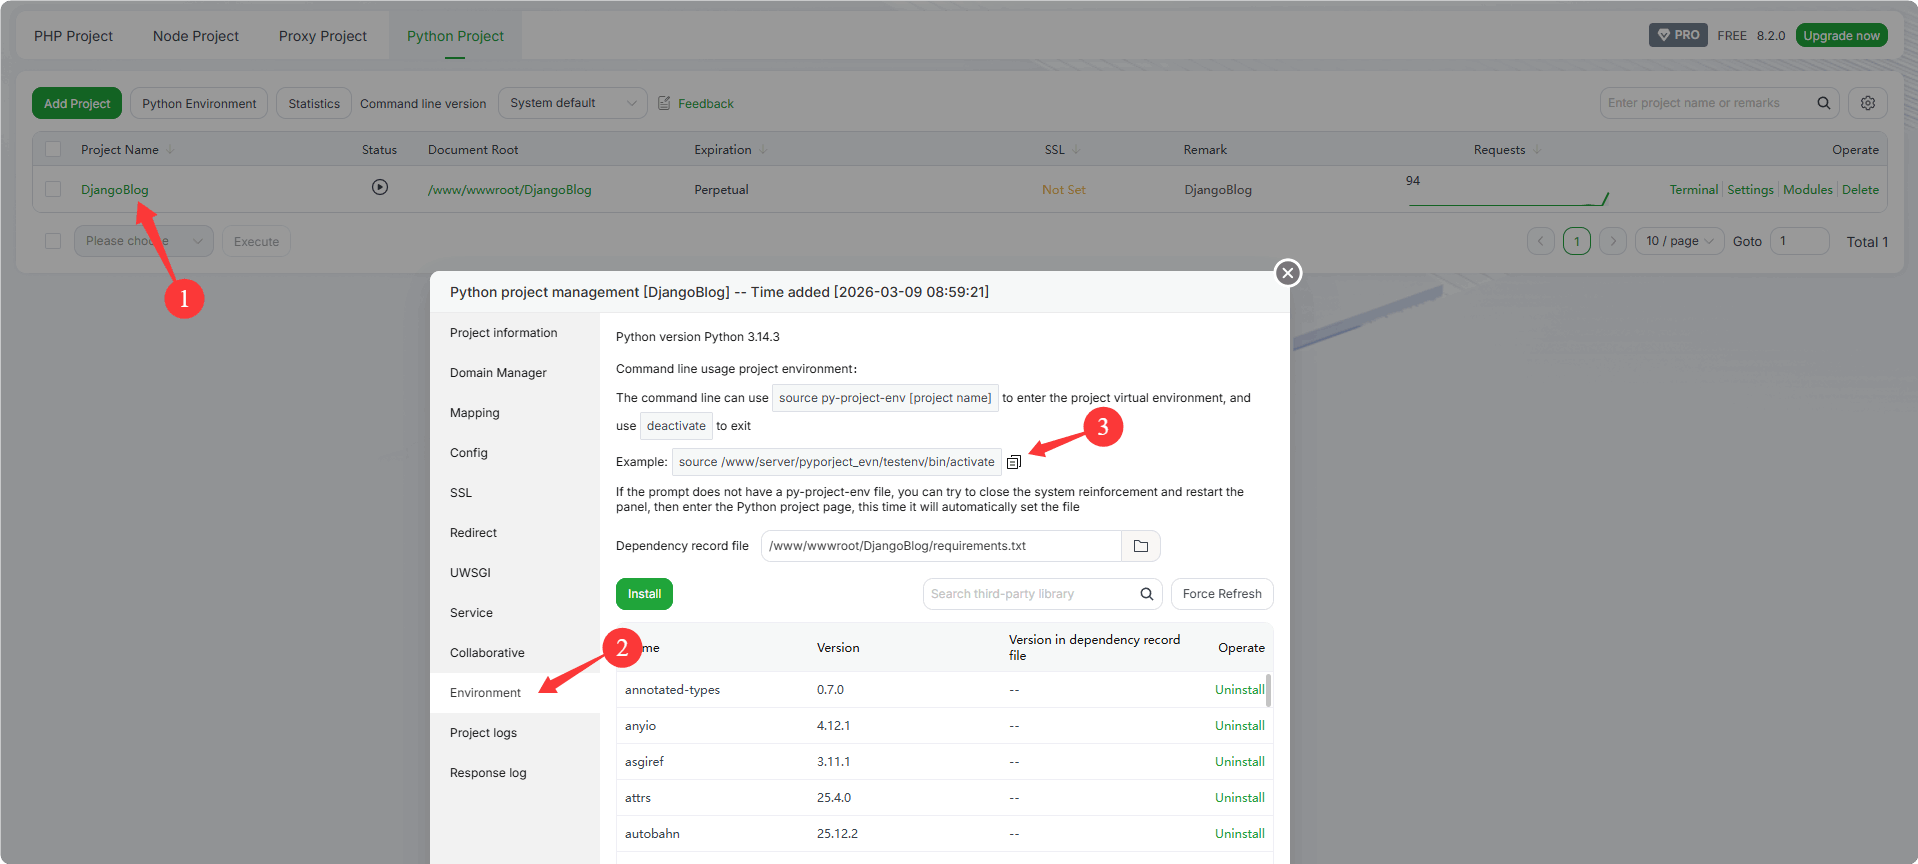 Example: Replace the virtual environment path with your own
cd /www/wwwroot/DjangoBlog
source /www/server/pyporject_evn/testenv/bin/activate
Initialize the database with root privileges
python manage.py makemigrations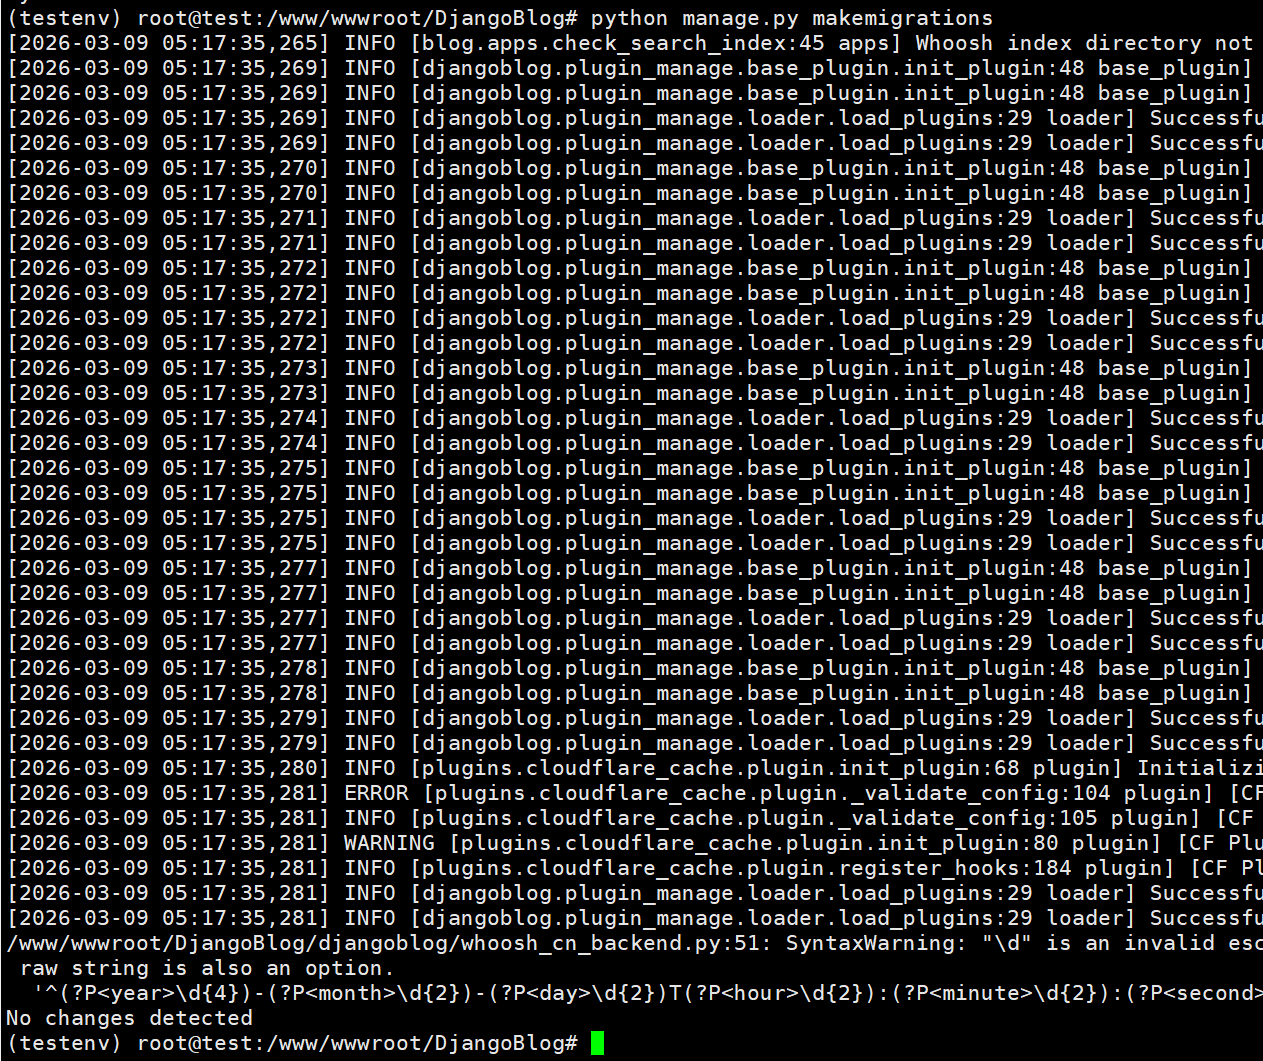
python manage.py migrate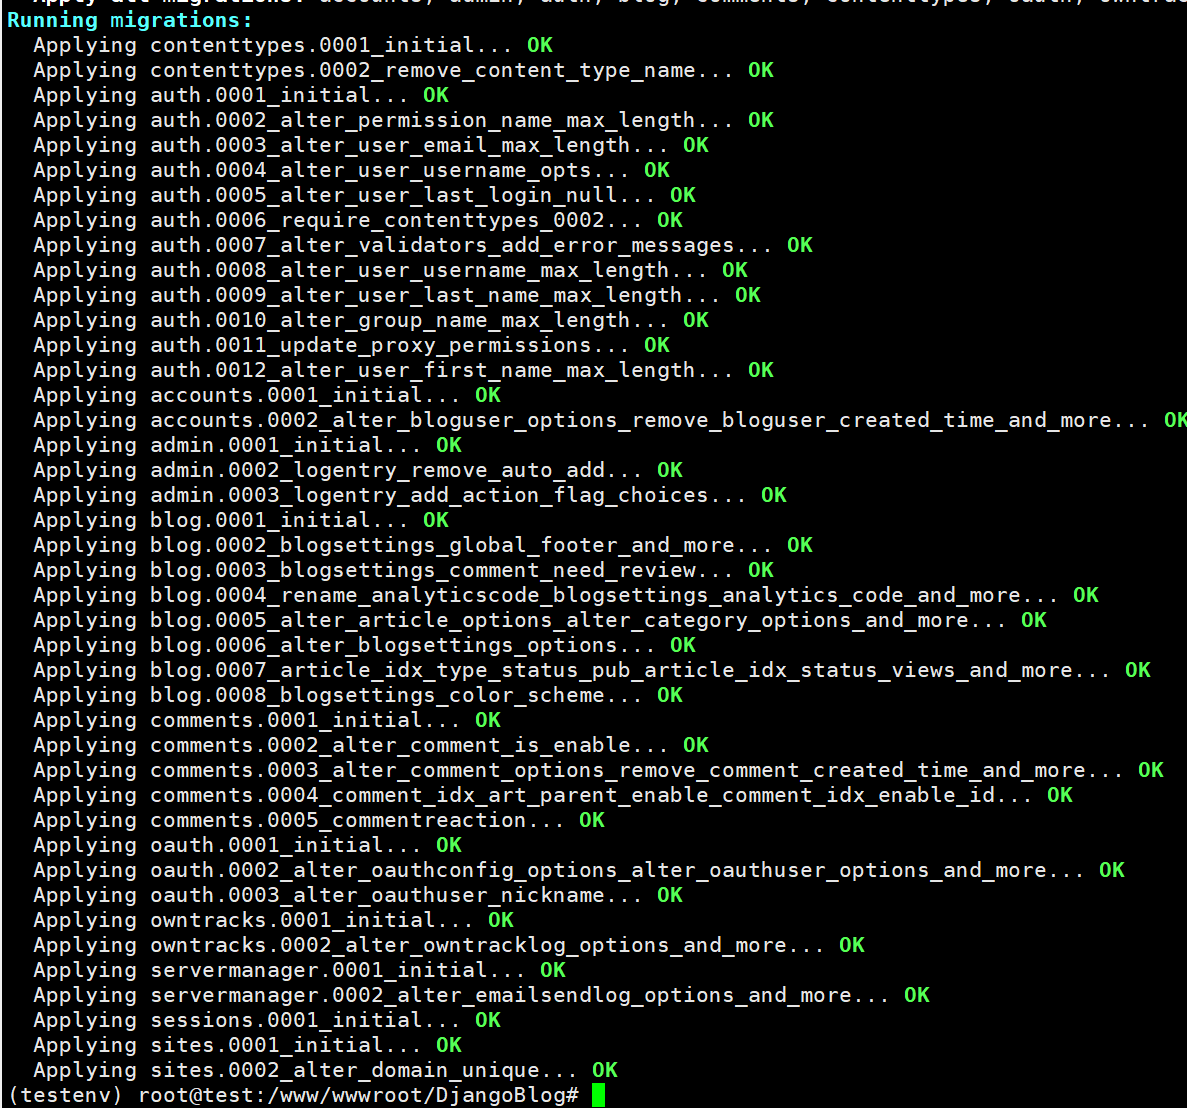
Create superuser account
- You will be prompted to enter a username, email address, and password. Note that the password cannot be too simple.
python manage.py createsuperuser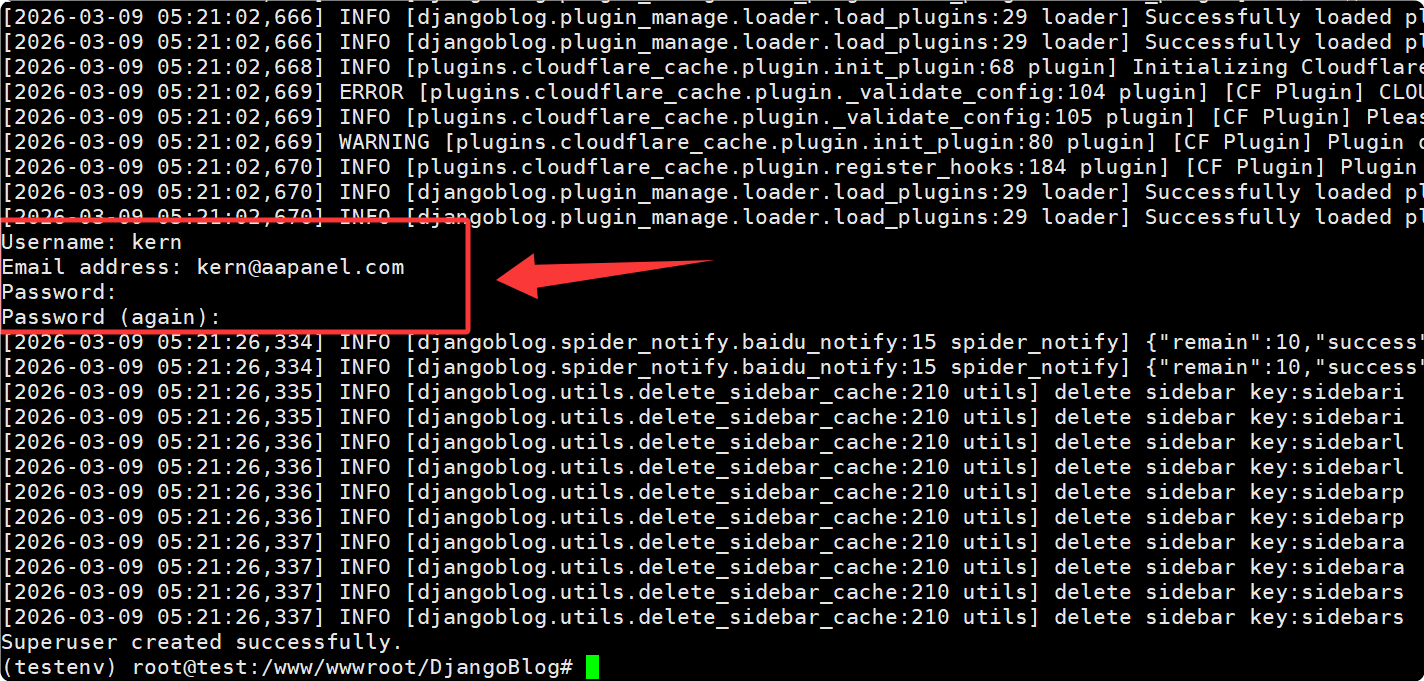
Build front-end resources
- Navigate to the front-end directory
cd /www/wwwroot/DjangoBlog cd frontend- Install dependencies (required for first run)
npm install
- Build production environment resources
npm run build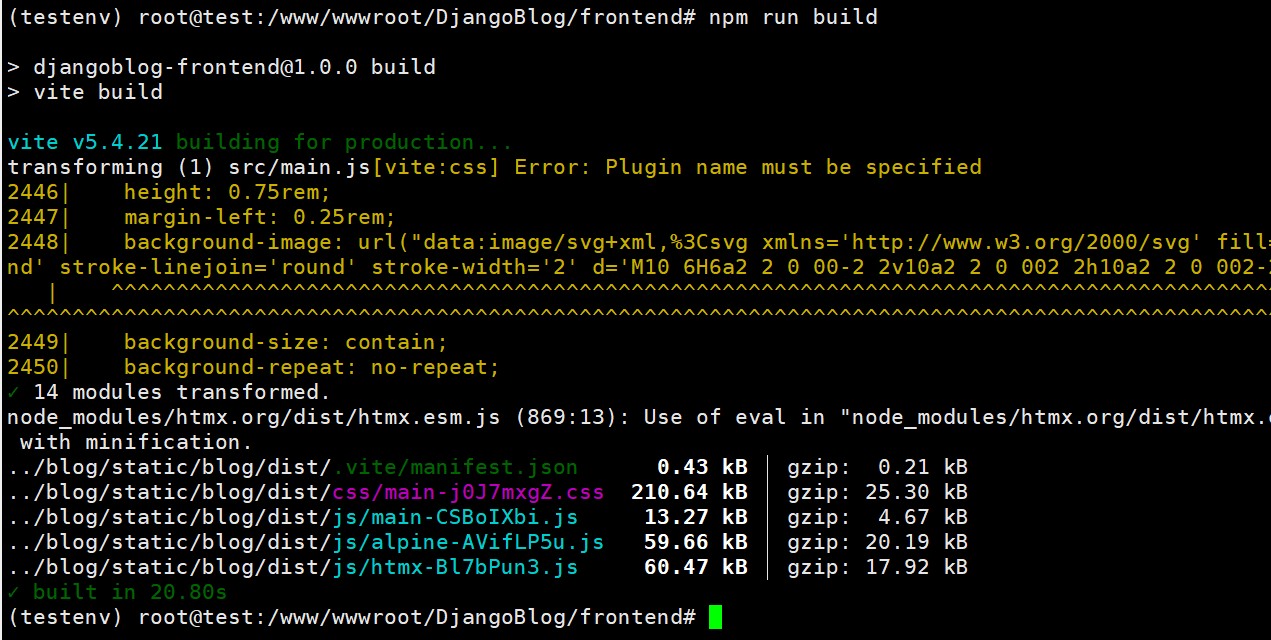
- Return to the DjangoBlog project root directory
cd /www/wwwroot/DjangoBlogCollect static files and compress
- Collect static files
python manage.py collectstatic --noinput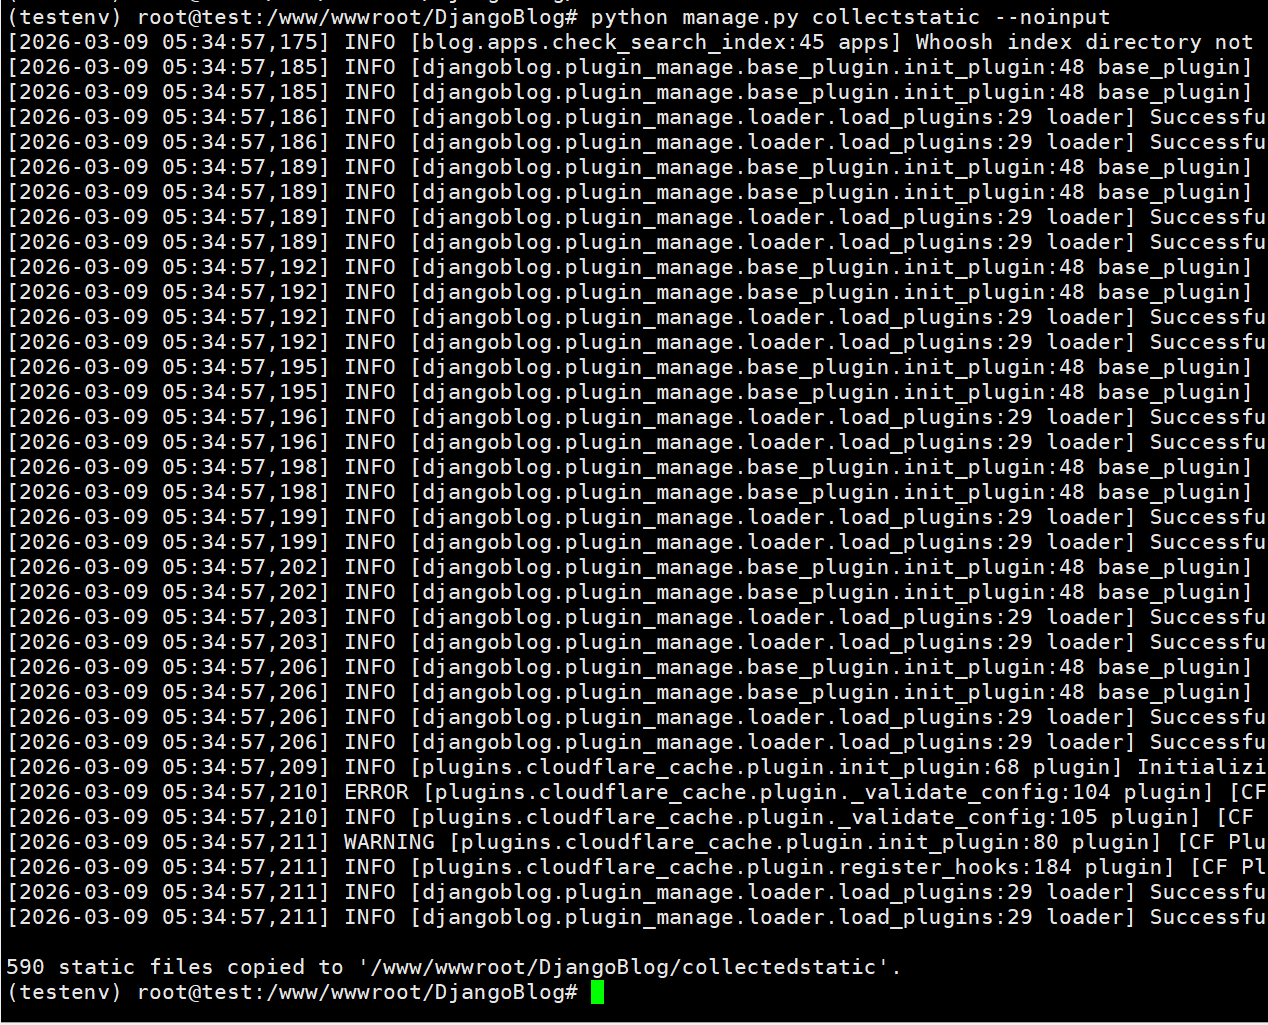
- (Optional) Compress files
python manage.py compress --force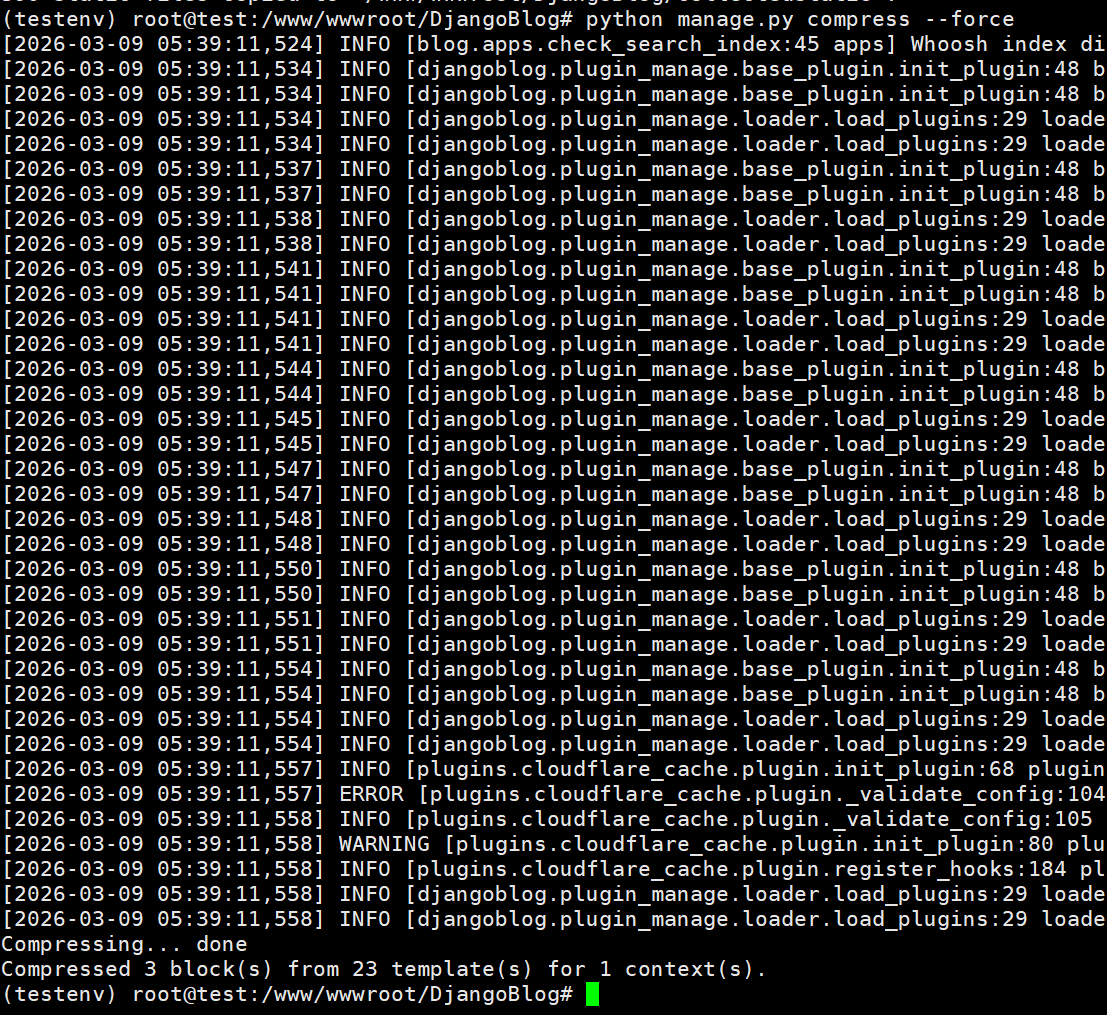
- (Optional) Generate test data
python manage.py create_testdata
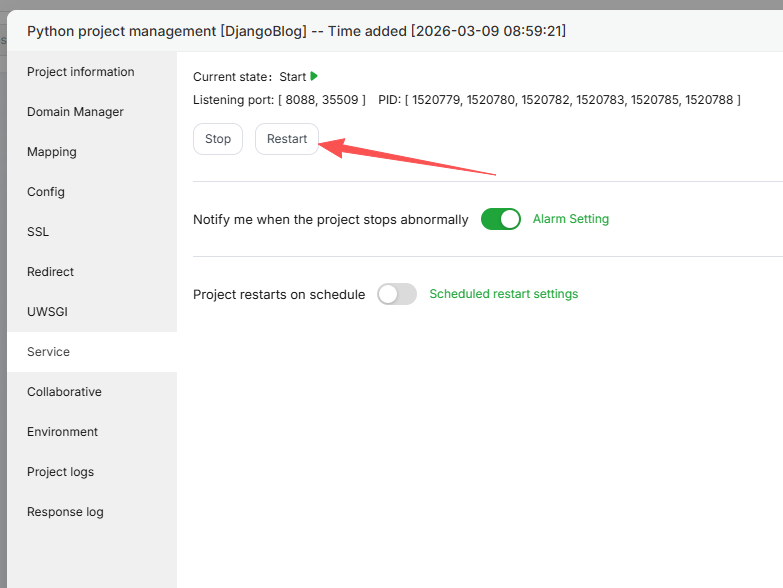
Restart DjangoBlog Project and Test Access
Restart the DjangoBlog project
Open the port of the DjangoBlog project (8088 in this case) in the system firewall and the server provider's security group
Test access:
http://Your-IP:8088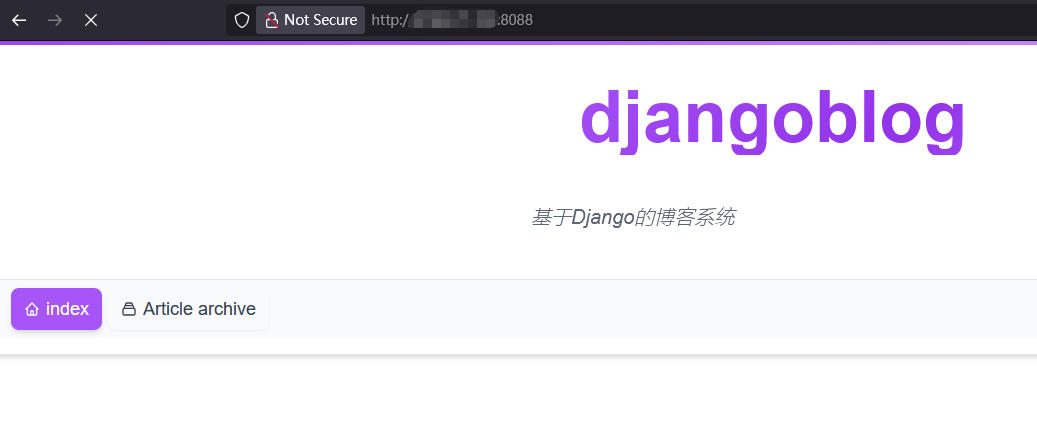
Production-Grade Deployment
Nginx serves static files, uWSGI handles dynamic requests
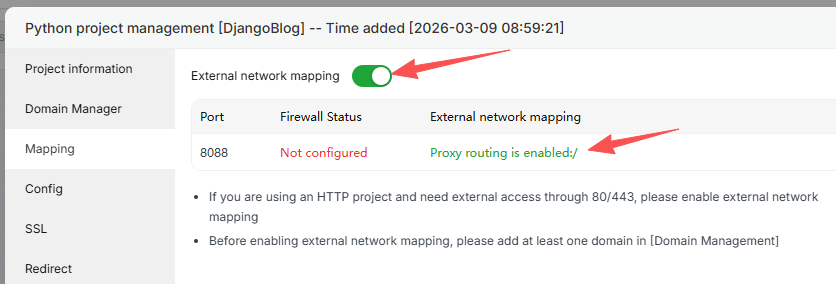
Add domain name to DjangoBlog project

Enable mapping to generate site configuration file
Configure static file rules
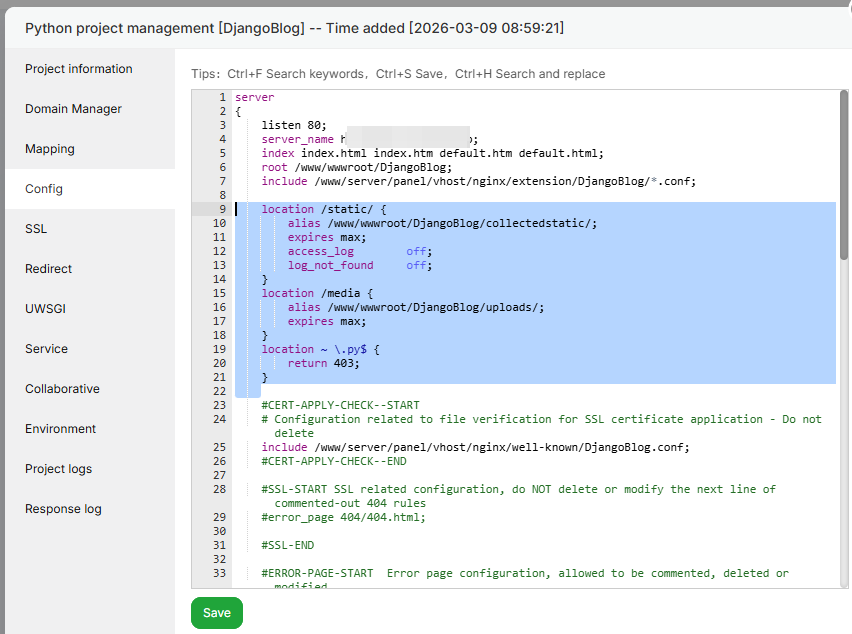
    location /static/ {
        alias /www/wwwroot/DjangoBlog/collectedstatic/;
        expires max;
        access_log        off;
        log_not_found     off;
    }
    location /media {
        alias /www/wwwroot/DjangoBlog/uploads/;
        expires max;
    }
    location ~ \.py$ {
        return 403;
    }
Deploy SSL certificate
Test access: https://domain.com